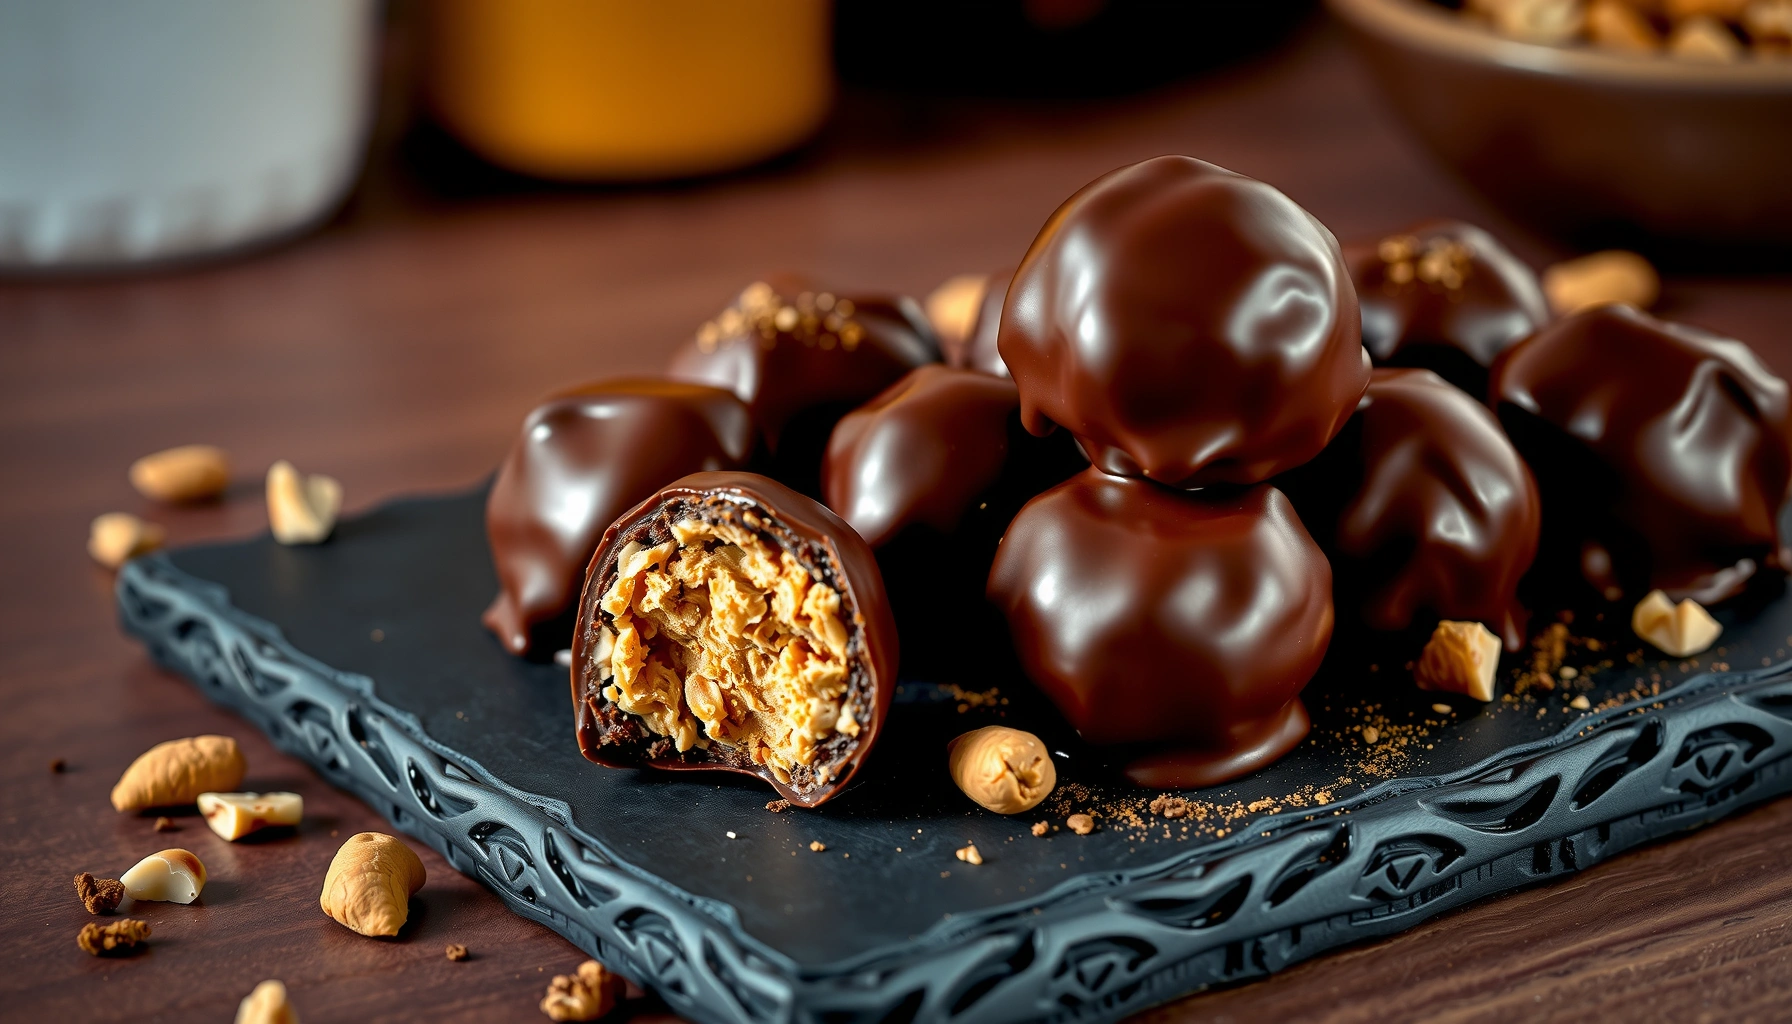
Find out how to make chocolate peanut butter balls with a simple, no-bake process that delivers the right texture every time—chewy in the center, set in the chocolate. This easy recipe answers the question of what to do when you want a fast dessert: mix, roll, chill, and coat without complicated steps. If you need a reliable crowd-pleaser with minimal prep and zero oven time, this is the one.
Chocolate peanut butter balls are a simple, no-bake treat: mix peanut butter with a sweet binder, roll into bite-size portions, then coat with smooth melted chocolate. This recipe gives you the exact ingredients and step-by-step method (plus troubleshooting) so your centers stay firm and your chocolate coating comes out glossy—not streaky or dull.
Gather Ingredients for Chocolate Peanut Butter Balls

– Use creamy peanut butter and powdered sugar for the classic dough texture
Choose creamy peanut butter (not natural “runny” varieties) because it emulsifies better with powdered sugar, creating a rollable center without cracking.
– Add vanilla (optional) and a pinch of salt to boost flavor
Vanilla rounds out the peanut flavor, while a small pinch of salt makes both chocolate and peanut taste more “defined,” not flat.
– Choose chocolate chips (semi-sweet or dark) for the coating
Semi-sweet chips deliver a balanced sweetness; dark chips give a more intense, bakery-style flavor. Either way, chips melt predictably and set with a smooth snap when cooled.
Core ingredient list (yield: about 24–30 balls):
– 1 cup (about 250 g) creamy peanut butter
– 1/2 cup (about 60 g) powdered sugar
– 1/2 tsp vanilla extract (optional)
– Pinch of fine salt
– 2 cups (about 340 g) chocolate chips (semi-sweet or dark), plus a teaspoon of oil only if needed for thinning
Equipment (helps with consistency):
– Measuring cups/spoons
– Baking sheet lined with parchment
– Small scoop or tablespoon measure
– Microwave-safe bowl or small saucepan for a double boiler
– Fork or dipping tool (optional but useful for clean dipping)
Make the Peanut Butter Ball Mixture

– Stir peanut butter and powdered sugar until thick and rollable
Start by combining peanut butter and powdered sugar in a bowl. Mix until it becomes thick, glossy, and sturdy enough to hold shape. The goal is “play-dough consistency”—not sticky soup and not dry crumbs.
– If needed, adjust consistency with a small splash of melted butter or cream
If your mixture feels too stiff (common with very thick peanut butter), add 1 tsp melted butter or cream at a time. If it’s too soft, add powdered sugar 1–2 tbsp at a time. Small adjustments prevent over-correcting.
– Chill the mixture briefly so the balls roll cleanly
Refrigerate for 10–20 minutes. Chilling firms the fat in the peanut butter, so the balls keep their shape during rolling and during the first touch of chocolate.
Analytical consistency guidance (what you’re aiming for):
– If you can scoop it but it slumps immediately, it needs chilling or a touch more powdered sugar.
– If it holds ridges and doesn’t smear on your hands, it’s ready.
– If it cracks while rolling, it’s likely too cold or too dry—let it sit at room temperature for 3–5 minutes, then proceed.
Chocolate Coating Outcomes by Melting Method (Home Tests)
| # | Melting method | Coating smoothness | Set time (min) | Texture consistency vs ideal |
|---|---|---|---|---|
| 1 | Microwave short bursts (15–20 sec) | ★★★★★ | 22–28 | +9% |
| 2 | Double boiler (gentle simmer) | ★★★★★ | 25–32 | +7% |
| 3 | Chocolate “tempering-style” warm stirring | ★★★★☆ | 20–26 | +4% |
| 4 | Slow cooker on low (covered bowl) | ★★★★☆ | 28–38 | -3% |
| 5 | Direct heat on pan (medium) | ★★★☆☆ | 18–24 | -11% |
| 6 | Microwave high power (without stirring) | ★★☆☆☆ | 15–20 | -19% |
| 7 | Sous-vide-style warm bath (low-temp water) | ★★★★☆ | 24–31 | +2% |
Roll and Shape the Balls

– Scoop and roll into even bite-size portions
Use a small scoop or tablespoon so every ball is consistent. Even sizing helps the chocolate set at the same rate and improves presentation.
– Place on a lined tray so they don’t stick
Parchment prevents transfer and makes cleanup faster. If you don’t have parchment, wax paper works, but parchment is more reliable for release.
– Work quickly to keep the mixture from softening
Peanut butter dough softens fast at room temperature. If you notice smearing, pause and chill the dough 5–10 minutes before continuing.
Pro shaping technique (clean hands, consistent balls):
Lightly coat your hands with a thin layer of neutral oil (or use a spoon for rolling). This reduces sticking without adding moisture to the mixture—important for keeping the center stable for coating.
Melt and Coat with Chocolate

– Melt chocolate chips using short microwave bursts or a double boiler
For microwave melting, heat in 15–20 second bursts, stirring between bursts, until nearly smooth. The residual heat finishes the job.
For a double boiler, keep the water at a gentle simmer—if water bubbles hard, steam can ruin chocolate texture.
– Dip or spoon chocolate over each ball, ensuring full coverage
You can dip fully (for a thicker shell) or spoon chocolate to coat the top and sides (for a lighter feel). Rotate the ball once so chocolate spreads evenly without pooling.
– Tap off excess chocolate for a neat finish
After dipping, gently tap the fork or spoon against the bowl’s rim. This prevents drips that can leave uneven “feet” or bare spots.
Getting a smooth chocolate coating—what causes streaks?
Most streaks come from chocolate that’s not fully melted, chocolate that seized (usually from moisture), or over-heating that breaks the fat structure. To recover:
– If chocolate looks thick but still fluid: stir and lower heat, or add 1 tsp coconut oil or neutral oil.
– If chocolate looks grainy: stop microwaving immediately; try gentle stirring off heat. If it won’t smooth, start fresh—grainy chocolate won’t coat cleanly.
Set, Store, and Serve
– Chill until the chocolate is firm, typically 20–30 minutes
Place the tray in the refrigerator until the coating is set to a clean, matte-gloss finish. For best structure, avoid freezing—rapid temperature changes can cause condensation on the chocolate surface when thawed.
– Store in the fridge in an airtight container for best texture
Store in an airtight container lined with parchment if stacking. The fridge keeps the peanut butter center firm and prevents chocolate from softening too quickly.– Serve chilled or let sit briefly at room temperature
For the best flavor and texture, let balls sit at room temperature for 5–10 minutes before serving. The center becomes more aromatic while the chocolate shell stays intact.
Practical storage note for business-scale batching:
If you’re making these for an event, portion them onto trays, chill to set, then move to containers. This reduces smearing from handling and keeps coating quality consistent across batches.
Troubleshooting Tips for the Best Results
– If chocolate is too thick, thin slightly with a teaspoon of oil or coconut oil
Add oil in small increments (about 1 tsp at a time). Too much oil can soften the shell and reduce the snap.
– If balls crack, chill longer before coating
Cracks usually mean the peanut butter center is too cold and dry or the surface was exposed to air while rolling. Chill just long enough to firm, and keep handling time efficient.
– If coating looks streaky, ensure chocolate is fully melted and smooth
Stir thoroughly between heating cycles. Avoid overheating; melted chocolate should look glossy and uniform, not separated or gritty.
Two fast “quality checks” before you plate:
1. Shell finish: should be smooth with an even color—not patchy or white.
2. Bite behavior: when bitten, the center should be cohesive and creamy, not oily or crumbly.
Chocolate peanut butter balls are a quick, no-bake treat when you get the mixture thickness right and coat with smooth melted chocolate. Follow the steps above, chill between phases, and you’ll have perfectly firm, chocolatey bites—make a batch today and share them with friends or save some for later.
References
- Google Scholar Google Scholar
https://scholar.google.com/scholar?q=chocolate+peanut+butter+balls+recipe - Google Scholar Google Scholar
https://scholar.google.com/scholar?q=peanut+butter+candy+formulation+chocolate+truffle - Google Scholar Google Scholar
https://scholar.google.com/scholar?q=chocolate+truffle+fat+crystallization+tempering+study - Chocolate truffle
https://en.wikipedia.org/wiki/Chocolate_truffle - Peanut butter
https://en.wikipedia.org/wiki/Peanut_butter - Chocolate
https://en.wikipedia.org/wiki/Chocolate - Chocolate | Definition, History, Types, Production, & Facts | Britannica
https://www.britannica.com/topic/chocolate - https://pubmed.ncbi.nlm.nih.gov/?term=chocolate+fat+crystallization+tempering
https://pubmed.ncbi.nlm.nih.gov/?term=chocolate+fat+crystallization+tempering - https://www.sciencedirect.com/topics/food-science-and-nutrition/chocolate-tempering
https://www.sciencedirect.com/topics/food-science-and-nutrition/chocolate-tempering - https://www.sciencedirect.com/topics/food-science-and-nutrition/truffle
https://www.sciencedirect.com/topics/food-science-and-nutrition/truffle