This cannoli tubes recipe delivers the crispiest cannoli shells you can make at home—using the right dough ratio, rolling thickness, and frying cues to get that signature snap. Follow these steps and you’ll know exactly when to shape the tubes, how long to fry for even browning, and what to do so they stay crisp until you pipe in the filling. If you want cannoli shells that actually shatter cleanly and hold their form, this is the quickest path to them.
Make cannoli tubes by wrapping dough tightly around metal molds, frying until golden and crisp, and cooling completely before filling—this is the fastest path to crunchy shells with bakery-style texture. Follow the steps below for foolproof cannoli shell technique, from dough prep and shaping to filling with sweet ricotta.
What You’ll Need for Cannoli Tubes

– Gather cannoli tube dough ingredients like flour, sugar, butter or lard, and wine (or alternative).
– Use cannoli tube molds (or cannoli forms) for consistent shape and crisp shells.
For reliably crispy cannoli shells, think of your tools and ingredients as “texture systems.” The molds control shape and browning; the dough hydration controls elasticity and crispness; and the frying temperature controls whether you get a shattering shell or a tender one.
Key ingredient notes (practical, not theoretical):
– Flour: Use all-purpose flour for a dependable structure; it’s what most classic cannoli dough recipes are built on.
– Fat (butter or lard): Lard tends to produce a more traditional, flaky crunch; butter also works but may yield a slightly less “snap.”
– Sugar: Adds subtle caramelization—too much sugar can brown too fast and risk bitterness.
– Wine (or alternative): Wine contributes flavor and helps the dough become crisp after frying. If substituting, use dry white wine or a splash of vinegar/citrus juice combined with water to mimic acidity.
Tool checklist:
– Cannoli tube molds/forms (stainless steel recommended)
– Heavy-bottom pot or fryer (for stable heat)
– Tongs or heat-safe gloves
– Wire rack for cooling/holding shells
– Piping bag and plain piping tip (for clean filling)
Shell-Quality Checklist: What Improves Crispness (Cannoli Tubes)
| # | Process Factor | Best Target | Impact | Risk if Off |
|---|---|---|---|---|
| 1 | Dough rest time | 60–90 min | ★★★½ | Tough shells |
| 2 | Dough thickness | ~1.5–2.0 mm | ★★★ | Rubbery interior |
| 3 | Wrapping tightness | No gaps | ★★★★ | Oil leakage / split shells |
| 4 | Frying temperature | 175–185°C (350–365°F) | ★★★★½ | Soggy texture (too cool) |
| 5 | Draining method | Rack, 5–10 min | ★★★ | Steam softening (paper) |
| 6 | Filling timing | Right before serving | ★★★★ | Loss of crunch |
| 7 | Oil type | Neutral, high-heat | ★★½ | Off flavors / instability |
Make the Cannoli Tubes Dough

– Mix ingredients to form a smooth, elastic dough, then rest it to improve texture.
– Roll dough thin and prepare it for wrapping around molds.
A great cannoli shell is the result of dough that’s elastic enough to wrap tightly and strong enough to fry into crisp layers. Start by combining dry ingredients, then add fat and liquid gradually.
Step-by-step dough process
1. Mix dry ingredients: Combine flour and a small amount of sugar. This helps browning without turning the dough overly sweet.
2. Add fat: Cut butter (or lard) into the flour until the texture resembles coarse crumbs.
3. Add wine (or alternative): Add wine slowly while mixing until a cohesive dough forms.
4. Knead briefly: Knead just until smooth and elastic. Over-kneading can toughen the dough.
5. Rest the dough: Cover and refrigerate for 60–90 minutes. Resting relaxes gluten and improves wrapability—critical for consistent frying.
Rolling for crisp cannoli tubes
– Roll the dough to about 1.5–2.0 mm thickness.
– If the dough shrinks back when wrapping, it needs more rest time.
– Cut strips wide enough to overlap slightly (but not so wide that they create thick seams).
Texture logic: thinner dough fries faster into a crisp shell; thicker dough can remain soft inside even if the exterior browns.
Wrap and Fry Cannoli Tubes

– Wrap dough tightly around the molds to prevent gaps and ensure crisp edges.
– Fry at the right temperature until evenly golden, then cool completely.
This is the stage where most home batches either become brittle and dry (too hot/too long) or soft and oily (too cool/under-fried). Your goal is even browning with fast crisping.
Wrapping technique (tight, even, controlled)
1. Lightly oil the molds (a light film only). This prevents sticking without saturating the dough.
2. Wrap one strip at a time around each mold, starting with the seam at the bottom edge.
3. Press the seam gently so it adheres—no bubbles, no gaps.
4. Keep the dough taut as you wrap. Loose wrapping creates airflow pockets that lead to uneven frying.
Frying for golden crunch
1. Heat oil to 175–185°C (350–365°F). Use a thermometer if possible.
2. Fry in small batches to avoid temperature drops.
3. Fry until shells are evenly golden (usually a short fry time; watch color rather than relying only on minutes).
4. Turn/rotate as needed for consistent browning.
Cooling without losing the crunch
– Move fried tubes to a wire rack.
– Allow shells to cool completely before removing from molds or filling (depending on your method). Cooling sets the crisp structure.
Common failure points and quick fixes:
– Shells soften after frying: You likely cooled on paper or filled too early.
– Shells burst: Wrapping may have gaps or oil may be too hot, causing rapid steam expansion.
– Shells taste greasy: Oil temperature was too low or molds weren’t adequately drained.
Drain, Cool, and Store for Best Crispness
– Drain on a rack (not paper) to keep the shells crisp.
– Store shells in an airtight container and fill only when ready to serve.
Cannoli shells lose crispness primarily due to steam and moisture reabsorption. Your job is to remove residual oil, then protect shells from humidity.
Drain correctly
– Always use a wire rack. Paper towels trap steam and can soften the crust.
– Let shells drain 5–10 minutes, until surface oil has stopped looking glossy.
Cool fully before storage
– If shells are warm when stored, condensation forms inside the container.
– Cool until shells are room temperature.
Airtight storage strategy
– Store shells in an airtight container with minimal stacking pressure.
– If you’re prepping ahead, store shells plain and fill only when serving.
Practical workflow for events:
Bake/fry shells earlier in the day, cool and store. Keep filling ingredients chilled. Assemble right before service to preserve the snap.
Classic Cannoli Filling for Your Tubes
– Mix ricotta with powdered sugar and flavorings like vanilla or cinnamon.
– Add mix-ins like chocolate chips or candied fruit for the classic cannoli taste.
A classic cannoli filling is creamy, sweet, and aromatic—yet structured enough to pipe cleanly. The key is moisture control, because watery ricotta can soften shells fast.
Build the filling
1. Drain ricotta (if needed): If your ricotta looks loose, strain it through cheesecloth for 30–60 minutes.
2. Sweeten with powdered sugar: Powder blends smoothly and stabilizes texture.
3. Flavor: Add vanilla extract and optionally a pinch of cinnamon.
4. Optional classic mix-ins:
– mini chocolate chips
– chopped candied fruit (orange or citron)
– toasted chopped pistachios (great with chocolate)
Texture check for piping
– The filling should hold ridges when piped.
– If too thick, loosen with a teaspoon of cream.
– If too loose, chill it longer or fold in a bit more drained ricotta.
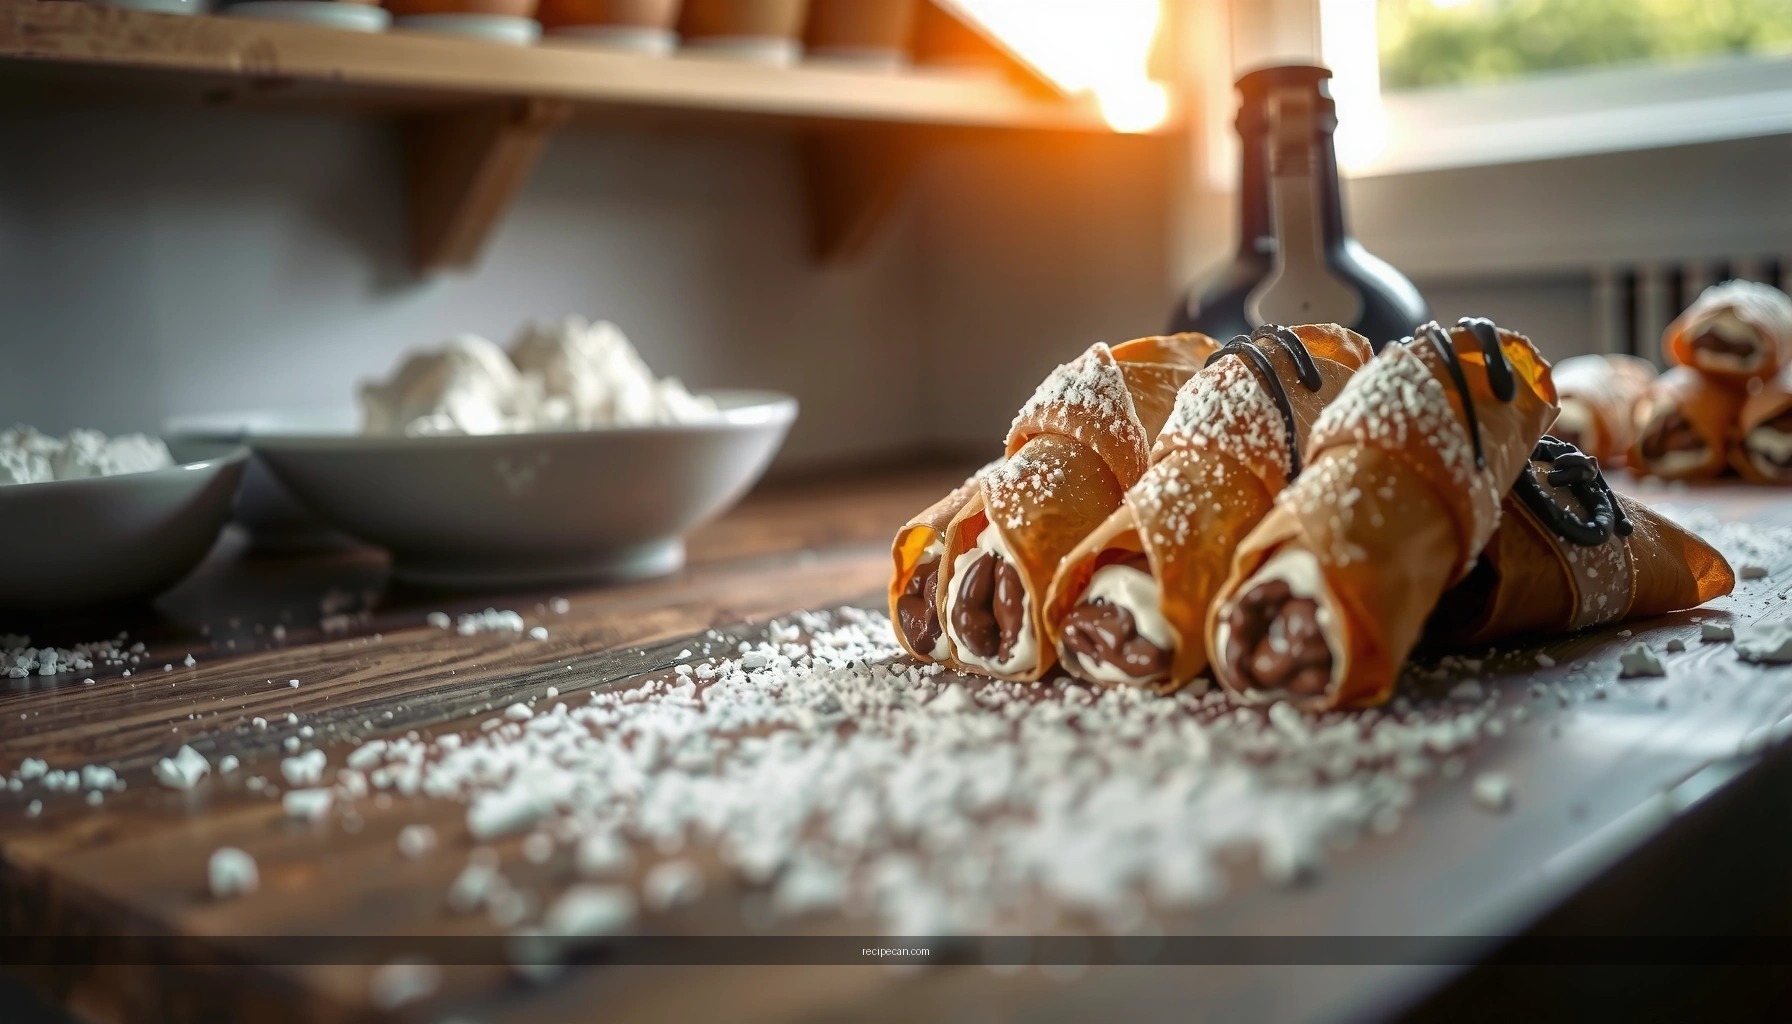
Fill and Serve Your Cannoli Tubes
– Pipe or spoon filling into cooled shells right before serving.
– Garnish if desired (chopped pistachios, powdered sugar) for a finished look.
Filling is the final step—and timing matters as much as technique. Ricotta’s moisture will gradually soften shells, so assemble close to serving.
Fill cleanly
1. Make sure shells are fully cool and dry.
2. Pipe filling into each end or from one side, depending on your shell shape.
3. Avoid overfilling: excess filling can leak and make shells tacky.
Garnish like a pastry case
– Dust with powdered sugar
– Add chopped pistachios for color contrast
– Optional drizzle: a light chocolate drizzle for a modern cannoli tube presentation
Service recommendation
– For maximum crunch, serve within a short window after filling (and keep filled shells chilled if your environment is warm).
Cannoli Tubes Recipe (Quick Summary You Can Execute Today)
To consistently produce crispy cannoli shells:
– Rest elastic dough 60–90 minutes.
– Wrap tightly around oiled molds with even thickness (~1.5–2.0 mm).
– Fry at 175–185°C (350–365°F) until evenly golden.
– Cool and drain on a wire rack, then store shells airtight and unfilled.
– Mix classic ricotta filling, pipe, garnish, and serve right away.
Crispy cannoli tubes start with tightly wrapped dough on molds, properly hot frying, and complete cooling before filling. Follow each section above—especially temperature control, rack cooling, and last-minute assembly—and you’ll produce crunchy shells with a classic sweet ricotta center. Try this cannoli tubes recipe today and bake a tray of homemade cannoli that delivers the right snap in every bite.
Frequently Asked Questions
What ingredients do I need for a cannoli tubes recipe?
For classic cannoli tubes, you typically need flour, sugar, a pinch of salt, baking powder, a little vinegar (or sometimes Marsala wine) for tenderness, and a small amount of oil or butter. You’ll also need egg (for structure) and dry white wine or another liquid such as Marsala to help form a workable dough. For frying, use neutral oil and cannoli tube molds to shape the shells. Having the right flour-to-liquid balance is key for tubes that crisp without becoming brittle.
How do I make cannoli tubes that don’t break when frying?
Let your dough rest to relax the gluten, and roll it evenly so thickness is consistent—thin enough to crisp, but not so thin it tears. Wrap the dough snugly around cannoli tube molds with the seam tightly sealed using a dab of water or egg wash. Fry in oil at a steady temperature (often around 350°F/175°C) and avoid overcrowding, so the tubes fry quickly and evenly before they lose structural integrity.
Why do my cannoli tube shells come out soft instead of crisp?
Soft cannoli shells usually come from dough that was too thick, under-fried, or fried in oil that was too cool. Another common cause is filling them too soon—cannoli filling can soften shells quickly, so pipe the ricotta filling only right before serving. After frying, cool the tubes on a rack to prevent steam from making them soggy, and store them uncovered until assembly. For best results, keep fried shells dry and crisp until you’re ready to fill.
Which cannoli tubes recipe method is best for beginners—no-knead or rolling?
For most beginners, a simple rolling method with rested dough is the most reliable for consistent cannoli tube shells. It helps you control thickness and ensures the dough wraps evenly around the molds, reducing splits and uneven browning. A no-knead approach can work for some doughs, but it may be harder to achieve the smooth, elastic consistency needed for tube shaping. If you’re new, focus on even rolling, tight sealing at the seam, and stable frying temperature.
What’s the best way to store cannoli tubes before filling and after frying?
After frying, let the cannoli tubes cool completely on a wire rack, then store them in an airtight container only if they’re fully cooled and dry—otherwise condensation can soften them. For best crispness, store shells at room temperature and fill them as close to serving as possible. If you need to prep ahead, you can make and store the unfilled shells for a day or two, then assemble right before guests arrive. Avoid refrigerating unfilled shells, because cooler, humid air often reduces crunch.
References
- Google Scholar Google Scholar
https://scholar.google.com/scholar?q=cannoli+tube+shell+recipe - Google Scholar Google Scholar
https://scholar.google.com/scholar?q=cannoli+shells+frying+dough+recipe - Google Scholar Google Scholar
https://scholar.google.com/scholar?q=italian+fried+pastry+tubes+recipe+cannoli - Cannoli
https://en.wikipedia.org/wiki/Cannoli - https://www.britannica.com/topic/cannoli
https://www.britannica.com/topic/cannoli - Fried dough
https://en.wikipedia.org/wiki/Fried_dough - Frying
https://en.wikipedia.org/wiki/Frying - Pastry
https://en.wikipedia.org/wiki/Pastry - Sicilian cuisine
https://en.wikipedia.org/wiki/Sicilian_cuisine - List of Italian desserts and pastries
https://en.wikipedia.org/wiki/List_of_Italian_desserts


