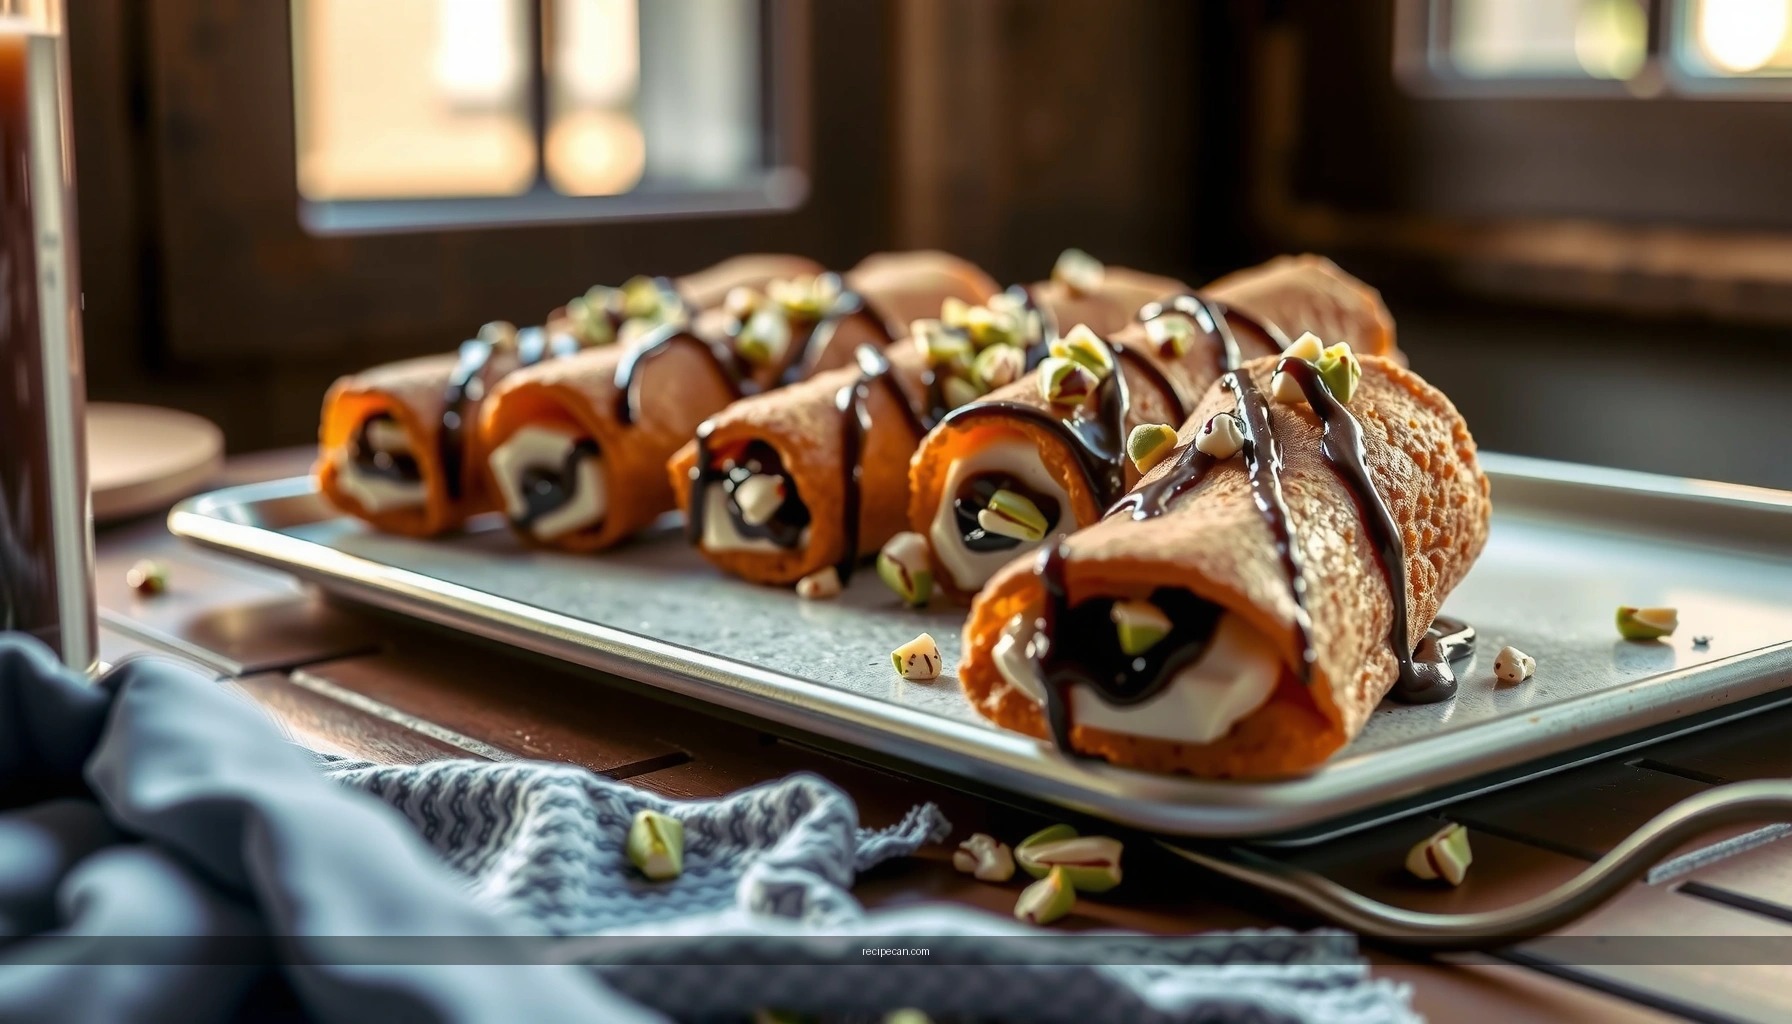
Get a classic cannoli cookie recipe that delivers crisp shells, a creamy ricotta filling, and the unmistakable cannoli flavor in every bite. This guide answers whether you can make cannoli-style cookies at home without special equipment or complicated steps—and gives you a reliable method, ingredient list, and baking timing to nail the texture. If you want authentic Italian cookies that taste like cannoli, not just “cookie-shaped dessert,” this is your best route.
Make cannoli cookies by baking crisp cookie shells and stuffing them with a thick, sweet ricotta filling—so every bite delivers the classic cannoli contrast of crunch and creamy sweetness. Below, you’ll learn how to bake the cookie base, whip a proper cannoli-style filling (with chocolate chips and citrus zest), and assemble them right for the best texture.
Cookie Ingredients You’ll Need

Cannoli cookies succeed when the ingredient list supports two distinct roles: (1) a sturdy, crisp cookie shell that won’t soften immediately, and (2) a rich ricotta filling that holds shape and tastes like traditional cannoli. Use a measured, pantry-friendly approach—then tailor with the add-ins that give cannoli cookies their signature flavor profile.
Core pantry ingredients for the cookie base
– All-purpose flour: provides structure and a clean snap.
– Granulated sugar: sweetens and helps the shell browning process.
– Unsalted butter: contributes flake-like tenderness and helps cookies bake up crisp.
– Egg: binds the dough for a consistent bake.
– Vanilla extract: rounds out sweetness without overpowering citrus.
– Baking powder (optional but helpful): gives a slightly lighter shell that still crisps well.
– Salt: balances sweetness and strengthens flavor perception.
– Cinnamon (optional): a subtle warmth that pairs well with ricotta and chocolate.
Cannoli-specific add-ins for the filling
Traditional cannoli filling often includes chocolate and citrus notes; the same logic applies here. In your cannoli-style ricotta, aim for a balance of creamy, bright, and chocolaty.
– Mini chocolate chips or chopped dark chocolate: distribute chocolate throughout for “cannoli-like” pockets.
– Orange zest and/or lemon zest: brightens ricotta and prevents the filling from tasting flat.
– Powdered sugar (commonly used for ricotta): melts smoothly and prevents graininess.
– Optional chocolate flavor booster: a few drops of espresso or a teaspoon of cocoa powder can deepen chocolate notes.
Pro tip (quality control): If you’re using ricotta straight from the container, expect varying moisture levels. Your goal is a filling that is “scoopable but not runny,” which is why draining matters so much (we’ll cover that in the filling section).
Cannoli Cookie Recipe Yield & Quality Targets (Standard Batch)
| # | Metric | Target | Why It Matters | Impact |
|---|---|---|---|---|
| 1 | Baked cookie shell color | Light golden, ~8–12 min | Indicates the shell has set for crispness | Meets texture goal |
| 2 | Ricotta moisture reduction | Drain 20–60 min | Prevents filling from running | Sharper, thicker filling |
| 3 | Filling consistency | Holds ridges after piping | Shell won’t collapse under filling | Clean assembly |
| 4 | Cookie shell cooling time before filling | At least 30–45 min | Stops melting and sogginess | Crispness preserved |
| 5 | Assembly timing for best crunch | Fill within 1–3 hours of serving | Minimizes moisture transfer | Maximum texture |
| 6 | Expected yield (assembled) | ~18–24 cookies | Depends on portion size and thickness | Reliable batch planning |
| 7 | Storage window (assembled) | Up to 24 hours, refrigerated | Crispness declines over time | Texture will soften |
Make the Cannoli Cookie Dough

To create cannoli cookies with a truly crisp bite, your cookie dough must be properly hydrated and baked to set. This stage determines whether your shells act like a “container” for the filling or become fragile.
1) Mix wet and dry ingredients with control
– Whisk flour, sugar, salt, and any dry flavoring (like cinnamon) in one bowl.
– In another bowl, beat butter until smooth, then add egg and vanilla.
– Combine wet into dry, mixing just until a smooth, workable dough forms. If the dough feels greasy or loose, add flour by the tablespoon; if it feels dry, add a teaspoon of water or milk.
2) Rest the dough (optional but effective)
Chilling for 15–30 minutes can improve shape retention and prevent spreading. This is especially valuable if your kitchen runs warm.
3) Shape for consistent baking
– Roll dough and cut rounds, or scoop and press into slightly domed disks.
– Keep thickness consistent (for example, about 6–8 mm) so all cookies bake at the same rate.
4) Bake until lightly golden
– Bake at a moderate temperature (commonly 350°F / 175°C) until the edges look set and the centers are just cooked.
– If you want a more pronounced crunch, bake slightly longer rather than shorter—but avoid dark browning, which can create bitterness that clashes with sweet ricotta.
Quality check: The cookie shells should feel firm on the tray immediately after baking, and crisp once cooled. Underbaked cookies will soften fast once filled.
Whip the Ricotta Cannoli Filling

The filling is where cannoli cookies become unmistakably “cannoli.” The two governing principles are: drain the ricotta and avoid overmixing once the sweetness and citrus are added.
1) Drain ricotta thoroughly
Ricotta contains significant moisture, even when labeled “fine” or “whole milk.” For a thicker, scoopable filling:
– Drain ricotta in a fine-mesh sieve or cheesecloth for 20–60 minutes (longer if it’s very watery).
– You’re aiming for a texture that holds shape when stirred.
2) Sweeten and flavor
– Mix ricotta with powdered sugar for a smooth, dessert-ready sweetness.
– Add vanilla and citrus zest (orange, lemon, or a combination).
– Fold in mini chocolate chips (or finely chopped chocolate) so they distribute evenly without turning the mixture glossy.
3) Fold gently, then stop
Stir only until the filling looks uniform. Overmixing can make the ricotta grainy or too loose, and it can also warm ingredients that would otherwise set more cleanly.
4) Adjust thickness if needed
If the filling seems too soft after mixing:
– Fold in an extra spoon of powdered sugar (for some structure), or
– Chill the filling 15–30 minutes to firm it up.
Assemble Your Cannoli Cookies
Assembly is simple—but timing and temperature control are what protect crispness. Think of the cookie shell as a crisp “container” that must not meet hot filling or moisture too early.
1) Cool cookies completely
– Fill only when the shells are fully cooled, typically 30–45 minutes after baking.
– Warm cookies will steam and soften, which can create a soggy base and a dull texture contrast.
2) Choose your filling method
– Pipe for clean edges and consistent portions, or
– Spoon for a rustic, bakery-style look.
Aim for a generous mound that covers the surface and tastes balanced—not so much that it overflows and melts into the cookie.
3) Press gently if the cookie is fragile
If your shells are thin, lightly press the filling in so it adheres without cracking the cookie.
4) Add a finishing touch
For an extra cannoli feel:
– Sprinkle a few extra chocolate chips on top.
– Add a tiny pinch more zest for aroma right before serving.
Storage and Serving Tips
Cannoli cookies are best fresh because the crisp shell gradually absorbs moisture from the filling. You can manage this by storing in smart phases.
Best practice: store components separately when possible
– Store baked, cooled cookie shells in an airtight container at room temperature.
– Store filling in the fridge in a covered bowl.
Assembled cookies
– Assemble close to serving (within 1–3 hours for maximum crunch).
– Refrigerate assembled cookies, but understand crispness will soften within 24 hours.
Service strategy (ideal for events)
– Keep shells sealed to prevent humidity pickup.
– Fill right before guests arrive.
This approach gives you the best flavor and the strongest texture contrast.
Common Mistakes to Avoid
Even experienced bakers run into predictable issues with cannoli-style desserts. Avoid these pitfalls to protect both taste and structure.
– Skip underbaking
Soft shells won’t hold up to the filling. Bake until lightly golden and fully set, then let them cool completely.
– Don’t forget to drain ricotta
Undrained ricotta produces a runny filling that seeps into the cookie, causing sogginess and a less “contained” flavor.
– Fill while cookies are warm
Heat accelerates melting and moisture transfer. Always cool shells fully before assembly.
– Overmix the filling
Once ricotta is combined with sugar and flavorings, mix gently and stop. Overmixing can worsen texture and loosen the filling.
– Wait too long to assemble
The longer the cookies sit filled, the more the shell loses its crisp snap.
Cannoli cookies are all about crisp baked shells and a thick, flavorful ricotta filling—made easier when you cool cookies fully and drain ricotta well. Follow the steps above, then assemble right before serving for the best crunch and cannoli flavor. Try this recipe today and share your perfect cookie batch!
Frequently Asked Questions
What’s the best cannoli cookie recipe for getting a crisp shell?
For crisp cannoli cookies, use a well-chilled dough and avoid overmixing so the gluten doesn’t develop too much. Bake until the edges are lightly golden, then let the cookies cool completely before filling—this helps them stay crisp. If your recipe includes shortening, it can improve tenderness while still supporting a crunchy bite.
How do you keep cannoli cookies from getting soggy after filling?
The key is timing: fill the cookies right before serving or shortly before storing in an airtight container. Use a thick cannoli filling (like drained ricotta mixed with powdered sugar and often a bit of mascarpone) so it doesn’t weep moisture. You can also pipe filling onto the cookies and add mini chocolate chips only at the last moment to maintain texture.
Which cannoli filling works best for a classic flavor in cannoli cookie recipes?
A classic filling uses ricotta as the base, but you’ll get the best results with well-drained ricotta (often labeled “ricotta” in tubs is still watery unless drained). For a richer, steadier texture, mix in mascarpone and sweeten lightly with powdered sugar, then add citrus zest (like orange or lemon) for that traditional cannoli flavor. If you prefer a sweeter cookie, increase sugar slightly, but avoid making the filling runny.
Why do my cannoli cookies taste grainy or watery, and how can I fix it?
Graininess usually comes from under-drained or low-quality ricotta; strain it through cheesecloth or use a ricotta that’s naturally drier. Watery filling often indicates the ricotta wasn’t pressed long enough or the mixture has too much liquid from added ingredients. To fix it, drain again, then re-mix until smooth and thick, and taste before piping onto your cookies.
How long should you bake cannoli cookies, and what temperature gives the best results?
Most cannoli cookie recipes bake well around 350°F to 375°F (175°C to 190°C), depending on thickness and whether they’re filled or filled-after-baking. Start checking for doneness at about 10–12 minutes, looking for set edges and a lightly golden color. Cool fully on a rack to prevent steam from softening the cookie, which is essential for a crisp cannoli-inspired cookie texture.
References
- Google Scholar Google Scholar
https://scholar.google.com/scholar?q=cannoli+recipe - Google Scholar Google Scholar
https://scholar.google.com/scholar?q=cannoli+cookie+recipe - Google Scholar Google Scholar
https://scholar.google.com/scholar?q=Italian+ricotta+dough+pastry+recipe+cannoli - Cannoli
https://en.wikipedia.org/wiki/Cannoli - https://www.britannica.com/topic/cannoli
https://www.britannica.com/topic/cannoli - Ricotta
https://en.wikipedia.org/wiki/Ricotta - Custard
https://en.wikipedia.org/wiki/Crema_pasticcera - Sugar cookie
https://en.wikipedia.org/wiki/Sugar_cookie - Cookie
https://en.wikipedia.org/wiki/Cookie - Pastry
https://en.wikipedia.org/wiki/Pastry


