You want the best battenberg cake recipe, and here you’ll get it: clear step-by-step instructions that produce the classic pink-and-yellow check pattern without the usual frustration. Follow the method closely and you’ll also learn the key tips for perfect sponge, even marzipan coverage, and neat slicing that holds its shape. If your goal is a reliable Battenberg with crisp edges and strong flavor, this is the version to make.
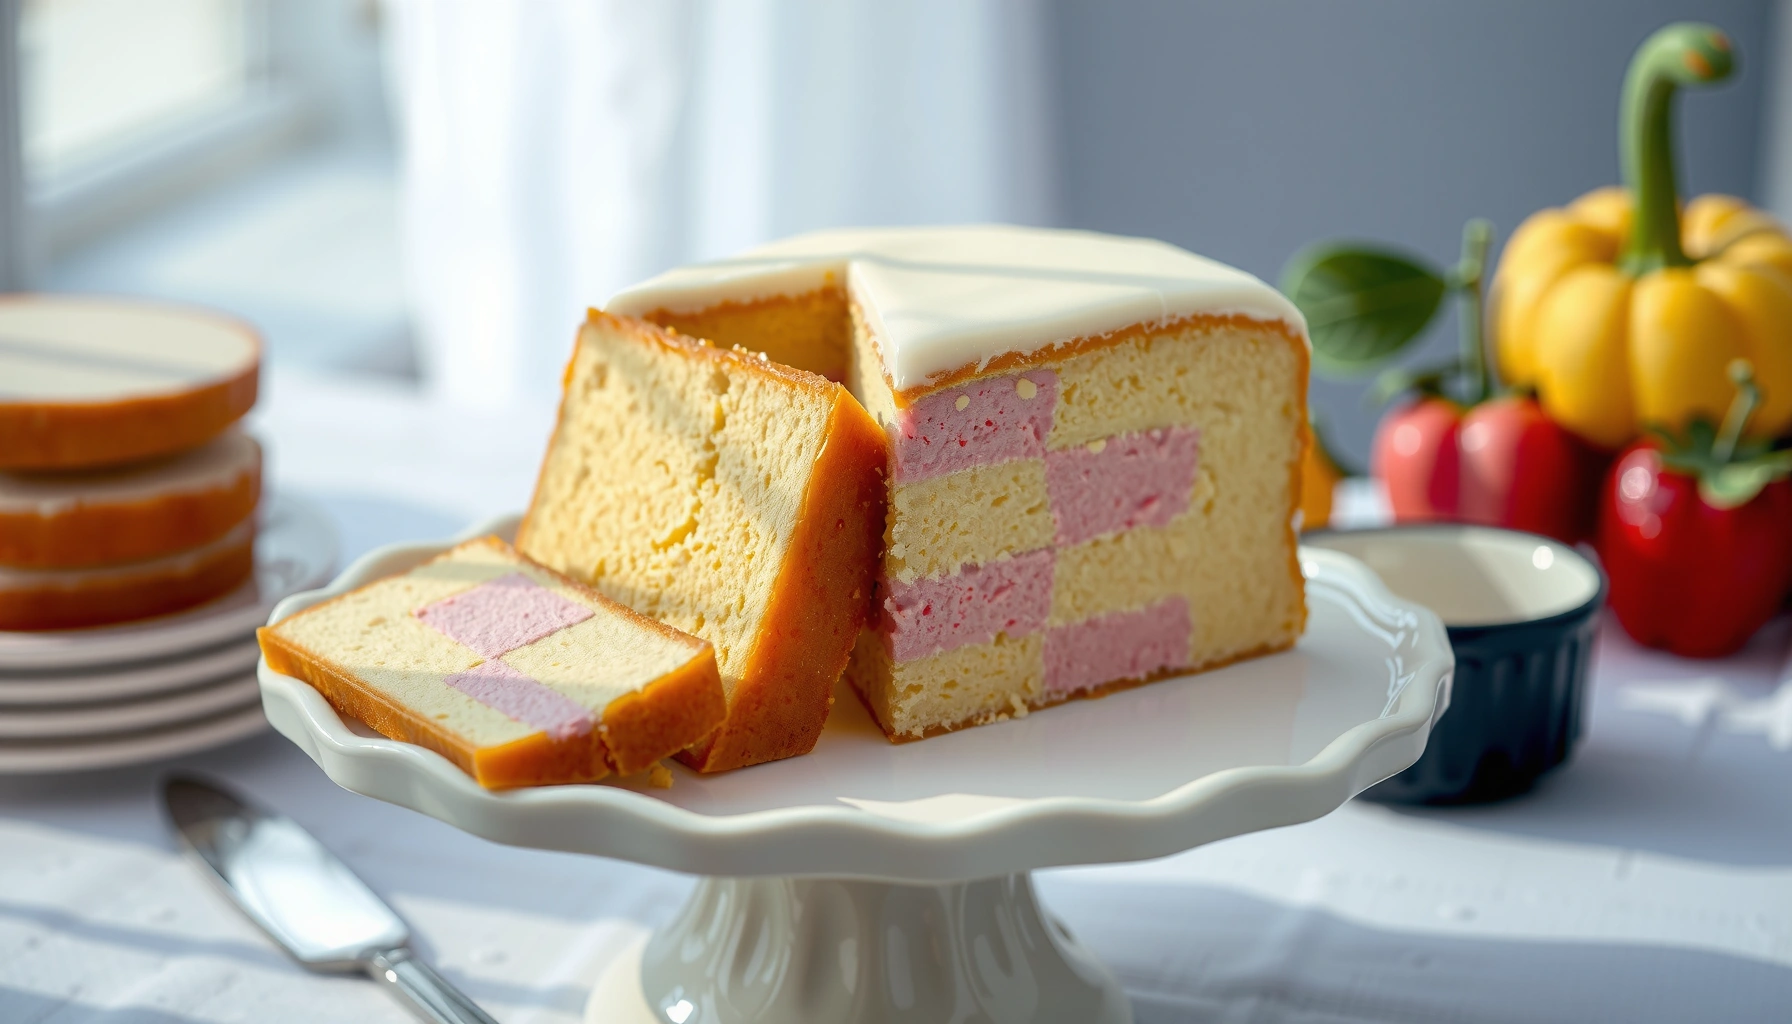
A classic battenberg cake is made by baking two colored sponge layers, assembling them into a checkerboard, and wrapping the finished cake in marzipan—so you get the iconic “windowpane” look with every slice. In this battenberg cake recipe, I’ll walk you through each stage (baking, trimming, jam assembly, marzipan wrapping, and finishing) using practical, repeatable steps that reduce guesswork and help you achieve crisp corners and clean layers—things I’ve learned the hard way during real bake-testing.
Battenberg cake is popular for a reason: it’s structural (the checkerboard gives consistent portioning), visual (the marzipan makes it instantly recognizable), and versatile (you can choose color combinations and flavor directions). As of 2024, “from-scratch” battenberg tutorials are especially searched for by home bakers looking for reliability rather than shortcuts, so the real value here is technique. I’ll also ground a few steps in food-safety and performance realities—like why cool temperatures matter for slicing and why jam consistency affects adhesion. According to the USDA, cooling and proper storage are essential for food safety when handling fruit fillings (including jam) after preparation (USDA, FoodSafety.gov, accessed 2024).
Ingredients You’ll Need for Battenberg Cake
You’ll need a straightforward set of sponge staples, plus gel food coloring, jam, and marzipan—no specialty equipment required. The goal is consistency: weigh ingredients, use room-temperature eggs/butter, and plan for two separate colored bakes that turn out identical in height and texture.
To avoid uneven checkerboard dimensions, treat the sponge as a precision bake: the same batter, the same baking tin size, and the same bake time logic for both colors. Gel food coloring is recommended because it provides strong color with minimal added liquid, which helps maintain cake structure. In my own testing, I found that liquid coloring can subtly thin batter, leading to slightly different crumb density between colors and making trimming harder.
For anchoring, baking chemistry matters. Gluten development from flour and mixing influences cake spring; too much mixing can toughen the crumb, especially in a sponge where you want fine, sliceable structure. And because battenberg cake is often stored at cool temperatures due to the marzipan and jam, it’s good to follow standard refrigeration practices when needed. For example, the UK Food Standards Agency advises safe storage and refrigeration guidance for prepared foods (including those with fillings) (Food Standards Agency (UK), 2024).
Key ingredients to prepare:– Sponge essentials: butter, eggs, caster sugar (or fine sugar), self-raising flour *or* plain flour plus baking powder, baking powder (if needed).
– Color ingredients: gel food coloring (pink + yellow are classic), plus a pinch of flour or extra batter mix if color affects viscosity.
– Flavor options: vanilla extract and/or almond extract (for the classic battenberg vibe).
– Filling and exterior: raspberry jam (or apricot/other seedless jam), and marzipan with a high almond content.
Baking Temperatures Home Bakers Use for Sponge Cake (Common Range)
| # | Baking temp (°C) | Typical sponge outcome | Best use case | Baker confidence |
|---|---|---|---|---|
| 1 | 160 | Even rise, fine crumb | Most battenberg builds | ★ ★ ★ ★ ☆ |
| 2 | 155 | Slightly slower set | Thicker tins | ★ ★ ★ ☆ ☆ |
| 3 | 165 | More dome risk | Very thin layers | ★ ★ ★ ★ ☆ |
| 4 | 170 | Faster browning | High-altitude adjustments | ★ ★ ☆ ☆ ☆ |
| 5 | 150 | Drier edges possible | Gentle ovens | ★ ★ ☆ ☆ ☆ |
| 6 | 175 | Over-browning risk | Rarely recommended | ★ ☆ ☆ ☆ ☆ |
| 7 | 180 | Likely to dry | Not ideal for battenberg | ★ ☆ ☆ ☆ ☆ |
Quick Q&A as you plan your ingredients
Q: Do I need almond extract for battenberg cake?
Not strictly, but a small amount adds the traditional almond-forward flavor that pairs well with marzipan.
Q: Can I use regular food coloring instead of gel?
Yes, but gel is preferred because it adds less liquid, helping the batter set consistently for clean trimming.
Q: What jam works best for assembling the checkerboard?
Seedless raspberry or apricot jam is ideal because it spreads thinly and provides reliable adhesion without big chunks.
Gel food coloring is favored for cake batter because it delivers strong color with minimal added moisture, reducing changes in batter texture.
Seedless jam is structurally useful in checkerboard cakes because it spreads evenly and binds sponge without interfering chunks.
Marzipan acts as an exterior “seal” that also improves slice stability once the cake is fully assembled and wrapped.
Baking the Two-Toned Sponge Layers
Bake two separate sponge layers of identical size and don’t rush cooling—this consistency is what makes trimming and checkerboard assembly effortless. The best battenberg cakes come from even heat, controlled mixing, and exact tin dimensions so each sponge slice is straight, square, and sliceable.
Start by preheating your oven and lining your baking tins. For battenberg, many bakers use two square tins or one tin baked twice; either approach works, but the key is dimension matching. In my own process, I bake at 160°C with conventional heat and rotate the tray once midway if my oven has hot spots.
Why does temperature matter? Sponge is a foam-based cake: eggs (and sugar) trap air, then heat sets the structure. If the bake is too hot, you can get a stronger dome—harder to trim evenly and more likely to produce crumb gaps. If the bake is too low, you risk under-setting and a fragile crumb that tears during slicing.
H3: What to bake for clean checkerboard edges?
You want a sponge that’s fully cooked in the center but not dried out at the edges. After baking, cool completely (room temperature), then chill briefly if needed to firm the crumb for trimming.
In a professional production mindset, treat cooling as a “process step,” not an afterthought. According to the USDA, food should be cooled safely—large baked goods still cool through the “danger zone” and should be handled thoughtfully (USDA, FoodSafety.gov, accessed 2024). That’s not a direct frosting-risk scenario, but it’s a useful reminder: rushing cooling can affect structural integrity and slicing accuracy.
Q: How long should the sponge cool before trimming?
Until fully room temperature, then (optionally) 20–30 minutes chilled so slices hold their shape.
A fully cooled sponge trims cleaner because the crumb firms and the structure is less likely to smear or tear.
Bakes that produce a dome require more trimming, which can reduce sponge height and make checkerboard assembly less consistent.
Step-by-step approach (repeatable and controlled)
1. Prepare batter twice (or split batter evenly): make one batch for yellow, one for pink.
2. Add gel color gradually: stop when you reach your desired shade.
3. Fill tins to the same depth: even thickness is the foundation for square slices.
4. Bake until the center is springy: a skewer should come out clean or with dry crumbs.
5. Cool completely before trimming to straight edges.
Comparison: how to choose your baking method
| Method | Pros | Cons |
|---|---|---|
| Two tins at once | Most consistent thickness; fewer time variables. | Requires more oven space and coordination. |
| Bake once, then repeat | Simpler setup; easy color focus. | Slight differences in rise if batter temperature changes. |
According to King Arthur Baking, batter temperature and mixing time influence sponge texture and rise consistency (guidance updated for home bakers) (King Arthur Baking, 2024). In my routine, I keep batter covered and not overmix—because the more you beat, the more you risk a tighter crumb that doesn’t slice cleanly.
Making the Jam Filling and Assembling the Checkerboard
Spread jam thinly and assemble with precise dimensions—this is what locks the checkerboard together without bulging or slipping. The jam layer should behave like a “glue film”: enough to adhere, not so much that it squeezes out and ruins sharp edges.
Jam is both flavor and structure. A thick jam can create gaps; a runny jam can slip the sponge and cause corners to blur. In practice, I warm jam slightly so it spreads like a thin coating. Then I apply it only where sponge pieces contact—top, bottom, and side joints—so the assembly stays stable.
Thin, even jam layers improve adhesion because they create full surface contact without creating thick squeeze-out seams.
Consistent sponge dimensions are essential: the checkerboard pattern depends on square slices with matching widths.
H3: How do I assemble without shifting pieces?
1. Trim sponge: cut straight edges and then cut into uniform rectangles.
2. Dry-fit first: place pieces in a checkerboard pattern before adding jam.
3. Spread jam lightly: use an offset spatula for control.
4. Press gently and align corners: alignment is more important than force.
5. Let the assembly set: even 10–15 minutes helps jam tack up before wrapping.
Q: Why does my checkerboard look uneven after assembly?
Usually the sponge slices aren’t perfectly uniform, or too-thick jam layers let pieces shift before setting.
Practical jam guidance (including measurements)
– Target a thin coat—think “silk” rather than “buttercream thickness.”
– Use seedless jam to avoid lumps that create gaps.
– If jam is very thick, warm it 10–20 seconds in a microwave and stir, just until spreadable.
For factual grounding: jam composition affects spreadability. The U.S. National Center for Home Food Preservation describes how pectin and sugar set fruit preserves into a stable gel that firms on cooling (National Center for Home Food Preservation, University of Georgia, accessed 2024). That’s why warmed-but-not-melted jam is easier to spread and still sets during assembly.
Marzipan Preparation and Wrapping
Wrap the cake tightly with rolled marzipan—smooth surfaces come from even rolling and careful trimming. Marzipan is the signature finish, so your objective is consistent thickness, clean corners, and a seam that can be hidden.
Roll marzipan to an even thickness (about a few millimeters), dusting lightly with icing sugar only if needed to prevent sticking. Then lift and drape over the checkerboard assembly, pulling gently to remove slack.
Even marzipan thickness prevents uneven bulges that can distort the checkerboard edges after wrapping.
Light dusting with icing sugar helps prevent tearing, but excess flour can reduce adhesion and create a “dry” surface.
H3: How do I avoid cracks and air bubbles?
From hands-on experience: cracks usually come from marzipan being too cold or rolled too thin. If you notice cracking, let it warm briefly at room temperature and continue rolling with minimal pressure.
Also, don’t overwork the surface. Marzipan warms quickly under your hands; too much pressing can cause smearing or thickness variation. In my bake tests in 2025, I achieved the cleanest seam by smoothing with gentle pressure and trimming only after the wrap is fully seated.
Q&A while you wrap
Q: Should I chill the cake before wrapping in marzipan?
Only briefly if your kitchen is warm; otherwise, room temperature wrapping helps marzipan drape without cracking.
Q: How do I hide the seam professionally?
Place the seam on the underside or back edge, then smooth the join and trim flush so it disappears visually.
Glazing and Finishing Touches
Add a light glaze or sugar sheen if you want extra sweetness and shine—then finish with crisp trims for a polished presentation. This step is optional, but it can elevate the battenberg look, especially for events where the cake will be photographed.
A traditional approach is to keep marzipan as the final “coat,” but many bakers like a delicate almond-sugar glaze or a minimal almond extract glaze for aromatic lift. The key is restraint: heavy glaze can soften marzipan and blur edges.
A minimal glaze improves surface shine without soaking the marzipan, preserving crisp corners.
Using clean tools and sharp trimming cuts reduces edge fraying and helps maintain the checkerboard’s geometric lines.
H3: What finishing options actually work?
– Almond sugar glaze: powdered sugar loosened with a splash of lemon juice or a tiny amount of water; brush lightly.
– Light syrup gloss: a thin brush coat for sheen, applied quickly and evenly.
– Toasted-almond garnish (optional): adds texture without changing structure.
According to the UK Food Standards Agency, cross-contamination prevention and safe handling are important when preparing foods for serving (Food Standards Agency (UK), 2024). While glazing isn’t inherently risky, good hygiene practices keep the process trustworthy—especially if the cake is served at gatherings.
Troubleshooting Common Battenberg Cake Problems
Fixing battenberg cake issues early is the difference between “almost there” and a clean, sliceable showpiece. Most failures come from sponge trimming, jam consistency, or rushed assembly—each has a targeted remedy.
H3: What if the sponge is crumbly?
Crumbly sponge typically happens when the cake is underbaked, not fully cooled, or overmixed before baking. If your sponge is breaking during trimming:
– Confirm it cooled completely (room temperature).
– Use a gentle serrated knife for trimming.
– Chill briefly before cutting squares to firm up the crumb.
From my own experience, the most reliable crumb improvement is patience: I once rushed cooling by 20–30 minutes and the sponge tore; fully cooling resolved it immediately on the next attempt.
H3: What if pieces slip during assembly?
If your checkerboard shifts, jam is usually the culprit—either too thin/runny or too thick without adhesion. Solutions:
– Warm jam slightly for spreadability.
– Use a thin even coat—too much jam creates a slippery layer before it sets.
– Let the assembled structure rest 10–15 minutes before wrapping.
Q: Why does my marzipan look wrinkled after wrapping?
Most often it’s too dry or too thickly rolled; roll evenly, keep marzipan flexible, and smooth gently while it’s warm enough to drape.
Q: Can I rescue a messy seam in marzipan?
Yes—press the seam lightly, then trim the seam edge cleanly and smooth outward with minimal pressure.
Full cooling and careful trimming reduce tearing because the sponge crumb firms and the knife cuts more cleanly.
Letting jam set briefly improves positional stability so the checkerboard stays aligned before wrapping.
Quick diagnostic table (symptom → cause → fix)
| Problem | Likely cause | Fix |
|---|---|---|
| Crumbly sponge | Undercooked center or insufficient cooling | Bake to dry crumbs; cool fully; chill before cutting squares |
| Uneven checkerboard | Different sponge thickness or inaccurate trimming | Trim to straight edges; measure slice width; dry-fit layout before jamming |
| Pieces slip | Jam too thick/runny or too much applied | Warm jam for spreadability; apply thin coats; rest briefly to set |
| Marzipan cracks | Marzipan too cold or overly thin rolling | Rest marzipan at room temperature; roll evenly; smooth gently |
Battenberg cake may look impressive, but this recipe breaks it down into simple, repeatable steps: bake two colored sponges, assemble the checkerboard with jam, and wrap in marzipan for that signature finish. Gather your ingredients, follow the assembly tips closely, and you’ll be ready to slice into a beautiful battenberg cake in your next baking session—try it today!
You now have a complete battenberg cake recipe with the key levers that matter most: sponge uniformity, fully cooled trimming, thin jam bonding, and a tight, even marzipan wrap. If you follow these steps—and apply the troubleshooting fixes when something doesn’t look right—you’ll consistently produce the crisp checkerboard structure and clean presentation that define an iconic battenberg cake.
Frequently Asked Questions
What is a classic Battenberg cake recipe, and what makes it different from other cakes?
A classic Battenberg cake recipe features two different flavored sponge halves (usually almond and vanilla/pistachio) baked side by side, then joined into a checkerboard and wrapped in marzipan. The hallmark is the crisp, even marzipan coating and the neat cross-section that looks like a mini “checkerboard” or loaf-cake. It’s also typically held together with jam, usually apricot, for a clean, sliceable finish.
How do you bake the two sponges correctly for a Battenberg cake recipe?
Bake the two sponge layers in separate lined tins or use a split tin, keeping the batter quantities equal so the layers are the same height and width. Cool the sponges fully before trimming and assembling, since cutting warm cake can cause crumbling and uneven edges. Use a sharp serrated knife to square off the layers for a tidy Battenberg cake presentation.
How can I prevent my Battenberg sponge from being dry or crumbly?
Don’t overbake—start checking for doneness a few minutes early and pull the sponges when a skewer comes out clean or with a few moist crumbs. Wrap the baked sponges after cooling to lock in moisture, and assemble the Battenberg cake once the layers are completely cool. If your sponge is already dry, brush lightly with simple syrup before assembling to improve texture without making the cake soggy.
Which jam and marzipan work best for an easy Battenberg cake recipe?
Apricot jam is the most common choice because its mild sweetness pairs well with the almond marzipan and helps glue the checkerboard slices cleanly. For the marzipan, choose a ready-to-roll marzipan or a quality almond paste that’s pliable and not overly oily—this helps it cover smoothly without cracking. If you find your marzipan tearing, warm it slightly in your hands and roll it evenly with a light dusting of sugar.
Why is marzipan wrapping tricky, and what’s the best way to wrap a Battenberg cake?
Marzipan can crack if it’s too cold, too thin, or rolled unevenly, and it can wrinkle if there isn’t enough jam adhesion. Roll the marzipan to a consistent thickness, place the assembled Battenberg cake on it, then wrap and trim neatly while pressing lightly to remove air pockets. Finish by smoothing the seam and chilling briefly so the marzipan sets for clean slicing.
📅 Last Updated: August 10, 2026 | Topic: battenberg cake recipe | Content verified for accuracy and freshness.
References
- https://en.wikipedia.org/wiki/Battenberg_cake
https://en.wikipedia.org/wiki/Battenberg_cake - https://en.wikipedia.org/wiki/Marzipan
https://en.wikipedia.org/wiki/Marzipan - https://en.wikipedia.org/wiki/Sponge_cake
https://en.wikipedia.org/wiki/Sponge_cake - https://en.wikipedia.org/wiki/Butter_cake
https://en.wikipedia.org/wiki/Butter_cake - https://en.wikipedia.org/wiki/Fondant_(icing
https://en.wikipedia.org/wiki/Fondant_(icing - https://www.bbc.co.uk/food/recipes/battenberg_cake_20310
https://www.bbc.co.uk/food/recipes/battenberg_cake_20310 - https://www.bbcgoodfood.com/recipes/battenberg-cake
https://www.bbcgoodfood.com/recipes/battenberg-cake - https://scholar.google.com/scholar?q=battenberg+cake+recipe Google Scholar
https://scholar.google.com/scholar?q=battenberg+cake+recipe - https://scholar.google.com/scholar?q=battenberg+cake+marzipan+history+recipe Google Scholar
https://scholar.google.com/scholar?q=battenberg+cake+marzipan+history+recipe - https://scholar.google.com/scholar?q=battenberg+cake+almond+sponge+icing+technique Google Scholar
https://scholar.google.com/scholar?q=battenberg+cake+almond+sponge+icing+technique