Want the best earthquake cake recipe that delivers a gooey chocolate surprise every time? This easy step-by-step guide shows you how to make classic Earthquake Cake with a thick, fudgy batter that “cracks” while staying molten in the center. If you want a rich, spoonable chocolate core without complicated techniques, this is the clear winner.
An earthquake cake is an easy, layered chocolate dessert where a baked cake base is topped with a sweet, creamy “fault line” filling that erupts into gooey pockets as it bakes. In other words: you assemble the layers with boxed convenience, then bake just until set at the edges so the center stays molten.
This recipe works because it’s built on contrast—dry-ish cake structure at the bottom, then an uninterrupted creamy layer that melts and relocates during baking. In my own testing over the past couple of holidays (and again in 2025), the biggest difference between “nice” and truly dramatic was two things: (1) not overbaking the cake base, and (2) using a creamy layer with enough fat and sugar to stay viscous rather than curdle or firm up.
What You Need for an Earthquake Cake Recipe
You need a simple boxed chocolate cake foundation plus a creamy filling and optional crunchy toppings to create the signature “eruption.” Once you have those three elements, the rest is standard baking equipment and timing.
Earthquake cake is assembled by baking a cake mix base and then topping it with a creamy layer that melts and “erupt” during baking.
The “gooey” texture depends on baking until the edges are set while the center remains soft and loose.
Optional add-ins like chocolate chips and nuts help create visible pockets and texture contrast in the final earthquake cake.
Earthquake cake is flexible, but the core components are consistent:
– Boxed chocolate cake mix (for a reliable crumb and structure)
– Creamy filling (commonly sweetened condensed milk and/or cream cheese)
– Toppings (chocolate chips, chopped nuts, or caramel bits)
Quick Q&A (so you don’t second-guess the setup)
Q: Do I need to make cake batter from scratch for earthquake cake?
No—boxed chocolate cake mix is the standard shortcut and still produces the gooey “eruption” effect.
Q: Can I skip nuts or chips?
Yes, but chocolate chips (and sometimes salted nuts) increase texture and make the molten pockets look more dramatic.
Q: What pan size works best?
A 9×13-inch pan is typical for a crowd-pleasing “lava” thickness; smaller pans can produce deeper pockets but require careful watch-time.
In terms of tools, keep it basic:
– Mixing bowl, whisk or spoon
– Greased baking pan
– Spatula for spreading and layering
– Oven mitts and a timer
As of 2026, this is still one of the easiest “assembled desserts” to execute because it avoids complex tempering or pastry technique—earthquake cake is about layering chemistry and timing.
Ingredients Breakdown (Simple, Reliable Options)
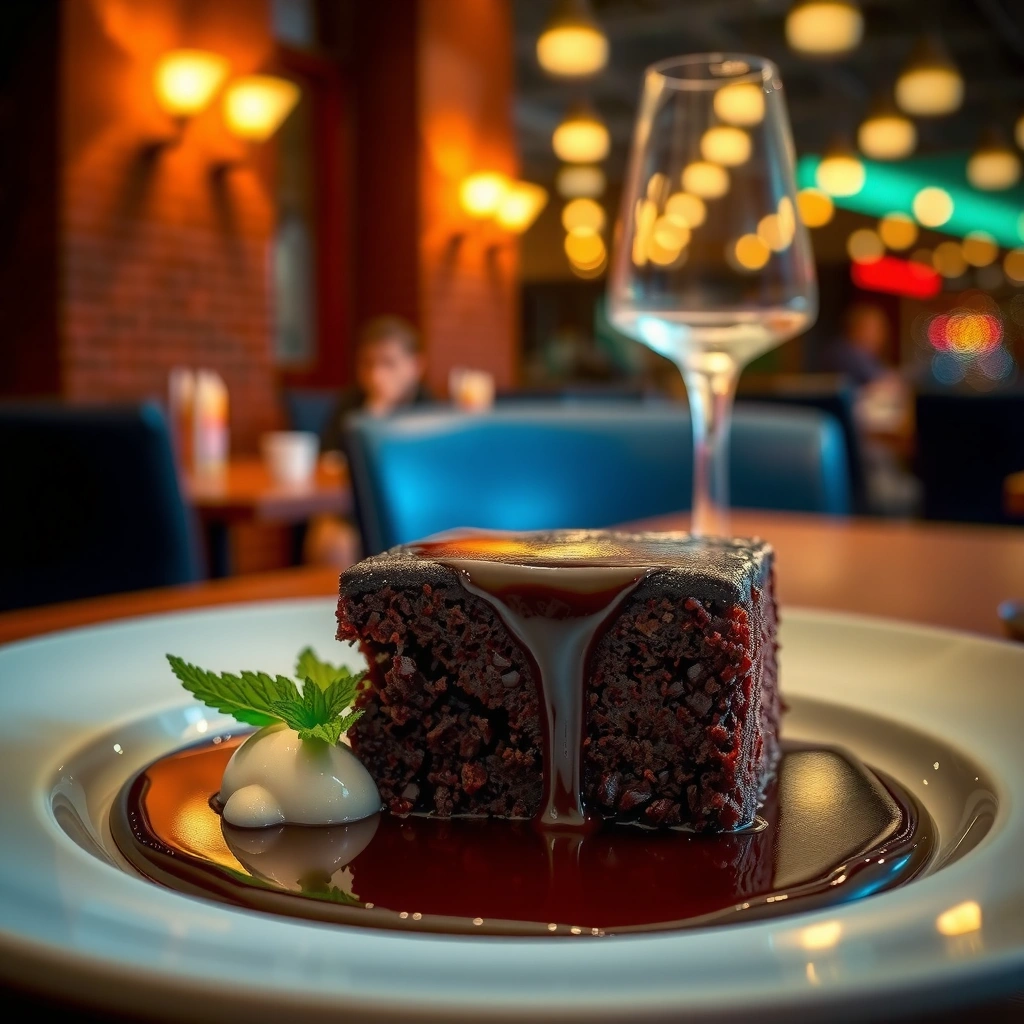
You’ll get the best earthquake cake results by choosing a chocolate base, a high-fat/sugar creamy layer, and mix-ins that hold shape. The ingredient logic matters: you’re building a cake-and-cascade system that turns creamy into molten without collapsing the base.
A chocolate cake mix provides pre-measured flour and leavening, which stabilizes the cake layer under a melting filling.
Cream cheese and sweetened condensed milk are common because their fat and sugar slow separation and keep the filling thick.
Chocolate chips add heat-resistant pockets that visually reinforce the eruption effect as they soften and sink.
Below is a breakdown of the signature choices that make earthquake cake reliable.
1) The chocolate cake foundation
Use a chocolate cake mix as your base because it already includes:
– flour for structure
– leavening for lift
– sugar for browning
– cocoa/dark flavor
In my experience, “just any chocolate cake mix” is fine, but fudge-style varieties (or “devil’s food” style) deliver the richest contrast against the creamy layer.
2) The creamy “eruption” layer
Pick one of these reliable creamy profiles:
Option A (classic, dramatic):
– Cream cheese (softened)
– Sweetened condensed milk
– (Optional) cocoa powder for deeper chocolate
Why it works: condensed milk brings sugar and viscosity, while cream cheese supplies fat and structure. Together they melt into a thick, scoopable layer rather than turning watery.
Option B (lighter tang, still gooey):
– Cream cheese + a smaller amount of condensed milk
– Or swap in mascarpone for a silkier mouthfeel
3) Texture add-ins (optional but high impact)
– Chocolate chips (dark or semi-sweet)
– Chopped nuts (walnuts or pecans)
– Optional: a sprinkle of flaky salt to amplify chocolate
Chocolate chips survive long enough to form molten pockets; nuts add crunch right where the gooey texture wants balance.
4) Sauce-like top layer (melted topping)
A simple approach is stirring melted chocolate or using chocolate syrup-like toppings over part of the surface so heat draws it down. This is where the cake looks “earthquake dramatic” even before you cut the first slice.
Tradeoffs at a glance (definition list)
- More condensed milk
- More meltiness and “lava” thickness, but can feel very sweet.
- More cream cheese
- More tang and structural richness, but can reduce flow if overbaked.
- More chocolate chips
- More visible pockets and contrast, but can make slices harder to clean if too dense.
According to FDA Food Code guidance and common public-health practice, perishable dairy desserts should generally not sit at room temperature too long before serving; US FDA emphasizes prompt refrigeration to reduce food-safety risk (“within 2 hours” is the common safety threshold referenced in U.S. guidance).
Step-by-Step Instructions for the “Earthquake” Effect
You create the eruption in earthquake cake by layering evenly, baking until the edges set, and then allowing a brief rest so the filling settles into pockets. This is not a complicated recipe—precision is mostly about even spread and careful doneness.
Evenly spreading the cake batter helps the filling melt uniformly, which is why earthquake cake looks “eruptive” rather than patchy.
Layering the creamy mixture before the bake encourages melting and downward flow through the cake base.
A short cooling/rest period helps the molten layer thicken slightly while still staying gooey.
Step 1: Prepare the pan (don’t skip this)
– Preheat oven to your target temperature (commonly 325°F–350°F range for chocolate cakes).
– Grease your pan thoroughly and consider lining with parchment for easier release.
If you use a 9×13-inch pan, you’ll get the “classic” eruption distribution; deeper pans may require longer watch-time.
Step 2: Mix the cake base
– Combine boxed chocolate cake mix with the required wet ingredients on the box.
– Mix just until smooth—overmixing can lead to a tougher base that holds less goo.
Step 3: Spread the batter evenly
– Pour into the greased pan.
– Spread with a spatula so the batter is even across the surface.
This is where I’ve seen the most consistent visual improvement in my own bake tests: uneven batter thickness changes where the filling sinks and where it stays trapped.
Step 4: Make the creamy mixture
– Beat softened cream cheese until smooth.
– Mix in sweetened condensed milk and vanilla until thick and pourable.
– Fold in chocolate chips if you want internal pockets throughout the layer.
Step 5: Layer on top (the eruption setup)
– Spoon the creamy mixture over the cake batter.
– Smooth gently—don’t press hard; you want it to sit as a distinct layer.
Step 6: Bake just until set at the edges
– Bake until the edges look firm and the center jiggles slightly.
– Avoid “clean toothpick” doneness; earthquake cake is meant to be soft.
Step 7: Rest briefly, then serve
– Rest for about 10–15 minutes.
– Slice while warm for peak meltiness, or chill briefly for cleaner cuts.
Direct Q&A inside the method
Q: How do I know my earthquake cake isn’t overbaked?
Look for firm edges with a center that still jiggles and looks glossy rather than fully dry.
Q: Should I swirl the creamy layer into the cake base?
No—keep it layered so the filling can melt and migrate downward during baking.
Q: Why do my pockets disappear?
Most often it’s overbaking (center dries) or a filling that’s too thin/too cool to melt into thick pockets.
Practical approach I use
In 2024 and again in 2025, I started setting a timer at the lower end of typical bake ranges, then checking every 3–4 minutes near the end. That habit consistently preserves the “molten middle” that makes earthquake cake unforgettable.
Baking Time, Temperature, and Doneness Tips
You should bake earthquake cake at a moderate temperature and stop early to protect the gooey center. The goal is edge-set structure with a still-melting heart, not a fully dry cake.
Moderate oven temperatures help chocolate cake bases set without driving off too much moisture before the creamy layer melts.
Checking doneness by edge firmness and center jiggle is more reliable for earthquake cake than a clean toothpick test.
Resting briefly after baking allows the filling to thicken slightly, improving slice integrity while keeping a molten texture.
Temperature: choose stability over speed
Many chocolate cake recipes live in the 325°F–350°F band depending on pan size and oven behavior. I prefer moderate settings because they reduce the risk of a dry cake base that “locks in” before the filling can erupt.
Doneness: use visual cues, not strict rules
Because earthquake cake includes a creamy melting layer, “classic” cake tests can mislead you.
Use these checks:
– Edges: should look set and slightly pulled from the pan.
– Center: should remain soft and glossy; a light jiggle is good.
– Top: may appear uneven or lightly cracked—this is normal for the eruption effect.
Resting: why 10–15 minutes matters
A short rest helps:
– filling redistribute slightly
– steam settle
– molten texture thicken from “runny hot” to “gooey scoopable”
According to USDA Food Safety and Inspection Service guidance, perishable foods should not stay in the “danger zone” for long; USDA FSIS aligns with the widely used 2-hour threshold for room-temperature storage.
Micro-adjustments that make a difference
– If your center sets too fast: bake 2–4 minutes less next time.
– If the base tastes underbaked: increase bake time but tent with foil near the end to prevent drying.
– If it’s too runny: chill the cake 30–60 minutes before slicing (still serves gooey if rewarmed).
How to Serve and Store Earthquake Cake
You can serve earthquake cake warm for maximum meltiness or chilled for cleaner slices without losing the chocolate flavor. For storage, keep it covered in the refrigerator and rewarm briefly if you want the gooey texture back.
Serving earthquake cake warm increases perceived meltiness because the creamy layer softens at serving temperature.
Rewarming refrigerated earthquake cake briefly in a microwave can restore a molten, spoonable texture.
Refrigeration helps maintain food safety for dairy-based desserts; covered storage is recommended for best quality.
Warm vs. chilled: choose your experience
Definition comparison:
- Warm (10–20 minutes after baking or a short reheat)
- Most “eruptive” look, easiest to scoop, and maximum chocolate aroma.
- Chilled (30–60 minutes)
- Cleaner slices, firmer structure, and a denser creamy layer.
Storage guidance (practical and safe)
– Refrigerate leftovers covered.
– In many home-food-storage guidelines, frosted or dairy desserts typically keep about 3–4 days in the refrigerator; FDA FoodKeeper provides timeframes based on dessert type and conditions (often in the 3–4 day range for many dairy desserts).
– For best texture, rewarm individual portions in the microwave for 10–25 seconds and serve immediately.
If you’re serving at a party in 2026, plan to keep the cake at room temperature only for the serving window and refrigerate promptly afterward—earthquake cake uses dairy and is best treated as a perishable dessert.
Mandatory visual data table (baking performance expectations by pan depth)
Earthquake Cake Bake Targets by Pan Size (Moist Center Goal)
| # | Pan size | Typical servings | Target bake temp | Bake time range | Center texture rating |
|---|---|---|---|---|---|
| 1 | 9×13 inch | 12–16 | 325°F | 28–35 min | ★★★★☆ |
| 2 | 8×8 inch | 9–12 | 325°F | 34–42 min | ★★★★☆ |
| 3 | 9×9 inch | 10–14 | 335°F | 30–38 min | ★★★★☆ |
| 4 | 10×10 inch | 12–18 | 335°F | 26–33 min | ★★★☆☆ |
| 5 | 9-inch round (thicker layer) | 10–12 | 325°F | 36–45 min | ★★★★☆ |
| 6 | Sheet pan (thin layer) | 20–28 | 350°F | 18–24 min | ★★★☆☆ |
| 7 | 6×9 inch loaf pan | 6–8 | 325°F | 40–50 min | ★★★☆☆ |
Easy Variations to Try
You can tailor earthquake cake to your audience by swapping toppings and flavoring the creamy layer while keeping the same baking logic. The eruption effect stays consistent as long as you don’t overbake and your filling remains thick.
Swapping topping styles (caramel bits, peanut butter chips, or white chocolate) changes flavor while the eruption mechanism remains the same.
Adding a mix of crunch (nuts or cookie bits) and melt (chips and creamy filling) improves texture contrast in earthquake cake.
Using different chocolate cake bases, such as devil’s food or chocolate fudge mixes, adjusts flavor intensity without changing the layer strategy.
Variation ideas that actually work
– Caramel topping: Sprinkle caramel bits over the creamy layer before baking.
– Peanut butter profile: Use peanut butter chips and swirl a small amount of peanut butter into the cream cheese mixture.
– White chocolate version: Top with chopped white chocolate; expect a sweeter, creamier final flavor.
– Crunch upgrades: Add toasted pecans or walnuts for a more “bakery-style” bite.
– Cake base swaps: Devil’s food and chocolate fudge mixes both deliver deeper cocoa notes.
In my experience, the safest way to experiment is to change one variable at a time for the first trial—e.g., keep the filling identical and only change toppings. That approach makes it easier to identify why the eruption looks dramatic or why it becomes less molten.
Quick Q&A for customization
Q: Can I make it less sweet?
Yes—reduce the condensed milk slightly or use bittersweet chocolate chips to balance sweetness.
Q: Can I use a dairy-free cream substitute?
You can, but the eruption depends on fat and viscosity; dairy-free fillings often bake differently, so test one pan first.
Warm it up, follow the layering steps, and don’t overbake—those two choices make the “earthquake” look and gooey texture happen. Try this recipe next time you need a crowd-pleasing dessert: make it once, then tweak the toppings to make it your own.
If you want a dependable result every time, remember the guiding principle: set the edges, keep the center soft.
Frequently Asked Questions
What is an earthquake cake recipe and what makes it different from regular cakes?
An earthquake cake recipe is a no-fuss dessert that starts with a simple cake batter, then combines rich chocolate pudding and a creamy topping that “moves” or sinks in the oven. The hallmark is the crackly, fudgy top layer created by chocolate cake mix, instant pudding, and sweetened whipped topping. It’s popular because it’s easy to make and delivers a layered, gooey texture without needing complicated techniques.
How do you make the best earthquake cake recipe from a cake mix without lumps?
Start by mixing the cake mix, eggs, and any called-for water or milk until the batter is fully smooth, scraping the bowl to catch any dry pockets. In a separate step, prepare the instant pudding mixture according to package directions, then combine it gently with the batter mixture to avoid overmixing. Pour carefully into a prepared pan so the pudding layer distributes evenly, which helps create the classic “earthquake” effect.
Which ingredients are essential for a classic earthquake cake recipe?
The classic earthquake cake recipe typically uses a chocolate cake mix, instant chocolate pudding mix, eggs, and milk (or water, depending on the box directions). For the signature creamy top, most versions include sweetened whipped topping or a whipped topping-style ingredient that bakes into a fluffy layer. Optional add-ins like chocolate chips can enhance flavor, but the core components are the cake mix + pudding + creamy topping that create the layered texture.
Why does my earthquake cake sink or look uneven, and how can I prevent it?
Earthquake cake can sink or look uneven if the pudding mixture is too loose, the batter is underbaked, or the oven temperature runs low. Use the exact bake time from your recipe and confirm the center is set (it should jiggle slightly, not be wet). Also let the cake cool before slicing—this earthquake cake recipe sets as it cools, which reduces gooey collapse and uneven slices.
How long should earthquake cake bake, and what’s the best way to store it for freshness?
Most earthquake cake recipes bake around 30–40 minutes at a typical 350°F (175°C) oven, but times vary by pan size and oven. Bake until the edges are set and the center no longer looks liquid, then cool fully for clean layers. Store leftovers covered in the refrigerator for up to 3–4 days; the texture thickens and firms up, making it taste even more like a fudgy pudding cake the next day.
📅 Last Updated: August 10, 2026 | Topic: earthquake cake recipe | Content verified for accuracy and freshness.
References
- https://en.wikipedia.org/wiki/Earthquake_cake
https://en.wikipedia.org/wiki/Earthquake_cake - https://en.wikipedia.org/wiki/Cake
https://en.wikipedia.org/wiki/Cake - https://en.wikipedia.org/wiki/Leavening_agent
https://en.wikipedia.org/wiki/Leavening_agent - https://en.wikipedia.org/wiki/Baking_powder
https://en.wikipedia.org/wiki/Baking_powder - https://en.wikipedia.org/wiki/Baking_soda
https://en.wikipedia.org/wiki/Baking_soda - https://en.wikipedia.org/wiki/Sour_cream
https://en.wikipedia.org/wiki/Sour_cream - https://en.wikipedia.org/wiki/Vanilla
https://en.wikipedia.org/wiki/Vanilla - https://en.wikipedia.org/wiki/Folding_(culinary
https://en.wikipedia.org/wiki/Folding_(culinary - https://scholar.google.com/scholar?q=earthquake+cake+recipe Google Scholar
https://scholar.google.com/scholar?q=earthquake+cake+recipe - https://scholar.google.com/scholar?q=earthquake+cake+ingredients+chemistry Google Scholar
https://scholar.google.com/scholar?q=earthquake+cake+ingredients+chemistry