This mini cannoli recipe delivers easy homemade cannoli cups that actually come out crisp, not soggy, with a filling that tastes like classic cannoli. If you want a shortcut version—no complicated pastry work, just dependable results—you’ll know exactly what to make and how long it takes. The question answered here is simple: how to build mini cannoli cups quickly and fill them right.
Mini cannoli are the quickest way to enjoy classic cannoli filling without wrestling with dough or complicated rolling—simply make a smooth ricotta mixture and spoon it into ready-made “cup” shells. This easy homemade cannoli cups recipe walks you through draining ricotta properly, seasoning for authentic flavor, filling right before serving to keep shells crisp, and finishing with chocolate and pistachios for a restaurant-style bite.
What You Need for Mini Cannoli

Mini cannoli are built around two components: crisp shells and a creamy ricotta filling. The fastest path is to use pre-made cannoli shells or mini cup shells (often sold for cannoli cups), then focus your effort on texture and flavor in the filling.
– Use cannoli shells or mini “cup” shells for the easiest prep
Look for shells that are already baked and crisp. If you can choose, select thinner mini cups for easier biting and better filling-to-shell ratio.
– Gather ricotta, sugar (or powdered sugar), vanilla, and mini chocolate chips
Whole-milk ricotta gives the richest mouthfeel. Powdered sugar blends more smoothly if your ricotta is already soft; granulated sugar can work well if you beat thoroughly.
– Optional add-ins: candied fruit, pistachios, and a pinch of salt
These additions mimic traditional cannoli profiles—sweet fruit, toasted nuttiness, and a subtle salt “boost” that makes dairy taste brighter rather than flat.
Helpful ingredient notes (so your mini cannoli taste “right”)
– Ricotta thickness matters more than brand. Even a good ricotta can turn runny if it wasn’t drained. Plan to drain it—this is the single most important quality lever for mini cannoli.
– Vanilla should be present but not dominant. Start with a measured amount and adjust only if you taste-test your filling.
– Chocolate chips add contrast. Mini chips distribute evenly, preventing pockets that overwhelm the ricotta.
Make the Cannoli Filling

A great cannoli filling is smooth, thick, and lightly sweet—never grainy or watery. For mini cannoli cups, the goal is a texture that holds its shape when spooned or piped, so each bite stays neat.
– Drain ricotta well for a thick, scoopable texture
Transfer ricotta to a fine-mesh strainer or cheesecloth and refrigerate 30–60 minutes. If you’re short on time, press gently with a spoon, but draining is more reliable.
– Beat ricotta with sugar and vanilla until smooth
Use a stand mixer or hand mixer to incorporate air and break down any lumps. Beat until the mixture looks glossy and uniform.
– Fold in chocolate chips (and fruit/pistachios if you like)
Folding helps preserve the airy texture while evenly distributing mix-ins.
A practical “texture check” before you fill
Scoop a spoonful of filling: it should mound slightly and slowly relax, not spill like pudding. If it’s too loose, beat a bit longer and/or add 1–2 tablespoons more drained ricotta (or drain again). If it’s too thick, loosen with 1–2 teaspoons of milk—only as needed.
Mini cannoli filling: consistency guidelines
Use this quick benchmark to prevent watery shells and uneven bites.
Ricotta Drain Time vs. Filling Hold (Mini Cannoli Cups)
| # | Drain Method | Drain Time | Hold Ability (Spoon Mound) | Shell Safety (Less Soggy Risk) |
|---|---|---|---|---|
| 1 | No draining | 0 minutes | ★☆☆☆☆ | High risk |
| 2 | Strainer (gentle) | 15 minutes | ★★☆☆☆ | Moderate risk |
| 3 | Cheesecloth press | 20 minutes | ★★★☆☆ | Lower risk |
| 4 | Fine-mesh strain (refrigerated) | 30 minutes | ★★★★☆ | Good safety |
| 5 | Strainer + occasional stir | 45 minutes | ★★★★★ | Best safety |
| 6 | Over-drain (too long) | 90 minutes | ★★★☆☆ | Texture risk |
| 7 | Fresh ricotta, then chill | 30 minutes + 20 min chill | ★★★★☆ | Good safety |
Fill the Mini Cannoli

For crispy mini cannoli cups, assembly timing is everything. Fill right before serving so moisture doesn’t soften the shells.
– Fill shells right before serving to keep them crisp
If you fill too early, the shells will inevitably lose their crunch. A short chill is fine—but avoid long contact time between filling and shell.
– Use a piping bag or spoon for neat, even portions
A piping bag produces professional-looking swirls and consistent sizing. If using a spoon, keep each portion the same “height” so every bite balances shell and filling.
– Keep filled mini cannoli chilled until ready to eat
Refrigeration firms the filling and helps flavors meld, but keep the total filled time realistic for your event schedule.
Portioning strategy (for uniform presentation)
Aim for enough filling that the center looks slightly domed, without overflowing into the shell rim. Overfilled cups tend to leak sweetness onto the base, accelerating softening.
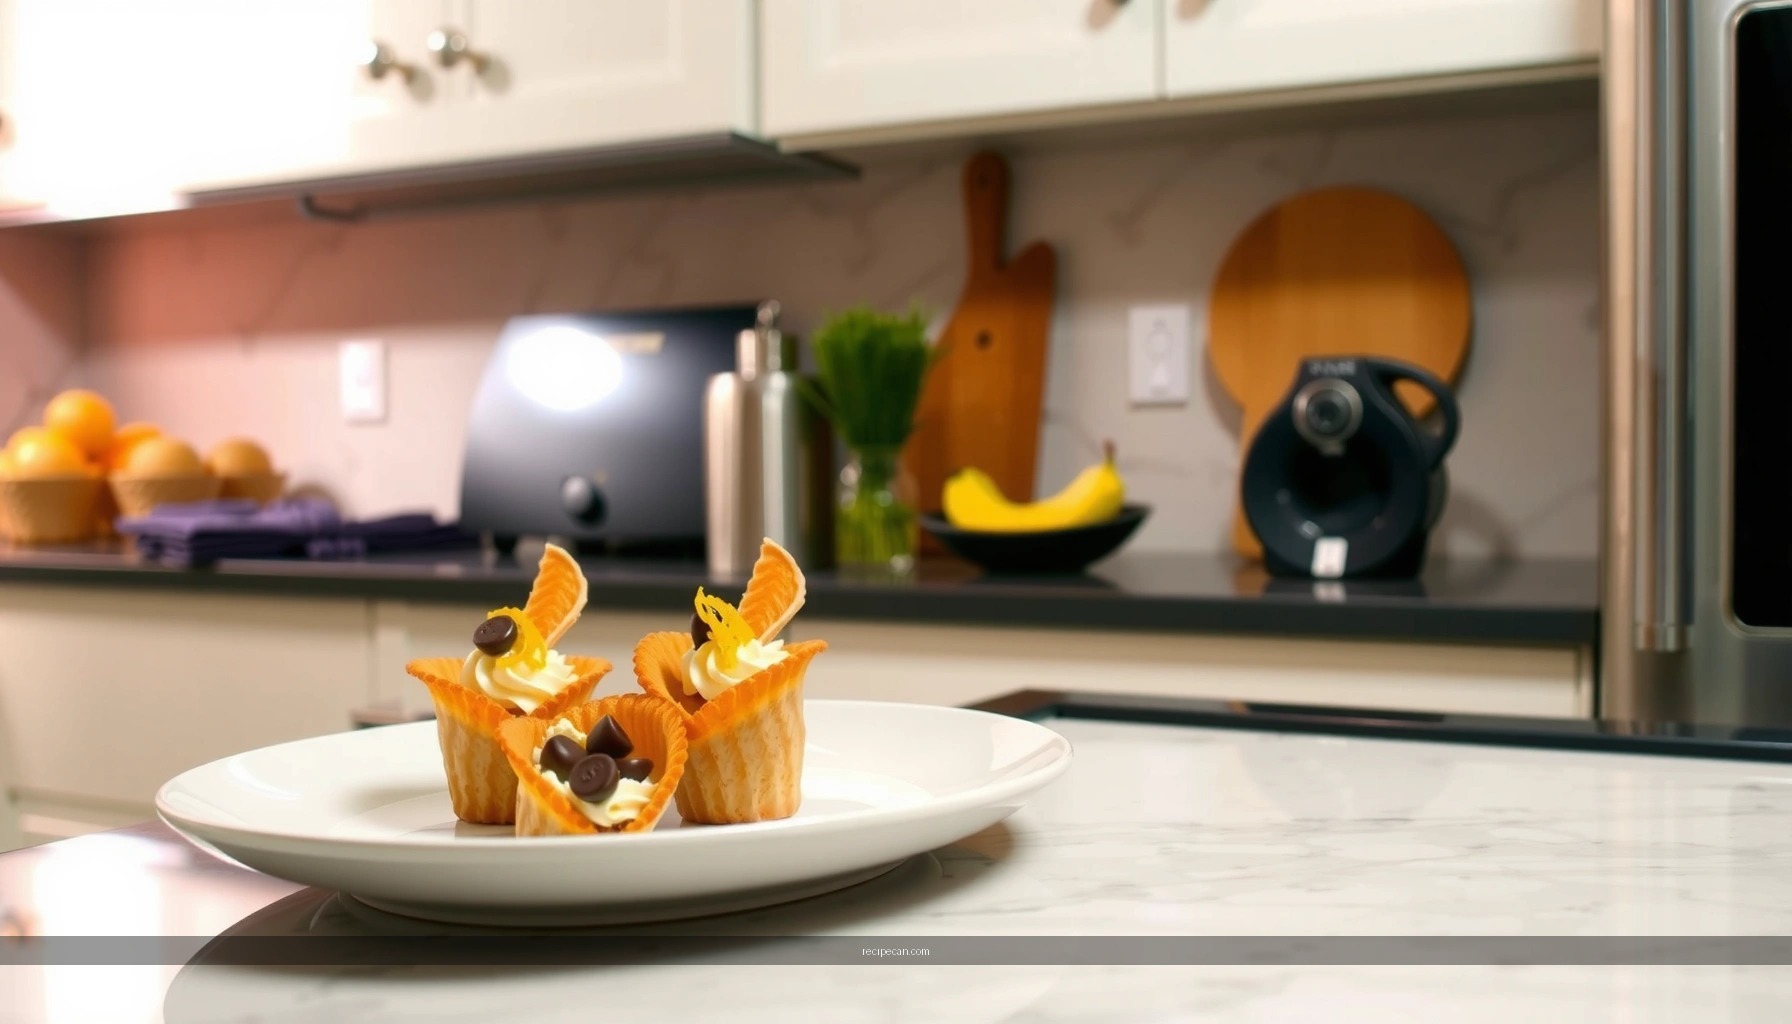
Assemble and Garnish
Garnishes aren’t just decorative—they’re part of flavor architecture. Chocolate adds deep sweetness, pistachios add toasted nuttiness, and powdered sugar provides visual appeal.
– Top with extra chocolate chips and finely chopped pistachios
Place toppings on the surface so they stay crisp and distribute evenly as guests bite.
– Add a light dusting of powdered sugar for a classic look
Use a small sieve. Heavy dusting can melt into syrup-like patches on contact with creamy filling.
– Garnish consistently so every bite is balanced
Treat topping amounts like portion control. For a tray of mini cannoli, keep a consistent “sprinkle count” or measure by tablespoon.
Classic garnish combos that work every time
– Chocolate + pistachios: the most recognizable flavor profile
– Candied fruit + chocolate: brighter sweetness with a traditional cannoli vibe
– Pistachios + a pinch of flaky salt (tiny amount): enhances overall flavor without tasting salty
Storage and Make-Ahead Tips
Mini cannoli are best fresh, but you can still plan efficiently for parties and gatherings. The key is separating the components.
– Store filled mini cannoli in the fridge for best texture (they soften over time)
Expect shells to gradually soften. For best results, fill, garnish, and serve soon—ideally within a few hours.
– Keep shells separate from filling if prepping ahead
This preserves the intended crunch. Store shells in an airtight container at room temperature (or a cool pantry) to avoid humidity.
– Freeze only the filling (avoid freezing filled shells)
Freezing can damage the delicate texture of ricotta cups and cause separation when thawed. If needed, freeze filling in a sealed container and thaw in the refrigerator, then re-stir gently before piping.
Make-ahead timeline (event-friendly)
– Day before: drain ricotta (if needed), mix filling, refrigerate in a sealed container
– Event day: prep shells to room temperature, fill and garnish 0–2 hours before serving
Serving Suggestions
Mini cannoli cups are designed for guests—bite-size, portion-friendly, and easy to serve in trays. Serve them chilled for a creamy texture that still respects shell crunch.
– Serve chilled for the best flavor and creamy texture
Cold ricotta tastes cleaner and chocolate feels more intense.
– Pair with espresso, cappuccino, or sweet dessert wine
Coffee complements the sweetness and enhances vanilla and chocolate notes; dessert wines can bring out the nutty pistachio profile.
– Offer extra toppings so guests can customize their mini cannoli
A small “topping bar” (extra chips, chopped pistachios, candied fruit) gives guests control and makes the dessert feel interactive.
Business-style hosting insight: reduce decision friction
If you’re catering or bringing dessert to a meeting, pre-garnish most cups and hold back a small topping portion. Guests feel variety without you needing to customize each cup individually.
Mini cannoli are quick, portion-friendly, and perfect for parties—just make crisp shells, mix a smooth ricotta filling, and assemble right before serving. Follow the steps above, chill briefly for best texture, and try a garnish combo (chocolate + pistachios) for the classic finish. With proper ricotta draining and careful timing, your mini cannoli cups will deliver an authentic, elegant result—without the complexity of traditional cannoli rolling.
Frequently Asked Questions
What is a mini cannoli and how do you make mini cannoli at home?
Mini cannoli are bite-sized Italian desserts made with crisp pastry shells filled with a creamy ricotta filling, typically sweetened and flavored with vanilla and citrus zest. To make mini cannoli, prepare the cannoli shells by frying or baking the dough until golden and crisp, then mix ricotta with sugar, vanilla, and optional cinnamon or chocolate chips. Spoon or pipe the filling into the cooled shells right before serving so they stay crunchy.
How do you prevent mini cannoli shells from getting soggy?
The most common cause of soggy mini cannoli is filling the shells too early or using ricotta that’s not drained well. Use well-drained ricotta (or strain it through cheesecloth), and avoid adding extra liquid like wet fruit or overly runny sweeteners. For best results, fill the mini cannoli shortly before serving and store shells separately until you’re ready to plate.
Why do my mini cannoli filling taste grainy, and how can I fix it?
Graininess in mini cannoli filling usually comes from ricotta that wasn’t fully drained or wasn’t mixed until smooth. To fix it, press and strain ricotta thoroughly, then mix it with powdered sugar and flavorings until creamy, scraping the bowl sides as you go. If needed, blend the ricotta briefly and then fold in chocolate chips or candied fruit for a smooth, classic cannoli cream.
Which ingredients are best for authentic mini cannoli filling?
For an authentic mini cannoli recipe, use high-quality whole-milk ricotta and powdered sugar for a smoother texture than granulated sugar. Fresh lemon or orange zest and a splash of vanilla extract are classic flavor boosters, while optional mini chocolate chips add sweetness and contrast. If you want restaurant-style flavor, add a pinch of cinnamon or a small amount of espresso powder, but keep the filling balanced so the ricotta flavor stays forward.
What’s the best way to make mini cannoli shells—fried or baked?
Fried mini cannoli shells are the traditional choice and deliver the crispest, most authentic crunch, but they require more time and careful oil temperature control. Baked shells are a great alternative if you want a lighter option, though they may be slightly less crisp depending on your dough and bake time. Either method works for a mini cannoli recipe—just cool shells completely before filling and aim for a golden, firm exterior.
References
- Google Scholar Google Scholar
https://scholar.google.com/scholar?q=mini+cannoli+recipe - Google Scholar Google Scholar
https://scholar.google.com/scholar?q=cannoli+ricotta+filling+recipe+technique - Google Scholar Google Scholar
https://scholar.google.com/scholar?q=cannoli+sugar+shell+fried+dough+recipe+method - https://pubmed.ncbi.nlm.nih.gov/?term=cannoli
https://pubmed.ncbi.nlm.nih.gov/?term=cannoli - https://pubmed.ncbi.nlm.nih.gov/?term=ricotta+cheese
https://pubmed.ncbi.nlm.nih.gov/?term=ricotta+cheese - https://pubmed.ncbi.nlm.nih.gov/?term=fried+dough+batter
https://pubmed.ncbi.nlm.nih.gov/?term=fried+dough+batter - Cannoli
https://en.wikipedia.org/wiki/Cannoli - Ricotta
https://en.wikipedia.org/wiki/Ricotta - https://www.britannica.com/topic/cannoli
https://www.britannica.com/topic/cannoli - https://pubmed.ncbi.nlm.nih.gov/?term=cheese+processing+microbiology+ricotta
https://pubmed.ncbi.nlm.nih.gov/?term=cheese+processing+microbiology+ricotta


