Get the best Italian cannoli cheesecake recipe you can bake at home: a creamy, classic cannoli-inspired dessert that actually tastes like the real filling, not just a cheesecake remix. This recipe answers whether you can nail that signature cannoli flavor and texture—ricotta tang, sweet citrus notes, and crisp shell-style bites—in one slice. If you want a straightforward method and a guaranteed result, this is the cannoli cheesecake to make.
This Italian cannoli cheesecake recipe delivers cannoli’s signature creamy ricotta filling—plus chocolate chips—inside a sliceable, classic cheesecake structure. You’ll build a sturdy crust, mix a smooth cannoli-style filling, bake for set-and-slice texture, then top right before serving so the chocolate and candied fruit stay vibrant.
Cannoli vs. Cheesecake: Key Texture Drivers (Why This Recipe Works)
| # | Component | What It Contributes | Best Practical Target | Outcome Score |
|---|---|---|---|---|
| 1 | Ricotta (well-drained) | Creamy cannoli base, gentle tang | 10–15% moisture (drain 1–2 hrs) | +9 |
| 2 | Cream cheese | Stability for slicing; cheesecake body | Room temp for smooth mixing | +8 |
| 3 | Egg ratio | Set without toughness | 2–3 eggs for 9-inch pan | +7 |
| 4 | Chocolate chips | Cannoli-like pockets and contrast | Semi-sweet; fold gently | +8 |
| 5 | Crust compression | Clean cuts; prevents crumbling | Press firmly; pre-bake 8–10 min | +7 |
| 6 | Bake moisture control | Prevents cracks and watery centers | Oven ~325°F (163°C), avoid overbake | +8 |
| 7 | Chill time | Final set for signature cheesecake slice | 4–6 hrs minimum (overnight ideal) | +9 |
Ingredients You’ll Need for Italian Cannoli Cheesecake

A successful Italian cannoli cheesecake recipe balances three priorities: (1) authentic cannoli creaminess, (2) cheesecake structure that slices cleanly, and (3) flavor “pockets” like chocolate chips and candied fruit.
– Ricotta (whole milk recommended): the backbone for cannoli flavor. For a cheesecake texture that isn’t watery, drain if it’s extra loose.
– Cream cheese: provides thickness and stability so the cheesecake sets properly.
– Eggs: bind the mixture and create the sliceable cheesecake crumb.
– Sugar: sweetens without washing out the ricotta tang.
– Vanilla extract: rounds flavor and complements chocolate.
– Salt: tightens sweetness and improves ricotta/cheese balance.
Chocolate and optional candied fruit
– Chocolate chips: classic cannoli-style chocolate bits; use semi-sweet for contrast.
– Candied fruit (optional): cherries or mixed candied peel add bright pops similar to traditional cannoli fillings. If you’re serving a mixed crowd, you can keep this optional and offer it on the side.
Crust ingredients
– Crushed cookies (common choice: vanilla wafers or biscotti-style cookies)
– Melted butter
– Optional cocoa powder (if you want a darker, more intense cannoli-adjacent vibe)
Ingredient quality notes (the “professional” part)
– Ricotta consistency matters more than brand. If your ricotta is wet, drain it in a fine-mesh sieve. This reduces the risk of a loose, custard-like center.
– Room-temperature dairy mixes smoother. Cold cream cheese often leads to lumps that won’t fully disappear after baking.
Make the Cheesecake Base (Crust + Filling)

The base is where your Italian cannoli cheesecake becomes “cheesecake” rather than “baked ricotta.” You want a crust that holds and a filling that stays creamy without turning dense.
1) Prepare and press the crust firmly
– Mix crushed cookies with melted butter until the texture looks like wet sand.
– Press into the bottom of a 9-inch springform pan (and optionally a small rim up the sides).
– Press with intention: use the bottom of a measuring cup to compact evenly. A firm press reduces crumbling and improves slice integrity.
2) Bake briefly to set
– Pre-bake the crust at about 325°F / 163°C for 8–10 minutes, then cool while you prepare the filling.
– This step helps the crust “lock in” before the ricotta layer hits it.
3) Mix the filling without overmixing
– Start by beating cream cheese until smooth, then add sugar.
– Add ricotta gently—mix just until the mixture looks uniform.
– Overmixing introduces too much air, which can cause puffing, instability, and a risk of cracks during baking.
4) Fold in chocolate chips last
– Fold them in at the end so they distribute evenly and don’t break down from vigorous mixing.
If you’re aiming for ultra-smooth cannoli cheesecake vibes, you can also press ricotta through a sieve or use a high-speed immersion blender for a few short pulses—just don’t turn it into soup.
Italian Cannoli Filling Mixture

This is the heart of the recipe: a cannoli-inspired cream filling that stays cheesecake-stable. Think of it as “ricotta authenticity” with “cream-cheese structure.”
Step-by-step cannoli-style flavor building
– Combine ricotta + cream cheese: The goal is a thick, spoonable cream—not runny.
– Add sugar + salt: Adjust sweetness; cannoli fillings are typically mildly sweet with a clear dairy taste.
– Add vanilla for the classic dessert aroma.
– Optional cinnamon: Many traditional cannoli preparations include warm spice; a light amount adds depth without overpowering.
Add-ins
– Chocolate chips: Fold in evenly so each slice shows visible chocolate pockets.
– Candied fruit (optional): Fold gently and reserve a handful for toppings so you can garnish with a “freshly finished” look.
Texture target (what “right” looks like)
– After mixing, the filling should be creamy and glossy, with only minimal lumps.
– It should fall from a spoon slowly, forming ribbons—not dripping like yogurt.
Professional tip: avoid gritty dairy
– If your ricotta feels grainy, use a sieve or blend briefly.
– If you taste the mixture raw and it’s under-seasoned, correct it now—after baking, you can’t “fix” blandness without overcomplicating the recipe.
Bake and Cool for the Best Texture
Baking is where many cannoli cheesecake attempts go wrong—not because of the flavor, but because of temperature control and cooling strategy.
Bake at the right temperature
– Bake around 325°F (163°C) for a stable set.
– Overbaking is the most common cause of dry, less creamy cheesecake texture.
Use visual cues, not just time
– The cheesecake should be set around the edges while the center still jiggles slightly (like soft gelatin).
– If the center looks fully firm, it’s likely overbaked.
Avoid opening the oven repeatedly
– Rapid temperature swings can create uneven rising and cracks.
– Keep the oven closed until the final minutes of baking.
Cool gradually, then chill fully
– Let the cheesecake cool on the counter first (typically 1–2 hours).
– Then refrigerate at least 4–6 hours. Overnight is best for the cleanest slices and the most cohesive cannoli-cheesecake texture.
Why the cooling matters: cheesecake is still setting as it cools. Quick cooling can shock the structure; slower refrigeration gives the dairy proteins and fats time to stabilize.
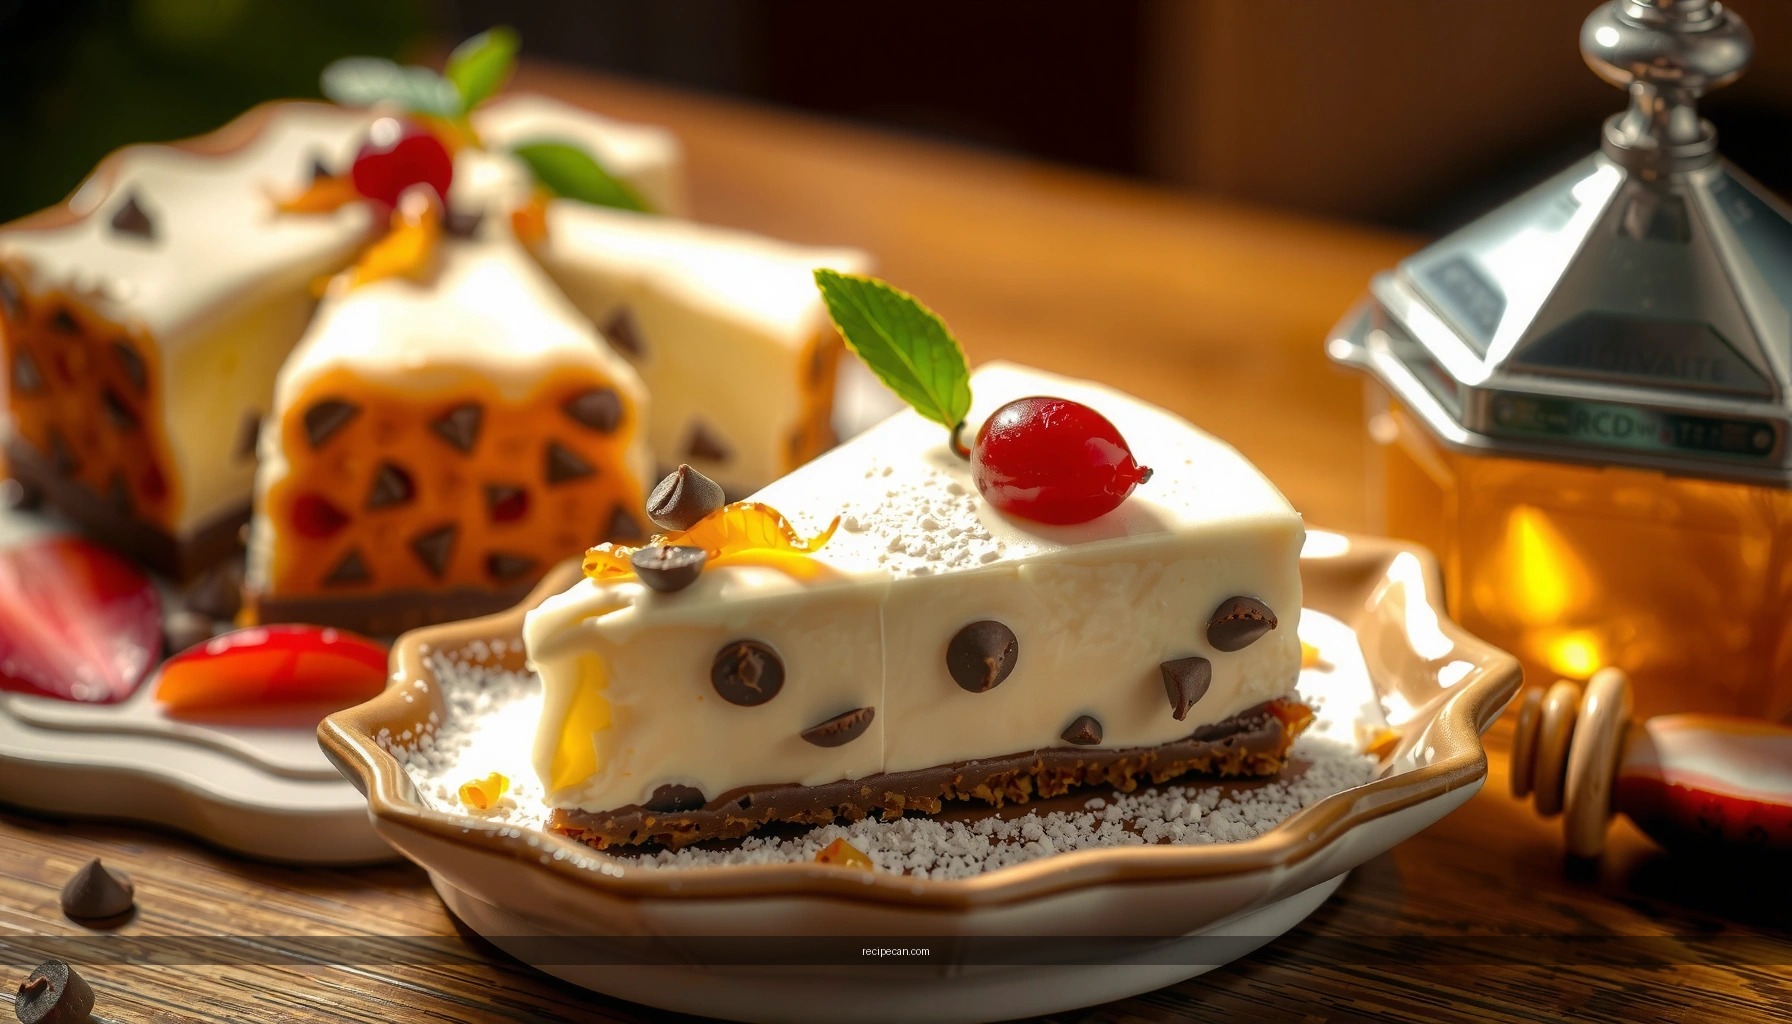
Assemble Cannoli-Inspired Toppings
This is where you transform “excellent dessert” into “showstopping finish.” Toppings should reflect cannoli cues—chocolate chips, candied fruit, and a touch of extra sweetness.
Garnish strategy
– Spoon and smooth the top with a final layer of cream, if desired (or simply garnish the baked filling).
– Add extra chocolate chips across the surface.
– Sprinkle candied fruit in small clusters so it looks intentional, not scattered.
Finishing options
– Chocolate drizzle: Melt chocolate and drizzle thin lines for a restaurant-style appearance.
– Powdered sugar dusting: Adds a light sweetness and visual contrast.
– Optional: a few drops of vanilla-infused syrup for aroma (especially if serving to guests who love Italian bakery flavors).
Practical handling
– If you’re transporting the cheesecake, do toppings right before serving or keep them separate until the last moment—this protects the texture of the garnish (especially candied fruit and chocolate).
Serving Tips and Make-Ahead Storage
For the best cannoli cheesecake experience, treat chilling and slicing like part of the recipe, not an afterthought.
Chill time for clean cuts
– Chill at least 4–6 hours; overnight is best.
– Plan slicing when the cheesecake is fully firm—this improves structure and reduces smearing.
Slicing technique
– Use a sharp knife and wipe it between cuts.
– If you want extremely clean edges, briefly warm the knife under hot water, wipe, and slice again.
Storage best practices
– Store in the refrigerator, covered, for up to 3–4 days for peak flavor and texture.
– For maximum crunch and visual appeal, keep toppings separate:
– Store the cheesecake plain (topped minimally)
– Add chocolate chips/candied fruit at serving time
Make-ahead perspective (for busy hosts)
– Bake the cheesecake a day ahead.
– Prepare garnishes in small containers.
– Assemble toppings the morning of serving (or right before).
This approach keeps the Italian cannoli cheesecake tasting fresh—creamy on the inside, with cannoli-inspired texture and contrast on top.
This Italian cannoli cheesecake recipe is a reliable, flavor-forward way to get true cannoli essence—ricotta creaminess, chocolate chips, and optional candied fruit—while still delivering the dependable structure of classic cheesecake. Focus on three execution points: (1) drain and handle ricotta for a creamy, not watery filling, (2) avoid overmixing and overbaking so the texture stays silky, and (3) chill fully before slicing, then top right before serving for maximum impact. If you try it, consider a topping twist—cocoa dusting, extra mini chips, or a light cinnamon finish—to make the cannoli flavor your own.
Frequently Asked Questions
What makes an Italian cannoli cheesecake different from a regular cheesecake?
An Italian cannoli cheesecake blends classic cheesecake with cannoli flavors—typically ricotta or mascarpone in the filling plus mini chocolate chips and a hint of citrus. Instead of plain vanilla, it often includes candied orange peel or cinnamon to mimic traditional cannoli. This combination gives you a creamy, tangy filling with cannoli-inspired texture and sweetness in every bite.
How do you make an Italian cannoli cheesecake with the right ricotta texture?
To avoid a grainy texture, use smooth ricotta and strain it well before mixing (at least 1–2 hours, or overnight for best results). Stir until completely smooth, then fold gently so you don’t overmix the batter. Many bakers also add a little mascarpone to Italian cannoli cheesecake recipes to create a thicker, richer consistency that stays creamy after baking and chilling.
Why does my cannoli cheesecake crack, and how can I prevent it?
Cracks usually happen from overmixing, baking too hot, or not using a gentle bake-and-cool method. Mix only until ingredients are combined, then bake at a moderate temperature and avoid sudden temperature changes by turning off the oven with the door slightly open. A water bath can help stabilize the bake, and thorough cooling in the refrigerator is key for clean slices.
What’s the best crust for an Italian cannoli cheesecake recipe?
A classic choice is a cannoli-style crust made from crushed Italian biscotti, amaretti, or graham crackers mixed with melted butter. For a more authentic Italian cannoli cheesecake, consider adding a touch of cinnamon or finely chopped toasted nuts to the crust. Press firmly into the pan and bake briefly so the crust holds up under the creamy filling.
Which toppings and flavor add-ins work best for an Italian cannoli cheesecake?
Traditional cannoli cheesecake toppings include mini chocolate chips, candied orange peel, and a light dusting of powdered sugar for that Italian cannoli look. You can also add a drizzle of chocolate ganache or a spoonful of sweetened ricotta on top for extra richness. For a bakery-style finish, garnish with crushed pistachios or shaved dark chocolate to complement the ricotta and citrus notes.
References
- Cannoli
https://en.wikipedia.org/wiki/Cannoli - Cheesecake
https://en.wikipedia.org/wiki/Cheesecake - Ricotta
https://en.wikipedia.org/wiki/Ricotta - https://www.britannica.com/topic/cannoli
https://www.britannica.com/topic/cannoli - Cheesecake | Dessert, Cream Cheese, Graham Cracker | Britannica
https://www.britannica.com/topic/cheesecake - https://scholar.google.com/scholar?q=italian+cannoli+cheesecake+recipe Google Scholar
https://scholar.google.com/scholar?q=italian+cannoli+cheesecake+recipe - Google Scholar Google Scholar
https://scholar.google.com/scholar?q=cannoli+ricotta+cheesecake+chemistry - Google Scholar Google Scholar
https://scholar.google.com/scholar?q=cheesecake+recipe+italy+ricotta+sugar+fat - https://pubmed.ncbi.nlm.nih.gov/?term=cheesecake
https://pubmed.ncbi.nlm.nih.gov/?term=cheesecake - https://pubmed.ncbi.nlm.nih.gov/?term=ricotta+cheese
https://pubmed.ncbi.nlm.nih.gov/?term=ricotta+cheese


