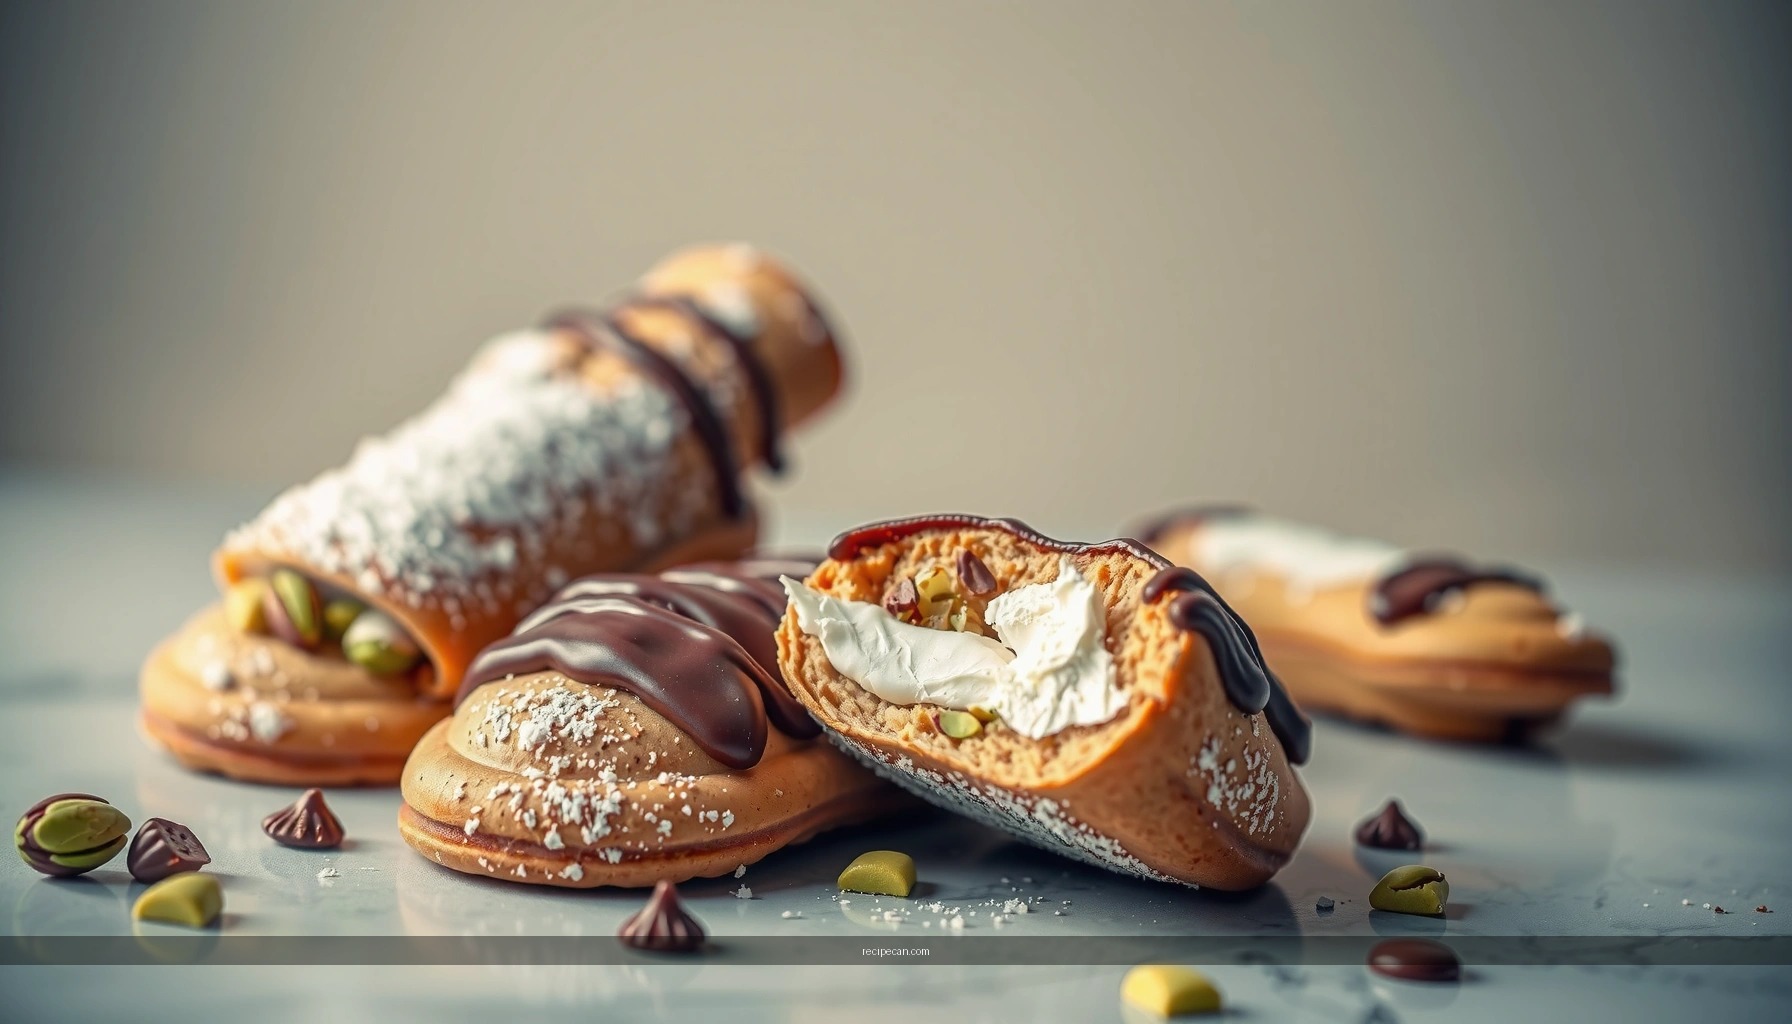
Get a reliable cannoli cookies recipe that delivers classic cannoli flavor in easy, drop-cookie form—perfect for when you want the taste of cannoli without the fuss. This recipe lays out the exact dough, cannoli-style filling mix, and baking steps so your cookies come out crisp at the edges with a sweet, creamy center. If your goal is effortless cannoli-style cookies that actually turn out, this is the winning method.
You can make cannoli cookies by baking crisp, lightly golden cookie shells and filling them with a sweet ricotta mixture—no traditional cannoli shells required. This cannoli cookies recipe breaks down the full process (dough, bake, fill) so you get classic cannoli flavors—citrus, cinnamon optional, and chocolate—built into cookie form.
Ingredients for Cannoli Cookies

– Gather ricotta, powdered sugar, cinnamon (optional), chocolate chips, and citrus zest
– Use flour, sugar, butter, eggs, and baking powder for the cookie dough
To keep cannoli-style cookies consistent, treat the ingredient list as two systems: (1) a buttery, snappy cookie dough and (2) a ricotta filling that holds shape without becoming watery.
Cookie dough (shell) building blocks
– All-purpose flour: Provides structure and keeps cookies crisp after cooling.
– Granulated sugar: Sweetness and gentle browning.
– Unsalted butter (softened): Creates tenderness and a snap at the edges.
– Egg: Binds the dough and improves browning and texture.
– Baking powder: Adds slight lift so cookies bake up light but still crisp.
– Pinch of salt (recommended): Balances sweetness and sharpens flavor.
Ricotta filling (cannoli flavor core)
– Whole-milk ricotta (best texture): Full flavor and creaminess.
– Powdered sugar: Dissolves smoothly for a silky consistency.
– Cinnamon (optional): A subtle classic cannoli note—use lightly.
– Chocolate chips: For the signature “cannoli” finish.
– Citrus zest (orange and/or lemon): Brightens sweetness and makes the filling taste less one-dimensional.
Important practical detail: If your ricotta is wet, your filling will be loose and the cookies won’t stay crisp. Plan to drain ricotta (details in a later section).
—
Recommended Bake Targets for Cannoli-Style Cookies (Convection/Conventional)
| # | Cookie Batch Goal | Oven Temp | Bake Time | Expected Texture | Doneness Score |
|---|---|---|---|---|---|
| 1 | Crisp edges + tender center | 175°C / 350°F | 10–12 min | Firm rim, slight give when warm | ★★★★☆ |
| 2 | More snap (less softness) | 180°C / 355°F | 11–13 min | Cracks slightly when cooled | ★★★★★ |
| 3 | Gentler bake (rookie-friendly) | 170°C / 340°F | 12–14 min | Slightly softer center after cooling | ★★★☆☆ |
| 4 | Light color (prevent over-browning) | 165°C / 330°F | 13–15 min | Pale-gold, best for ultra-crisp filling hold | ★★★☆☆ |
| 5 | Crisp but at risk of dryness | 190°C / 375°F | 10–11 min | Very dry if cookies aren’t watched closely | ★★☆☆☆ |
| 6 | Under-baked (filling leakage risk) | 160°C / 320°F | 8–10 min | Set but bends when handled | ★☆☆☆☆ |
| 7 | Evenly browned “showcase” batch | 175°C / 350°F | 11–12 min | Golden bottoms, crisp surface | ★★★★☆ |
Step-by-Step Cookie Dough Instructions

– Mix wet and dry ingredients until a thick dough forms
– Shape into small cookies and bake until lightly golden
The dough stage determines whether your cannoli cookies hold their structure after filling. You’re aiming for a batter-to-dough transition that’s scoopable, not sticky.
1) Preheat and prep
– Preheat to 350°F / 175°C.
– Line baking sheets with parchment for clean release and to help cookies brown evenly.
2) Combine dry ingredients
In a medium bowl, whisk:
– flour, baking powder, salt (if using), and sugar (or sugar portion depending on your method).
This even distribution prevents pockets of baking powder and ensures consistent rise.
3) Cream butter and sugar (for texture control)
In a mixing bowl, beat softened butter with sugar until smooth and slightly lighter in color. This step creates air pockets that help deliver a crisp edge.
4) Add eggs and vanilla (if desired)
Beat in the egg until fully incorporated. If you’re using vanilla, add it now—vanilla complements ricotta and supports the “bakery-style” profile.
5) Mix into a thick dough
Add dry ingredients to the wet gradually. Stop when the dough forms and no dry flour remains. Overmixing can toughen cookies, which may reduce the tender center you want.
6) Shape for uniform baking
– Portion with a spoon or cookie scoop.
– Roll lightly (optional) and flatten slightly.
– Aim for consistent size so you don’t overbake smaller cookies while waiting for larger ones.
7) Bake to lightly golden
Bake until the edges look set and the tops are just beginning to color. Cookies firm up as they cool—so pull them slightly before you think they’re “done” for that crisp shell effect.
—
Make the Ricotta Cannoli Filling

– Stir ricotta until smooth, then mix in powdered sugar and flavorings
– Fold in chocolate chips for the classic cannoli finish
The filling is where cannoli cookies earn their name. The goal is a creamy, pipeable (or spoonable) mixture that tastes bright and structured—not grainy, not runny.
1) Drain and smooth the ricotta
For best results:
– Press ricotta in a fine mesh sieve for 10–20 minutes (or blot in cheesecloth).
– Stir until smooth. If it’s still grainy, whisk it longer or break it down with the back of a spoon.
2) Sweeten and flavor
Add:
– powdered sugar to taste (start with a smaller amount and adjust),
– citrus zest (orange and/or lemon),
– cinnamon (optional—use sparingly),
– and a small pinch of salt if your ricotta tastes flat.
3) Target the right consistency
You want filling that holds ridges from a spoon or piping tip. If it’s too thick, loosen with a teaspoon of milk at a time. If it’s too thin, continue draining or add a touch more powdered sugar.
4) Fold in chocolate chips last
Stir gently so chips distribute evenly without turning the mixture streaky.
5) Chill to improve stability
A short chilling period (even 20–30 minutes) helps the filling set so it doesn’t soak into the cookies as quickly.
—
Assemble and Fill Your Cannoli Cookies
– Pipe or spoon filling onto cooled cookies
– Assemble close to serving to keep cookies crisp
Timing is the most overlooked variable in cannoli cookies. Cookie crispness fades as moisture migrates from filling into dough.
1) Cool completely
Fill only when cookies are fully cooled. Warm cookies can melt filling and increase moisture transfer.
2) Choose a filling method
– Piping: Best for clean edges and a consistent, “cannoli-like” look.
– Spoon: Works well for rustic presentation.
You can create a small well in each cookie (light indentation) using the back of a spoon before filling, which helps the ricotta stay centered.
3) Assemble close to serving
For the best texture:
– Fill and plate within 1–2 hours of serving.
– If serving later, consider filling only the amount you plan to serve immediately, then fill the remainder right before the event.
4) Optional finishing touches
– Dust lightly with powdered sugar.
– Add a few extra chocolate chips on top for visual contrast.
– Serve with espresso or lightly sweetened tea to balance the ricotta richness.
—
Tips for Perfect Cannoli-Style Texture
– Drain ricotta well to prevent a runny filling
– Don’t overbake the cookies—aim for firm edges and tender centers
Cannoli-style cookies are all about balance: crisp shells plus creamy filling that doesn’t collapse.
Ricotta drainage: non-negotiable
– If your ricotta arrives watery, drain it first. Even “whole-milk” ricotta can vary by brand.
– If the filling looks loose after mixing, it will soak into cookies and reduce crispness.
Baking: under- vs over-baking
– Underbaked cookies can bend and create a softer base that accelerates sogginess.
– Overbaked cookies can taste dry and lose the pleasant tender center that makes them feel bakery-quality.
Use visual cues: lightly golden edges, set bottoms, and a structure that firms as it cools.
Portion consistency
Uniform cookies bake evenly, which improves both texture and filling stability.
Chilling strategy
If your kitchen runs warm, chill the shaped dough for 15–20 minutes before baking. This improves spread control and helps maintain crispness.
—
Storage and Make-Ahead Options
– Store filled cookies in the fridge and eat within 1–2 days for best texture
– Freeze unfilled cookies; thaw and fill when ready
Planning ahead is where you can maximize both flavor and texture.
Best practice: separate components
– Unfilled cookies store well at room temperature in an airtight container for 2–3 days (paper towels optional to absorb humidity).
– Ricotta filling can be stored refrigerated in a sealed container for 2 days. Stir before use.
Filled cookies
– Refrigerate in a sealed container.
– For best texture, eat within 24–48 hours.
– Avoid leaving them at room temperature too long, as moisture migration accelerates.
Freezing
– Freeze unfilled cookies for up to 2–3 months.
– Thaw at room temperature, then fill close to serving.
– Freezing the filled cookies can soften the shell significantly, reducing that intended crisp cannoli-cookie contrast.
—
Cannoli cookies are an easy way to enjoy classic cannoli flavors with crisp, baked cookies and a sweet ricotta filling. Follow the dough steps, chill/drain the ricotta properly, and fill right before serving for the best results—then try a batch today and share your favorite variation!
Frequently Asked Questions
What are the best ingredients for a cannoli cookies recipe?
A classic cannoli cookies recipe uses flour, sugar, butter or shortening, eggs (often just for dough structure), and a touch of baking powder for lift. For the filling, you’ll want ricotta (well-drained), powdered sugar, vanilla, and chocolate chips or mini chocolate pieces. To get that traditional cannoli flavor, many bakers also add a pinch of cinnamon and use zest from an orange or lemon.
How do I make cannoli cookie dough that doesn’t spread too much?
Chill your cannoli cookie dough before baking—most spreading issues come from warm butter and ricotta moisture. Use correctly measured flour and don’t overmix once the dry ingredients are added, since gluten can make cookies spread. If your recipe includes a filling or stuffing component, let the filling cool and keep it thicker (drain ricotta thoroughly, and add enough powdered sugar or a small amount of cornstarch if needed).
Why is my cannoli filling watery, and how can I fix it?
Watery cannoli filling usually comes from ricotta that wasn’t drained properly or from letting the mixture sit too long. Press the ricotta in a fine sieve or cheesecloth for at least 30 minutes, then mix with powdered sugar only until smooth. If it’s already too loose, gently stir in more powdered sugar to thicken, or fold in a small handful of chocolate chips to help stabilize the texture.
Which baking time and temperature works best for cannoli cookies?
Most cannoli cookies bake best at 350°F to 375°F (175°C to 190°C) until the edges are set and lightly golden. Start checking around 9–12 minutes, because cannoli cookies can go from “pale” to “overbaked” quickly. For crisp edges with a tender center, cool the cookies on the tray for a few minutes before transferring to a rack.
How do I store and keep cannoli cookies fresh after baking?
Store cannoli cookies in an airtight container at room temperature for up to 2–3 days if they’re not filled, or refrigerate for 3–5 days if they contain fresh ricotta filling. To prevent sogginess, keep cookies with filling layered with parchment and avoid sealing them while warm. For best flavor, bring them to room temperature before serving and consider refreshing crispness in a low oven (about 300°F/150°C) for 3–5 minutes.
References
- Google Scholar Google Scholar
https://scholar.google.com/scholar?q=cannoli+cookies+recipe - Google Scholar Google Scholar
https://scholar.google.com/scholar?q=cannoli+cookie+recipe - Google Scholar Google Scholar
https://scholar.google.com/scholar?q=cannoli+shell+recipe+ricotta+powdered+sugar - Cannoli
https://en.wikipedia.org/wiki/Cannoli - Ricotta
https://en.wikipedia.org/wiki/Ricotta - Biscuit
https://en.wikipedia.org/wiki/Biscuit - https://en.wikipedia.org/wiki/Italian_desserts
https://en.wikipedia.org/wiki/Italian_desserts - Shortcrust pastry
https://en.wikipedia.org/wiki/Shortcrust_pastry - https://en.wikipedia.org/wiki/Culinary_confectionery
https://en.wikipedia.org/wiki/Culinary_confectionery - https://www.britannica.com/topic/cannoli
https://www.britannica.com/topic/cannoli


