Looking for easy tiramisu recipes that actually deliver quick, foolproof dessert results? This guide gives you a clear winner: simple, no-stress tiramisu methods that come together fast—without complicated steps or hard-to-find ingredients. You’ll get ready-to-make instructions for creamy layers, clean assembly, and flavors that taste like classic tiramisu from the first bite.
You can make authentic-tasting tiramisu at home without complicated techniques: brief dipping, a smooth mascarpone filling, and a long enough chill time do most of the work. Below are foolproof, easy tiramisu recipes and methods that help you avoid runny layers, grainy cream, and uneven soaking—so you get creamy texture and balanced coffee flavor every time.
What Makes These Easy Tiramisu Recipes Work

These easy tiramisu recipes succeed because they optimize the three variables that most often cause trouble: (1) ingredient simplicity, (2) water control during dipping, and (3) chilling time for structural set.
– Minimal prep with classic, accessible ingredients
The traditional tiramisu flavor profile—coffee bitterness, cocoa aroma, and creamy mascarpone—doesn’t require specialty equipment. You only need a mixing bowl, whisk, spatula, and a baking dish. Even “quick tiramisu” works because the flavor components are straightforward and the assembly is largely hands-off.
– Clear steps to avoid runny layers or uneven soaking
Tiramisu turns from “custardy and cohesive” to “soupy and fragile” when ladyfingers (savoiardi) absorb too much liquid or when the filling is not mixed with the right temperature and technique. These methods keep dipping time short, maintain a stable filling consistency, and rely on chilling to firm the layers so slices hold cleanly.
A practical way to think about it: tiramisu is a layered set dessert, not a cake batter. Your goal isn’t to fully hydrate the ladyfingers—it’s to *perfume* them with coffee and allow the chill to integrate moisture gradually.
Essential Ingredients for Easy Tiramisu Recipes

Using the right components makes your tiramisu easier, more consistent, and more forgiving.
– Coffee (espresso or strong brewed) and sugar
Espresso provides intensity with minimal volume, but strong brewed coffee works perfectly. Sugar matters for balance: it softens bitterness and helps coffee flavor spread evenly across the layers.
– Mascarpone, eggs (or alternative options), and ladyfingers/savoiardi
Mascarpone is the signature—rich, thick, and sweet-leaning. Traditional recipes often use egg yolks (and sometimes whites) to create a silky custard-like filling. For convenience, there are eggless and simplified options that still deliver creamy texture when you choose the right substitute and mixing method. Ladyfingers/savoiardi provide the “layer logic”: they structure the dessert and absorb coffee without becoming cake-like when dipped briefly.
To make your easy tiramisu recipe consistently smooth, you should also plan for:
– Cocoa powder (unsweetened), for topping
– Vanilla or a hint of liqueur (optional), for aroma
– A stable dairy base temperature (cold mascarpone can be harder to blend; warmed slightly can mix more smoothly)
Tiramisu Assembly: How Long to Dip & Chill for Best Texture
| # | Step Variable | Recommended Range | Why It Matters | Texture Outcome |
|---|---|---|---|---|
| 1 | Ladyfinger dip time | 1–2 seconds per side | Limits liquid absorption | ★4.8/5 |
| 2 | Coffee temperature | Room temp or cool | Prevents filling separation | ★4.7/5 |
| 3 | Filling mixing method | Fold, don’t beat | Keeps texture airy | ★4.6/5 |
| 4 | Chill time (minimum) | 4 hours | Sets layers for clean slices | ★4.5/5 |
| 5 | Chill time (ideal) | 8–12 hours | Moisture equalizes across layers | ★4.9/5 |
| 6 | Cocoa timing | Top just before serving | Prevents cocoa from dissolving | ★4.8/5 |
| 7 | Over-dip risk | More than ~4 seconds total/side | Leads to sogginess or collapse | ★2.7/5 |
Quick No-Fuss Tiramisu Method (Step-by-Step)

This is the fastest “easy tiramisu recipe” workflow that still tastes classic. It’s designed around the same principle you’ll see in professional kitchens: control moisture during dipping and let chilling do the finishing work.
1. Brew and sweeten the coffee
– Make espresso or strong coffee.
– Stir in sugar until dissolved.
– Let it cool to room temp or cool so it doesn’t destabilize the filling.
2. Prepare the filling (simple, smooth, stable)
– Mix mascarpone with sugar (and vanilla if using).
– If using eggs, cook or temper them as your method dictates, then blend gently to a uniform cream.
– If you’re simplifying, use a method that keeps texture thick (more on alternatives below).
3. Dip ladyfingers briefly
– Dip each side 1–2 seconds.
– Remove immediately and let excess drip off (a quick pause on a plate is enough).
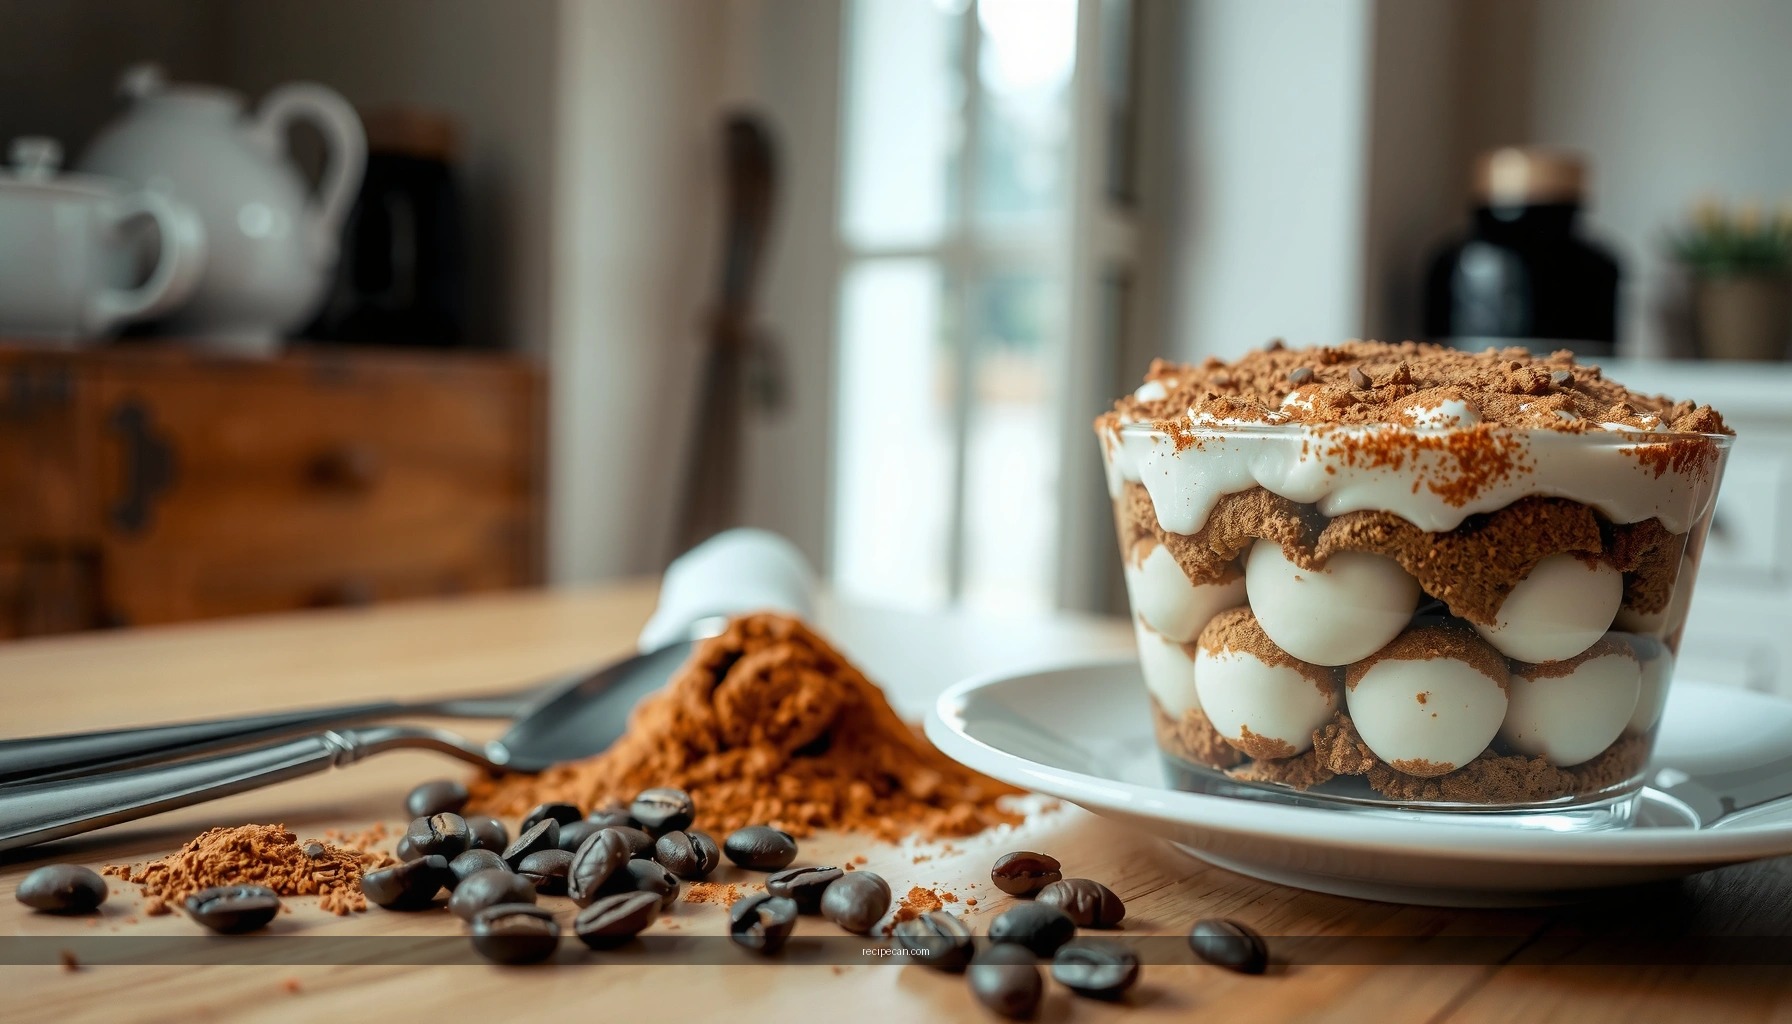
4. Assemble in layers
– Spread a thin layer of filling first—this acts like a “glue.”
– Add a layer of dipped ladyfingers, then spread filling again.
– Repeat until you reach your dish height, finishing with filling on top.
5. Chill until set
– Refrigerate at least 4 hours; overnight (8–12 hours) is ideal for sliceable texture and cohesive flavor.
Why this method works: brief dipping gives you coffee flavor without soaking through. Chilling hydrates the ladyfingers slowly, while the filling firms up so the dessert holds its structure.
Easy Variations to Try (Without the Complexity)
Once you’ve mastered the basics, variations help you customize without adding technical risk. These are “swap-friendly” approaches that preserve the easy tiramisu recipe experience.
– Eggless option for a simpler, more convenient filling
For many home cooks, the biggest barrier is egg handling. An eggless tiramisu typically uses mascarpone plus a whipped dairy component (such as whipped cream) or a mascarpone-based cream thickened with carefully chosen ingredients. The goal is the same: thick, spoonable cream that doesn’t weep after chilling.
Practical tip: even in eggless versions, keep your filling thick and your dipping brief—otherwise you’ll still get runny layers.
– Chocolate or cocoa topping upgrades for extra flavor
You can enhance tiramisu quickly by changing the top and/or adding texture:
– Dust with cocoa right before serving for classic bitterness.
– Add a thin layer of dark chocolate shavings for crunch.
– Mix some cocoa into the top filling for a “fudgier” profile.
– For a faster twist, use a cocoa-cinnamon blend for warmth.
These modifications are low effort because tiramisu’s core performance—brief dipping + stable cream + proper chilling—remains unchanged.
Common Mistakes (And How to Fix Them)
Even easy tiramisu recipes can go sideways. The good news: most problems are fixable if you recognize the cause early.
– Too-wet ladyfingers: dip faster and chill longer
– Symptom: watery pooling, soft layers that slide, or uneven slice structure.
– Fix:
1) Dip for less time (aim for 1–2 seconds per side).
2) Let excess coffee drip briefly before layering.
3) Chill longer—if your dessert is only slightly loose, an overnight set often corrects it.
– Grainy or loose filling: mix gently and use proper ingredient temperature
– Symptom: lumps in the mascarpone/cream, a curdled look, or filling that doesn’t spread cleanly.
– Fix:
– Avoid overmixing: fold gently once ingredients are combined.
– Use mascarpone at a manageable temperature (not icy straight from the fridge).
– If using eggs, follow safe tempering steps and remove from heat promptly to prevent curdling.
– Weak flavor: coffee isn’t strong enough
– Symptom: dessert tastes sweet but not distinctly “tiramisu.”
– Fix: Use espresso or stronger brewed coffee, and consider dialing back sugar slightly so coffee flavor has room to stand out.
A professional way to diagnose is to separate the issues: if the filling is wrong, the texture collapses immediately; if the dipping is wrong, the problem shows up over chilling as layers soften and loosen.
Make-Ahead Tips and Serving Ideas
Tiramisu is naturally suited to planning—because chilling improves flavor and texture.
– Chill at least 4 hours (overnight is even better)
– Minimum: 4 hours for structure.
– Best: 8–12 hours for balanced absorption and a creamier, more integrated taste.
– Portion tips for cups, pans, or individual servings
– Individual cups: Assemble in small glasses so servings are consistent and presentation is easy. Aim for uniform layer thickness so every bite has the same coffee-to-cream ratio.
– Single pan: Use a rectangular dish for clean slices. If you slice, wipe the knife between cuts for neat edges and fewer smears.
– Portion sizing: For a standard 8×8-inch pan, plan on about 9–12 servings depending on how thick your layers are.
Serving idea that feels elevated but stays simple: dust cups with cocoa right before service, and add a few chocolate flakes for visual contrast. It boosts perceived “restaurant quality” without complicating the recipe.
Tasty tiramisu is easy when you focus on the basics: quick prep, brief dipping, and proper chilling. Pick one method above, gather your ingredients, and make your first easy tiramisu recipe today—then try a variation to keep it fun.
Frequently Asked Questions
What is the easiest tiramisu recipe for beginners?
An easy tiramisu recipe for beginners uses store-bought ladyfingers, instant espresso (or strong coffee), and a simple mascarpone mixture. Instead of cooking anything, you just dip the ladyfingers, layer them with the mascarpone filling, and refrigerate until set. A reliable shortcut is using a no-fuss egg-free tiramisu variation made with whipped cream or stabilized mascarpone, which still tastes creamy and classic.
How do you make an easy tiramisu without raw eggs?
To make an easy egg-free tiramisu, whisk mascarpone with powdered sugar and fold in whipped cream, then flavor with espresso and vanilla. You can also use pasteurized eggs if you prefer the classic texture, but egg-free versions are often faster and safer for weeknight dessert. Either way, keep the mixture thick so it holds layers and doesn’t turn runny when assembled.
Which espresso substitute works best for easy tiramisu?
The best espresso substitute for easy tiramisu is strong brewed coffee, because it gives the dark, bitter-sweet flavor that balances the mascarpone. If you’re short on time, instant espresso or instant coffee granules dissolved in hot water work great and are consistent. Aim for a concentrated coffee so the ladyfingers absorb flavor without becoming soggy.
Why does homemade tiramisu turn watery, and how can you prevent it?
Watery tiramisu usually happens when ladyfingers are dipped too long or the filling is too loose from warm mascarpone or under-whipped cream. To prevent this, dip each ladyfinger quickly (about 1 second per side) and use chilled ingredients for an easy tiramisu that holds its shape. Also refrigerate long enough—typically 4 to 6 hours, or overnight for best results—so the layers set.
What’s the best way to layer an easy tiramisu for perfect texture?
For best texture in an easy tiramisu, use thin, even layers: a base of dipped ladyfingers, followed by a mascarpone layer, and repeat until you reach the top. Make sure the mascarpone mixture is spread evenly and gently tap the dish to remove air pockets. Finish with a dusting of cocoa powder and refrigerate so the ladyfingers soften slightly while keeping the dessert creamy and sliceable.
References
- Google Scholar Google Scholar
https://scholar.google.com/scholar?q=easy+tiramisu+recipe - Google Scholar Google Scholar
https://scholar.google.com/scholar?q=no-bake+tiramisu+recipe+mascarpone+ladyfingers - Google Scholar Google Scholar
https://scholar.google.com/scholar?q=classic+tiramisu+recipe+coffee+cocoa+preparation - Tiramisu
https://en.wikipedia.org/wiki/Tiramisu - Tiramisu | Meaning, Ingredients, Origin, Desserts, & Taste | Britannica
https://www.britannica.com/topic/tiramisu - Mascarpone
https://en.wikipedia.org/wiki/Mascarpone - Lady finger
https://en.wikipedia.org/wiki/Ladyfinger - Ladyfingers (biscuits)
https://en.wikipedia.org/wiki/Savoiardi - Espresso
https://en.wikipedia.org/wiki/Espresso - Google Scholar Google Scholar
https://scholar.google.com/scholar?q=easy+tiramisu+recipes


