Get the classic Russian tea cakes recipe you want: buttery, melt-in-your-mouth butter cookies that roll cleanly in powdered sugar. Follow this method step by step and you’ll land the right texture and flavor every time—tender inside, crisp at the edges. If you’re choosing between “quick” versions and true old-school results, this one delivers the real thing.
Russian tea cakes are classic, melt-in-your-mouth butter cookies shaped into small balls, baked until just set, and then rolled in powdered sugar while warm for a snowy finish. If you follow a precise creaming + baking approach—and coat at the right temperature—you’ll get tender cookies with that signature “snowdrift” look every time.
Ingredients for Russian Tea Cakes

At their core, Russian tea cakes (also known as Mexican wedding cookies in some regions) rely on a simple formula: buttery richness + finely chopped nuts + a powdery sugar coating. While the ingredient list is short, the quality and ratios matter because they determine texture (how tender), structure (how they hold their shape), and flavor (how nutty and aromatic they taste).
– Butter: Provides the cookie’s rich flavor and tender crumb. Use unsalted butter so you can control salinity.
– Powdered sugar (for dough): Dissolves into the fat more easily than granulated sugar, helping create a soft, delicate texture.
– All-purpose flour: Gives the dough enough structure to bake into cohesive cookies without becoming dry.
– Chopped nuts: Typical choices include walnuts, pecans, or almonds. Finely chopping improves tenderness and distribution.
– Vanilla: Adds a warm, round bakery flavor that complements butter and nuts.
– Optional spices (cinnamon): A light pinch can make the cookies smell more holiday-like without overpowering the nutty base.
Common ingredient precision tip: toast the nuts lightly (optional) before chopping. Toasted nuts increase aroma and deepen flavor, improving “bakery-style” results without changing the recipe’s simplicity.
Russian Tea Cake Texture Targets by Nut Choice
| # | Nut Type | Recommended Roast | Best Cookie Texture | Coating Hold Rating |
|---|---|---|---|---|
| 1 | Walnuts | Light toast 6–8 min | Soft & aromatic | ★★★☆ (High) |
| 2 | Pecans | Light toast 5–7 min | Tender with buttery crunch | ★★★★ (Very High) |
| 3 | Almonds | Medium toast 7–9 min | Fragrant & fine-crumb | ★★★☆ (High) |
| 4 | Mixed Nuts | Toast 6–8 min total | Balanced flavor | ★★★ (Good) |
| 5 | No-Nut (Allergy Option) | Not applicable | More delicate, less nutty | ★★☆☆ (Lower) |
| 6 | Toasted Hazelnuts | Medium toast 6–8 min | Silky and aromatic | ★★★☆ (High) |
| 7 | Pistachios | Light toast 4–6 min | Slight crunch, vivid notes | ★★★ (Good) |
Step-by-Step How to Make the Dough

The dough is the heart of Russian tea cakes. To achieve that tender, crumbly-in-a-good-way texture, focus on gentle mixing and proper fat distribution. Overmixing can develop flour structure and make cookies harder rather than meltier.
A reliable method:
1. Cream the butter until smooth and slightly lighter in color. This step disperses water and aerates the fat so the cookies bake with a delicate tenderness.
2. Add powdered sugar and vanilla, mixing just until the mixture looks cohesive.
3. Fold in flour and chopped nuts. Add the flour gradually, then mix only until you no longer see dry streaks.
4. Check dough consistency. It should be soft and workable—like a thick paste that can hold shape when rolled.
– If it’s too soft to roll, refrigerate 20–30 minutes.
– If it’s too crumbly, add 1–2 teaspoons of softened butter (or a teaspoon of milk/cream) and mix gently.
Why creaming matters: powdered sugar blends into butter more readily, creating a base that bakes into a fine crumb. Then, when you add nuts, they act like tiny “texture anchors,” preventing the cookie from turning uniformly soft.
Process accountability tip for consistency: Use a cookie scoop (or measure by tablespoon) so every ball is the same size. Even baking is what makes the final sugar coating look even, not patchy.
Shaping and Rolling Tips

Russian tea cakes are small by design. Smaller cookies set faster and hold the snowy coating better.
Shaping best practices:
– Roll into uniform balls: Aim for roughly 1 tablespoon of dough per cookie (or about 18–24 cookies per standard batch, depending on your dough size).
– Handle gently: Dough warms quickly; friction can soften butter and smear the coating later. If your kitchen is hot, chill the dough in between batches.
– Leave space on the tray: Nuts spread slightly as butter melts. Bake on parchment or a silicone mat to avoid sticking.
Coating strategy (when to roll in powdered sugar):
– Traditional approach: roll after baking while warm, so powdered sugar adheres instantly and forms a thick “snow” layer.
– Alternative approach: Some bakers partially cool cookies first to reduce sugar absorption. However, the most visually classic results typically come from coating while warm.
Optional refinement for a bakery finish:
– Roll once thoroughly, then let cookies cool completely.
– Once cool, re-roll (or lightly dust) to top up the coverage. This gives the signature high-density powdered look without making the cookies gummy.
Baking Instructions and Timing
Baking time is where many people either underbake (cookies crumble or taste raw) or overbake (cookies become dry and lose that tender melt).A dependable baking profile:
– Temperature: Bake at 350°F / 175°C.
– Time: Typically 10–14 minutes, depending on cookie size and oven calibration.
What you’re looking for:
– The cookies should look set on top with no wet sheen.
– Edges should be lightly set, not deeply browned.
– If you prefer slightly softer centers, pull them when the tops appear matte but still pale.
Cooling discipline:
– Let them cool on the tray for 3–5 minutes—they’re fragile when too hot, but rolling immediately at full scalding temperature can cause sugar to melt and clump.
– Then roll in powdered sugar while they’re still warm.
Oven variability note: if your oven runs hot, start checking at 9–10 minutes. If it runs cool, you may need closer to 14–15 minutes. The correct cue is “set” texture rather than exact minutes.
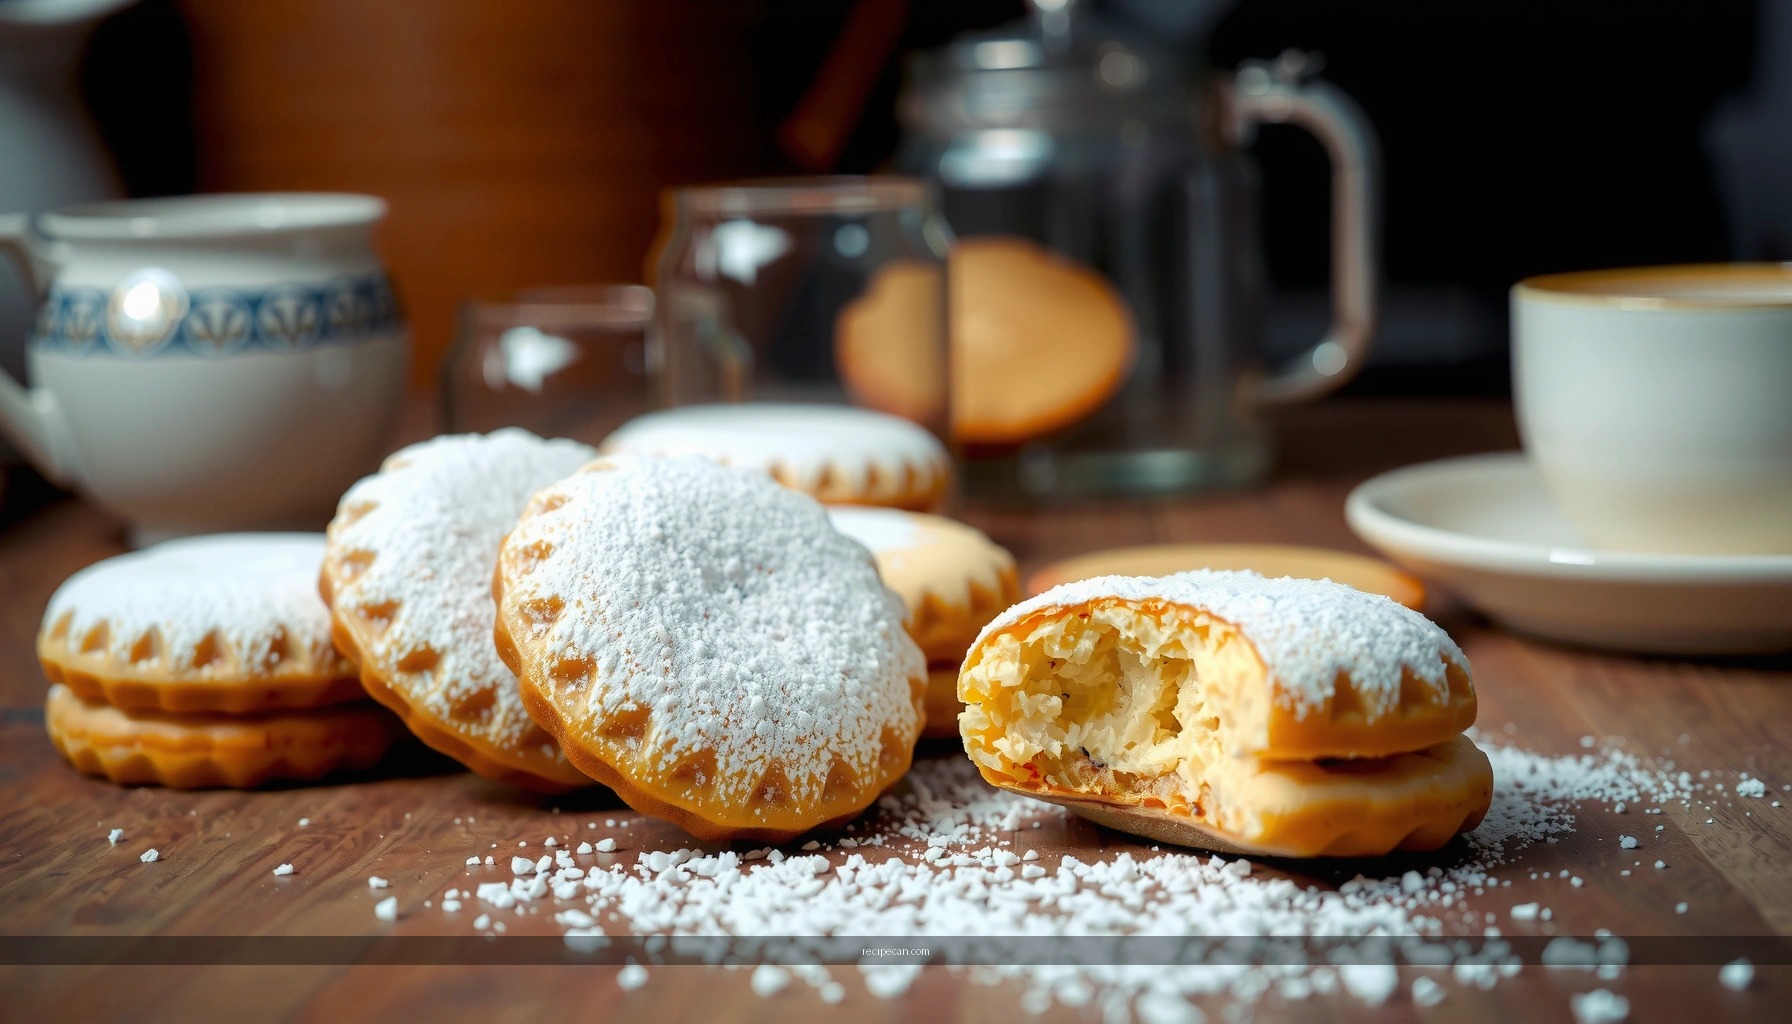
The Best Powdered Sugar Coating
The coating step is not just decorative—it affects mouthfeel and appearance. Powdered sugar adheres best when cookies are slightly warm and the surface moisture from melting butter has not yet evaporated completely.
Best practices:
1. Use real powdered sugar (not confectioners’ sugar blends with unusual starch levels unless you know they behave well).
2. Coat in a wide bowl so you can roll easily without smearing.
3. Coat while warm for immediate adhesion. If cookies are too cool, sugar falls off; if too hot, sugar can dissolve into a paste.
Two-roll method (recommended for “snowdrift” thickness):
– First roll: Immediately after a short tray cool, roll each cookie until fully coated.
– Second roll: Once cookies cool for 10–15 minutes, re-roll again. This refreshes the topcoat and helps prevent thin, uneven dusting.
Texture payoff:
– The first coating bonds to the cookie surface.
– The second coating creates a more stable, thicker shell that holds well during packaging and gift delivery.
If you’re aiming for a crisp visual but still tender bite, keep re-roll gentle—avoid pressing sugar hard into the cookies.
Storage and Make-Ahead Options
Proper storage protects both tenderness and the coating appearance. Russian tea cakes are at their best when served fresh, but they also hold up well when managed correctly.
Storage guidance:
– Short-term: Store in an airtight container at room temperature for up to 4–5 days.
– To reduce powder sugar loss, place a piece of parchment between layers or keep a single layer when possible.
– Avoid humidity exposure; powdered sugar can absorb moisture and look less “snowy” over time.
Make-ahead options:
– Freeze baked cookies: Cool completely, then freeze in a single layer and transfer to a freezer bag/container once solid.
– Thaw at room temperature before re-rolling (optional) for the freshest powdered look.
– Freeze dough balls: Shape into balls, freeze on a tray until firm, then bag. Bake from frozen with a slight time increase (usually 1–3 minutes more). Roll in powdered sugar after baking.
For holiday production planning (the practical business baker mindset):
– Bake 2–3 days ahead and store airtight.
– Re-roll powdered sugar right before serving or packaging to restore peak appearance.
Russian tea cakes are easy to master: make a buttery nut dough, bake until set, then coat in powdered sugar for that signature finish. Follow the shaping, baking, and coating tips above for consistent results, and try this recipe today—then share your batch once you’ve got that perfect sugary “snow” coating.
Frequently Asked Questions
What is the best Russian tea cakes recipe for beginners?
A beginner-friendly Russian tea cakes recipe uses simple pantry ingredients like butter, powdered sugar, vanilla, and finely chopped nuts (usually pecans or walnuts). The key is to cream softened butter until smooth, then mix in flour and nuts just until combined so the dough stays tender. Bake until the bottoms are lightly set (not browned), then roll the cookies in powdered sugar while warm and again after cooling for the classic “snowy” finish.
How do you make Russian tea cakes without nuts or with nut-free substitutions?
To make a nut-free Russian tea cakes recipe, replace chopped nuts with an equal amount of finely ground toasted sunflower seeds, pumpkin seeds, or a nut-free flour blend. You can also use crushed pretzels or fine cookie crumbs for texture, but keep the dough’s consistency in mind—add a teaspoon of flour if it’s too soft. Roll the cookies in powdered sugar as usual, and bake until the edges are set to ensure they hold together without nuts.
Why do Russian tea cakes crack or fall apart when baked?
Cracking or crumbling usually happens when the dough is too dry or overmixed, or when the butter isn’t properly softened before mixing. Use softened (not melted) butter and mix flour and nuts just until combined; chill the dough briefly if it’s sticky or warm. Also, avoid overbaking—Russian tea cakes should remain tender, so pull them when they look slightly underdone in the center.
Which nuts are best for Russian tea cakes—pecans, walnuts, or almonds?
Pecans and walnuts are the most common in a traditional Russian tea cakes recipe because their flavor is rich and they chop easily into small pieces. Almonds work well too, especially if you use finely ground almonds for a more delicate texture and nutty aroma. Whichever you choose, keep the pieces small so the cookies bake evenly and roll smoothly in powdered sugar.
How do you store Russian tea cakes to keep them fresh and “powdered”?
After baking, let Russian tea cakes cool completely before storing so the powdered sugar sets properly. Store them in an airtight container at room temperature for up to 5 days, or refrigerate for about a week if your kitchen is warm. For the best look, re-roll in powdered sugar right before serving, since the coating can absorb moisture over time.
References
- Russian tea cake
https://en.wikipedia.org/wiki/Russian_tea_cake - Russian tea cake
https://en.wikipedia.org/wiki/Mexican_wedding_cookie - Teacake
https://en.wikipedia.org/wiki/Tea_cake - Cookie
https://en.wikipedia.org/wiki/Cookie - Powdered sugar
https://en.wikipedia.org/wiki/Powdered_sugar - https://en.wikipedia.org/wiki/Shortbread
https://en.wikipedia.org/wiki/Shortbread - https://en.wikipedia.org/wiki/Almond_cookie
https://en.wikipedia.org/wiki/Almond_cookie - Google Scholar Google Scholar
https://scholar.google.com/scholar?q=Russian+tea+cakes+recipe - Google Scholar Google Scholar
https://scholar.google.com/scholar?q=Russian+tea+cake+ingredients+powdered+sugar+butter - Google Scholar Google Scholar
https://scholar.google.com/scholar?q=Mexican+wedding+cookies+%28Russian+tea+cakes%29+recipe