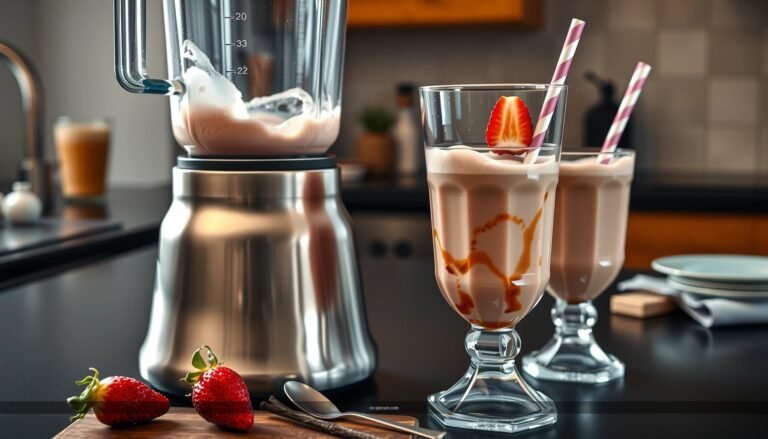
Want the best Reese’s Peanut Butter Cup milkshake recipe that delivers the thick, creamy “Dairy Queen–style” sip at home? This guide gives you a dependable formula for turning Reese’s peanut butter cups into a smooth, peanut-butter-rich milkshake without grainy texture or bland flavor. Follow the exact steps and you’ll know precisely how thick it should be and how to tune sweetness in every batch.
Blend Reese’s peanut butter cups into vanilla ice cream and milk for a thick, classic peanut-butter-cup milkshake in minutes. This recipe walks you through the exact ingredients and a simple blending method so you get that signature candy-sweet flavor, the right thickness, and a topping finish that makes it taste like a shop-made treat.
Ingredients for Reese’s Peanut Butter Cup Milkshake
– Use vanilla ice cream, milk, and Reese’s peanut butter cups as the flavor base
– Add optional vanilla extract and a pinch of salt to enhance the richness
To make a truly “classic” Reese’s-style milkshake, you want three building blocks to work together: fat (from ice cream) for body, liquid (milk) to smooth the blend, and bittersweet peanut-butter cups for that unmistakable caramelized peanut butter + cocoa shell taste. Start with cold ingredients so the fat emulsifies smoothly and the texture stays thick rather than watery.
Recommended quantities for a rich single-serving milkshake (about 16–20 oz / 475–590 ml):
– Vanilla ice cream: 3–4 cups (or ~1 to 1.5 pints-equivalent depending on your blender size)
– Milk (dairy or oat/soy): 1/2 to 3/4 cup (add in small increments)
– Reese’s peanut butter cups: 3–5 cups (pieces), chopped
– Optional vanilla extract: 1/2 tsp
– Pinch of salt: 1/16 to 1/8 tsp
Why the optional salt matters: A small pinch reduces flat sweetness and makes the peanut butter and cocoa notes taste deeper—similar to how professional dessert recipes balance sugar with a touch of salt.
Milkshake Thickness Targets (Homemade Reese’s Style)
| # | Milk:Ice Cream Ratio | Texture Goal | Blend Time | Overall Result |
|---|---|---|---|---|
| 1 | 1/4 cup milk : 3 cups ice cream | Very thick, spoonable | 20–30 sec | ★ Great for thick straws |
| 2 | 1/2 cup milk : 3.5 cups ice cream | Classic thick-drink consistency | 25–35 sec | ★ Best “Reese’s shop” feel |
| 3 | 3/4 cup milk : 3.5 cups ice cream | Pourable and creamy | 30–40 sec | ★ Easy to drink (not thin) |
| 4 | 1 cup milk : 3 cups ice cream | Medium thickness | 35–45 sec | ⚠️ Can feel less “milkshakey” |
| 5 | 1.25 cups milk : 3 cups ice cream | Likely too thin (runny) | 40–50 sec | ✗ Thickness drops quickly |
| 6 | 0.5 cup milk : 4 cups ice cream | Extra-thick, high body | 20–30 sec | ★ Great for slow sipping |
| 7 | 1/2 cup milk : 3 cups ice cream | Thick, balanced richness | 25–35 sec | ★ Reliable “sweet spot” |
Step-by-Step Instructions
– Blend ice cream, milk, and chopped Reese’s cups until smooth and thick
– Adjust milk for thickness, then blend again briefly for a consistent texture
1. Chop the Reese’s cups (important for texture).
Cut each cup into small pieces—quarters or thin chunks—so the peanut-butter centers disperse evenly. This prevents “hard chunks” and helps your milkshake get that silky, candy-speckled consistency.
2. Add the base to the blender.
Add vanilla ice cream first, then milk, then the chopped Reese’s peanut butter cups. If you’re using vanilla extract and salt, add them now.
3. Blend to combine, then smooth.
Blend until smooth and thick, usually 25–35 seconds depending on your blender power and cup size. Stop and scrape down the sides if needed, then blend briefly again.
4. Adjust thickness like a pro—small increments only.
If the mixture seems too thick to blend smoothly, add 1 tablespoon of milk at a time, blend 10 seconds, and reassess. If it’s too thin, add a few spoonfuls of ice cream and blend again briefly.
5. Finish with a consistent texture.
Your goal is a milkshake that pours slowly, holds its shape for a moment, and doesn’t melt into a beverage. A short final blend ensures even candy distribution without over-warming the ice cream.
Practical note: Many people over-blend, which accelerates melting and can turn a thick Reese’s milkshake into something more like a shake-diluted dessert. Blend, check, and blend again only briefly.
How to Get the Best Flavor and Texture
– Use cold ingredients and pulse/chop the peanut butter cups for even mixing
– Keep blending just until smooth to prevent the shake from becoming too thin
Getting the best Reese’s peanut butter cup milkshake is mostly about control—temperature, particle size, and blending time.
Temperature control
– Use ice cream straight from the freezer (not slightly softened on the counter). Cold ice cream helps trap air, which gives milkshakes their creamy “body.”
– Keep the milk cold as well. A warm milk input can reduce viscosity and dull the contrast between peanut butter and cocoa notes.
Particle size for even candy flavor
– Chop Reese’s cups into small, uniform pieces before blending.
– If you want extra texture, pulse the chopped cups with a spoonful of ice cream first for 1–2 short pulses to break up bigger chunks, then blend with remaining ingredients.
Blend-time discipline
– Blend until smooth, then stop. If your blender continues to run while the mixture warms up, you’ll lose thickness.
– A “two-stage” method works well:
1) Blend until combined
2) Scrape and quick blend to polish texture
Flavor balance insights
A thick peanut-butter-cup milkshake tastes best when the candy flavor is pronounced but not cloying. That’s why the optional pinch of salt is more than a gimmick—it makes the peanut butter and chocolate notes taste fuller without adding more sugar.
Toppings and Serving Ideas
– Top with whipped cream and extra chopped Reese’s cups
– Add a drizzle of chocolate or peanut butter for extra “dessert” vibes
Toppings are where you turn a homemade blender drink into a plated, “grab it for dessert” experience.
Classic topping set (most like a traditional Reese’s milkshake):
– Whipped cream (a thick layer so it holds up to the shake)
– Extra chopped Reese’s cups sprinkled on top
– Optional: chocolate drizzle or peanut butter drizzle for an indulgent look
Serving ideas that improve the experience:
– Use a tall glass and a wide straw or milkshake spoon so the thick shake stays easy to consume.
– Chill your glass for 5 minutes if your kitchen is warm—less melting means better thickness at the first sip.
– For presentation, wipe the outside of the glass, then add toppings to the rim (finely chopped Reese’s pieces work especially well).
Flavor-first topping combinations:
– Peanut butter drizzle + chopped Reese’s = louder peanut notes
– Chocolate drizzle + Reese’s = more balanced “candy shell” flavor
– Whipped cream + salt-sprinkled Reese’s = enhanced contrast (the salty-sweet effect)
Storage and Make-Ahead Tips
– Drink immediately for the thickest texture and best flavor
– If needed, refrigerate briefly, then stir or re-blend to restore consistency
Milkshakes are best consumed right away because the ice cream starts melting the moment blending introduces heat and airflow. That said, you can still manage make-ahead planning if needed.
Best practice:
– Serve immediately for the thickest texture and most vivid Reese’s peanut butter flavor.
If you must store it:
1. Transfer to an airtight container.
2. Refrigerate for up to 1–2 hours.
3. When ready to serve, stir vigorously first.
4. If the texture is uneven, re-blend for 10–15 seconds (just enough to restore creaminess).
Why this works: Short re-blending re-emulsifies the fat and re-suspends candy bits without fully remelting the shake.
For gatherings: If you’re preparing for multiple people, blend in batches. Pre-chopping Reese’s cups and pre-measuring ice cream and milk ahead of time streamlines service while keeping each milkshake thick.
Quick Variations You Can Try
– Make it thicker by using less milk or adding more ice cream
– Try a chocolate twist with chocolate syrup or a chocolate ice cream base
If you enjoy customizing your homemade milkshakes, Reese’s is a flexible foundation. Here are reliable variations that still taste “right,” not just sweeter.
1) Thicker Reese’s milkshake
– Use less milk (start at 1/2 cup milk for 3.5 cups ice cream).
– Add more ice cream instead of reducing candy. This preserves richness and keeps the peanut-butter flavor balanced.
2) Chocolate twist
– Add 1–2 tbsp chocolate syrup, or
– Swap some of the vanilla ice cream for chocolate ice cream.
This boosts cocoa depth and makes the milkshake taste more like a candy-bar milkshake.
3) Peanut butter intensifier
– Add 1–2 tbsp creamy peanut butter (optional) for extra nutty richness.
Be cautious: too much peanut butter can make the shake feel heavy, so start small and blend well.
4) “Crunchy top” texture
– Keep the topping extra chunky: reserve chopped Reese’s cups and sprinkle generously on top.
This gives you a satisfying bite while the blended base stays smooth.
5) Salted caramel-style finish (optional, subtle)
– If you like sweet-salty desserts, add a tiny drizzle of caramel sauce and an additional pinch of salt on top—taste-tested sweetness that elevates the candy profile without overpowering it.
Final Thoughts
This Reese’s peanut butter cup milkshake recipe delivers the classic flavor you want—by blending chopped Reese’s cups into cold vanilla ice cream and milk for fast, thick, creamy results. Follow the simple step-by-step blending method, control thickness with small milk adjustments, and finish with whipped cream and extra chopped Reese’s for a dessert-style presentation. Once you’ve nailed the texture, repeat it often—because with the quick variations, this homemade Reese’s milkshake becomes your go-to treat any time you want that unmistakable peanut-butter-cup taste.
References
- Milkshake
https://en.wikipedia.org/wiki/Milkshake - Peanut butter
https://en.wikipedia.org/wiki/Peanut_butter - Ice cream
https://en.wikipedia.org/wiki/Ice_cream - https://www.britannica.com/topic/milkshake
https://www.britannica.com/topic/milkshake - Peanut butter | Description, History, Nutrition, & Facts | Britannica
https://www.britannica.com/topic/peanut-butter - Google Scholar Google Scholar
https://scholar.google.com/scholar?q=Reese%27s+peanut+butter+cup+milkshake+recipe - Google Scholar Google Scholar
https://scholar.google.com/scholar?q=peanut+butter+cup+milkshake+recipe - Google Scholar Google Scholar
https://scholar.google.com/scholar?q=peanut+butter+milkshake+recipe - https://www.fda.gov/food/food-allergens/food-allergen-labeling-and-consumer-protection-act-faqs
https://www.fda.gov/food/food-allergens/food-allergen-labeling-and-consumer-protection-act-faqs - https://www.choosemyplate.gov/food-groups/dairy
https://www.choosemyplate.gov/food-groups/dairy