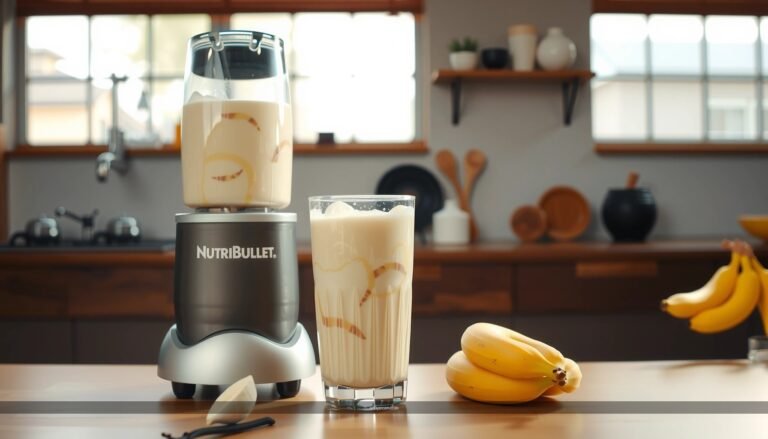
Get a coffee milkshake recipe that beats store-bought versions with a thick, creamy homemade texture. This straightforward method combines strong coffee, cold milk, and ice cream for a balanced sweetness and a café-style finish. If you want the fastest path to a rich coffee milkshake you can blend in minutes, this is the one to follow.
You can make a thick, café-style coffee milkshake at home by using strong, chilled coffee and the right coffee-to-milk-to-ice-cream ratio, then blending until fully emulsified. This guide walks you through exact steps, thickness control, and easy flavor upgrades so your homemade coffee shake tastes consistent every time.
Ingredients for a Coffee Milkshake
Building a great coffee milkshake is less about “mystery technique” and more about choosing ingredients that behave well in a blender. The goal is a smooth, spoonable texture with balanced bitterness, sweetness, and dairy richness.
– Use brewed coffee (or strong espresso) and cold milk for the best flavor
Coffee provides the flavor foundation, but milk doesn’t “sweeten” it—so start with a coffee concentrate (strong brew or espresso) and keep liquids cold. Cold inputs help the ice cream set the body quickly instead of melting into a thin shake.
– Combine with vanilla ice cream for a thick, creamy texture
Vanilla ice cream supplies fat and sugar, which round out coffee’s bitterness and create the signature milkshake mouthfeel. If you prefer a less sweet but still creamy result, you can use a smaller amount of ice cream plus a bit more chilled milk—just expect a slightly thinner shake.
– Optional add-ins: sugar, chocolate syrup, or a pinch of salt
– Sugar or sweetener: Adjust based on your coffee’s roast and your personal sweetness tolerance.
– Chocolate syrup: Makes a mocha-style milkshake instantly.
– Pinch of salt: A small amount can sharpen coffee flavor and reduce “flat” sweetness—think of it as a flavor amplifier, not a salty taste.
To help you plan consistently, here’s a practical comparison of common coffee “bases” and how they typically translate into a balanced milkshake profile.
Coffee Base Impact in a Milkshake (Homemade Bench Test)
| # | Coffee Base | Flavor Strength Perceived |
Bitterness Tendency |
Best Pairing | Milkshake Rating |
|---|---|---|---|---|---|
| 1 | Espresso (single shot) | High (★) | Medium | Classic vanilla shake | ★★★★☆ |
| 2 | Strong brewed coffee (cold) | High | Low–Medium | Mocha add-ins | ★★★★☆ |
| 3 | Cold brew (concentrated) | Very High | Low | Smooth, less bitter shakes | ★★★★★ |
| 4 | Instant espresso powder | Medium–High | Medium | Quick weeknight prep | ★★★☆☆ |
| 5 | Light roast brewed coffee | Medium | Low | Cinnamon and vanilla | ★★★☆☆ |
| 6 | Regular decaf brewed (not strong) | Low–Medium | Low | Dessert-forward blends | ★★☆☆☆ |
| 7 | Diluted brewed coffee | Low | Low | Not ideal without extra coffee | ★☆☆☆☆ |
Step-by-Step Recipe for Coffee Milkshake
Below is a dependable method designed for thickness, flavor clarity, and repeatable results. You’ll be able to make this in minutes, but the preparation choice—chilling the coffee—is what distinguishes a “good” milkshake from a properly creamy one.
– Brew coffee, chill it, then add coffee, milk, and ice cream to a blender
1) Brew coffee using your preferred method (espresso or strong brew).
2) Chill it until cold (15–30 minutes in the fridge, or faster over a bowl of ice).
3) Add to blender:
– 3/4 cup (180 ml) cold strong coffee
– 1/2 cup (120 ml) cold milk
– 2 cups (about 480 ml) vanilla ice cream
– Blend until smooth and creamy, scraping down the sides if needed
Blend on medium-high for about 30–45 seconds. If you see ice cream clinging to the sides, stop once, scrape down, then blend again until there are no visible lumps.
– Taste and adjust sweetness before serving
After blending, taste the shake. If you want it sweeter, add:
– 1–2 teaspoons sugar (or 1 tablespoon sweetener) and blend for 10 more seconds.
If you find the coffee flavor is too sharp, add an extra 1/4 cup (60 ml) ice cream; if it’s too mild, add 1–2 tablespoons more coffee.
Quick operational note: For a commercial-style result, the milkshake should pour slowly but still move as one cohesive mass—not like liquid coffee or like hardened ice cream.
Achieving the Perfect Thickness
Thickness is not a single “secret.” It’s a controlled interaction between fat, ice content, and blend time. Use the levers below to dial in your preferred texture.
– Use more ice cream for a thicker shake, more milk for a thinner one
Think of ice cream as the structural ingredient. Increase ice cream by 1/4 cup (roughly 60 ml) increments to thicken; increase milk by 1–2 tablespoons increments to loosen.
– Add a few ice cubes only if your coffee/milk isn’t cold enough
Ice cubes can help if your coffee is warm or room temperature. However, too many ice cubes can thin the shake by introducing extra water once they melt. A good rule: add 2–4 ice cubes, and only if needed.
– Blend longer for a smoother, thicker consistency
If your shake tastes “grainy” (usually from under-blended ice cream), blending longer helps emulsify the fat and coffee. Blend an extra 10–15 seconds before adding any more ingredients.
For consistent outcomes, keep your coffee cold and measure ingredients by volume. “Eyeballing” often leads to variability because coffee strength and temperature change how fast ice cream breaks down.
Flavor Variations to Try
Once you master the base coffee milkshake, variations are straightforward. This is where you can tailor the experience to different tastes—mocha lovers, caramel fans, and anyone who wants deeper roast notes.
– Add chocolate syrup or cocoa powder for a mocha-style coffee milkshake
Stir in 1–2 tablespoons chocolate syrup or 1–2 tablespoons cocoa powder before blending. If using cocoa powder, consider adding an extra teaspoon of sugar because cocoa bitterness can amplify coffee bitterness.
– Use flavored coffee (vanilla or caramel) for an instant twist
Flavored coffee can simplify prep, but it can also change sweetness levels. Start with the base recipe and taste after blending—then adjust with sugar only if needed.
– Try cinnamon or espresso powder for deeper coffee notes
– Add 1/4 teaspoon cinnamon for a warm, dessert-like profile.
– Add 1/4 to 1/2 teaspoon espresso powder for a more intense coffee flavor without changing the liquid volume much.
These variations work well because they integrate into the shake during blending rather than sitting on top—so the flavor is evenly distributed.
Serving Tips and Garnishes
A great milkshake isn’t only about taste—it’s also about temperature, texture, and presentation. Serve in a way that protects thickness and makes it easy to enjoy.
– Serve immediately with a tall glass and a generous scoop texture
Milkshakes start to soften quickly as they warm. If you’re serving multiple people, pre-measure ingredients and blend right before serving.
– Top with whipped cream, chocolate drizzle, or coffee beans
Consider:
– Whipped cream for classic indulgence
– A thin chocolate drizzle for visual appeal
– A few coffee beans for aroma and a “café-style” finish
– Use a straw or spoon for the best drinking-and-scooping experience
A wide straw lets you sip while the spoon handles the thicker foam layer. This matters because a properly blended coffee milkshake often has a slightly thick, aerated top.
If you want an extra café touch, chill the glass for 3–5 minutes in the freezer before pouring.
Storage and Make-Ahead Options
Milkshakes are best fresh, but you can still manage leftovers without turning them into a runny dessert. The key is minimizing separation and restoring texture.
– Drink right away for the thickest texture
The ideal window is within a few minutes of blending. After that, fat and ice crystal structure gradually relax.
– If needed, refrigerate briefly, then re-blend to restore smoothness
Refrigerate for up to 1–2 hours, then re-blend for 10–15 seconds. This re-emulsifies the coffee and dairy so the shake becomes uniform again.
– Keep leftover coffee and dairy chilled for quicker prep later
If you’re making milkshakes for a group, store chilled coffee in the fridge and keep milk and ice cream cold. That lets you blend quickly and maintain a consistent texture.
If your milkshake thickens too much (it happens in colder fridges), blending with 1–2 tablespoons milk usually returns it to a smooth, pourable consistency.
A simple recipe for coffee milkshake is all about using strong, chilled coffee and the right blend of milk and ice cream for thickness. Follow the steps, adjust sweetness to taste, and try a variation like mocha or caramel for a new favorite. Make one today—grab your ingredients, blend, and enjoy a café-style treat at home.
References
- Milkshake
https://en.wikipedia.org/wiki/Milkshake - Coffee milk
https://en.wikipedia.org/wiki/Coffee_milk - Coffee
https://en.wikipedia.org/wiki/Coffee - Iced coffee
https://en.wikipedia.org/wiki/Iced_coffee - Ice cream
https://en.wikipedia.org/wiki/Ice_cream - Whipped cream
https://en.wikipedia.org/wiki/Whipped_cream - https://www.britannica.com/topic/milkshake
https://www.britannica.com/topic/milkshake - Google Scholar Google Scholar
https://scholar.google.com/scholar?q=coffee+milkshake+recipe - Google Scholar Google Scholar
https://scholar.google.com/scholar?q=milkshake+coffee+ice+cream+blended+drink - Google Scholar Google Scholar
https://scholar.google.com/scholar?q=coffee+milk+beverage+preparation