Want to make a Chick-fil-A milkshake at home that tastes like the real thing? This guide gives you the closest copycat method—exactly how to mix the creamy base, nail the flavor, and get the right shake thickness. You’ll know whether the recipe delivers a true Chick-fil-A style result in your own kitchen, not just a “milkshake-inspired” dessert.
You can recreate the classic Chick-fil-A milkshake at home by blending cold vanilla ice cream with milk until it’s thick and smooth, then finishing with a simple vanilla drizzle. This guide breaks down the exact ingredients, the easiest blend-and-adjust method to match the signature consistency, and practical tips so your homemade version tastes right and holds its shape like the real thing.
Ingredients You’ll Need for a Chick-fil-A Milkshake

A Chick-fil-A-style milkshake is defined by two things: vanilla-forward flavor and a thick, spoonable texture. The ingredient list is simple, but each item plays a role in dialing in the finished result.
– Vanilla ice cream as the creamy base
Use a quality vanilla ice cream (not “vanilla flavored” soft serve). The higher the butterfat and the more real dairy-forward the ice cream, the closer you’ll get to that rich, smooth mouthfeel. For best results, choose an ice cream that’s designed to be scoopable and firm—not overly airy.
– Milk to reach the right thickness
Milk is your viscosity control. Whole milk is usually the most reliable starting point because it adds creaminess without thinning the shake too aggressively. If you prefer a slightly lighter shake, you can switch to 2% milk, but you’ll need to be more cautious while adjusting thickness.
– Vanilla extract (and optional sweetener) for flavor balance
Vanilla extract boosts aroma and depth. Vanilla ice cream provides sweetness and body, but extract helps you match the “classic vanilla” profile you expect from a fast-food milkshake. If your ice cream is less sweet, add a small amount of sugar or vanilla syrup—just enough to round out flavor, not to turn the shake into dessert-heavy sweetness.
What Changes Milkshake Thickness at Home (Practical Ranges)
| # | Factor | Typical Setting | Effect on Texture | Result Direction |
|---|---|---|---|---|
| 1 | Ice cream temperature | -10 to -16°C (5–8°F) | More scoopable and slower to melt | Thicker |
| 2 | Milk type | Whole (≈3.25% fat) | Creamy viscosity with less thinness | Closer match |
| 3 | Milk added (per 2 scoops) | 1–3 tbsp (15–45 ml) | Small changes noticeably affect thickness | Best control |
| 4 | Blend time | 15–30 seconds total | Smooth without adding air/icy texture | More spoonable |
| 5 | Vanilla extract amount | 1/4–1/2 tsp | Boosts aroma without thinning | Flavor accuracy |
| 6 | Glass temperature | Chilled (10–15 minutes in fridge) | Slows melt and preserves thickness | Holds shape |
| 7 | Rest time after blending | 1–2 minutes | Stabilizes texture before serving | Smoother finish |
Step-by-Step: How to Blend the Perfect Milkshake

The goal is to achieve a thick, smooth blend without overworking the ice cream. Think of your blender as a tool for combining—not a machine you should run continuously.
– Blend ice cream and milk until smooth and thick
Start by scooping your vanilla ice cream into a blender. Add a small splash of milk first (you can always add more). Blend on low to medium speed until the mixture looks uniform and thick—usually within 15–20 seconds for most blenders. If you see chunks, blend briefly again rather than increasing milk immediately.
– Add vanilla (and any optional extras) and blend briefly again
Add vanilla extract after the base is already smooth. This helps you distribute flavor evenly without turning the shake into a warm liquid from extended blending. If you’re using a touch of sweetener or vanilla syrup, add it here as well, then blend just 5–10 seconds.
– Adjust milk a little at a time to avoid making it too thin
Thickness is the signature trait. If the shake seems too thick, add milk one tablespoon at a time, blending 5 seconds between additions. If it becomes too thin, the only real fix is to add more ice cream and re-blend briefly.
Actionable ratio for consistent results (for one thick shake):
– 2–3 generous scoops of vanilla ice cream
– 1–3 tablespoons milk to start
– 1/4 to 1/2 teaspoon vanilla extract (to taste)
Achieving the Classic Thick and Creamy Texture

A Chick-fil-A milkshake isn’t just “vanilla and dairy”—it’s engineered for a thick, spoonable texture that doesn’t immediately feel watery. At home, you control this by temperature, blend time, and small incremental adjustments.
– Use cold ingredients for a thicker shake
Cold ice cream holds its structure better when blended. If your ice cream has softened in a warm kitchen, it will blend more easily into something that feels thinner. For best results, keep ice cream in the freezer until you’re ready to scoop, and measure milk straight from the fridge.– Blend less at first, then refine consistency gradually
Over-blending can introduce air, change the mouthfeel, and make the shake seem slightly “foamy” rather than creamy. Start with short blending bursts. You’re aiming for a uniform, thick texture, not a prolonged mixing cycle.
– Let it sit 1–2 minutes if you need it to firm up
After blending, give the shake a brief rest. During that time, the ice cream matrix settles, and the shake often becomes a touch thicker and smoother—closer to what you’d expect from a freshly made fast-food milkshake.
Flavor Variations (Without Losing the Chick-fil-A Vibe)

Once you’ve nailed the base, small tweaks can personalize your shake while keeping the classic vanilla identity. Use variations sparingly—strong flavors are easy to overpower in a milkshake format.
– Make it extra vanilla by increasing vanilla extract slightly
If you want that more pronounced vanilla aroma, increase vanilla extract from about 1/4 teaspoon to 1/2 teaspoon. Blend briefly to distribute and taste once before serving. This stays aligned with the “classic vanilla” profile rather than turning the shake into a different dessert category.
– Try chocolate syrup swirls for a chocolate-style twist
For a chocolate-vanilla vibe, add 1 to 2 teaspoons of chocolate syrup and swirl it in lightly after blending. Avoid blending chocolate syrup fully into the base if your goal is the “vibe” of a vanilla-forward shake—light marbling looks and tastes more like a controlled twist than a complete flavor swap.
– Add a small pinch of salt to make flavors pop
A pinch of salt sounds too simple, but it works. Salt sharpens sweetness and enhances vanilla. Add it very sparingly (start with a micro-pinch), then reassess. Too much salt will pull the flavor out of balance.
Toppings and Serving Tips
Even if your blend is perfect, serving choices affect the final experience. Milkshakes change quickly as they melt, so timing and temperature matter.
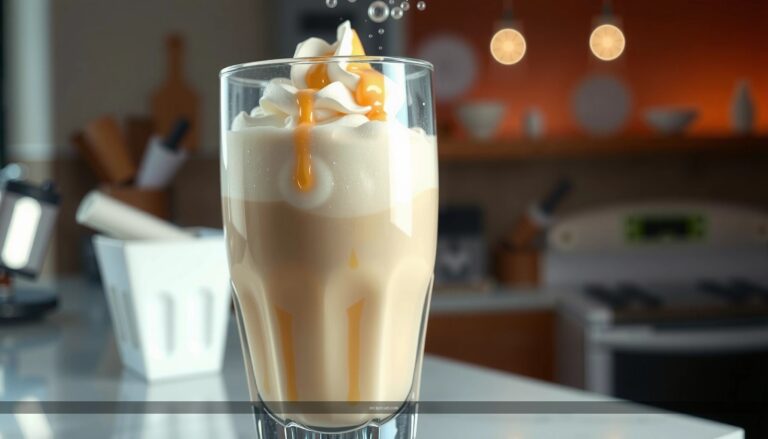
– Top with whipped cream and a drizzle (optional)
Whipped cream is a classic finishing touch, and a small drizzle—vanilla syrup or chocolate syrup depending on your variation—adds visual appeal. Keep toppings light so they don’t mask the underlying vanilla flavor.
– Serve immediately for best thickness and flavor
Milkshakes are most authentic right after blending. If you let it sit too long, the texture loosens. For the best “thick-smooth” effect, serve as soon as it looks evenly blended and slightly thickened after the short rest.
– Use a chilled glass to keep it from melting too fast
Chilling the glass helps the shake maintain thickness for a longer window—especially if you’re serving multiple people. A 10–15 minute fridge chill is usually enough.
Common Mistakes to Avoid
Most home attempts fail due to a few predictable issues—usually temperature, liquid volume, or blender technique.
– Adding too much milk at once (start with less)
Once the shake is thin, it’s hard to restore the original texture. Begin with a conservative amount, then adjust in small increments.
– Over-blending until it turns icy
Prolonged blending can make the milkshake feel less creamy and more “cold and frosty.” Keep blend time short and use brief bursts.
– Using warm ice cream or low-quality vanilla
Warm ice cream accelerates melting and thins the texture. Low-quality vanilla can taste flat or overly artificial, which makes the milkshake feel “generic” rather than classic.
Enjoy your homemade Chick-fil-A milkshake by following the simple blend-and-adjust method for the thick, smooth texture you love. Pick your flavor variation, add your favorite toppings, and make your next shake in minutes—then share your results or try a new twist!
Final note: If you want the closest match every time, prioritize cold ingredients, short blending bursts, and incremental milk adjustments—that combination is what produces the signature thick-smooth consistency.
References
- Google Scholar Google Scholar
https://scholar.google.com/scholar?q=chick+fil+a+milkshake+recipe - Google Scholar Google Scholar
https://scholar.google.com/scholar?q=chick-fil-a+milkshake+copycat+recipe - Google Scholar Google Scholar
https://scholar.google.com/scholar?q=milkshake+formulation+ice+cream+emulsion+study - Milkshake
https://en.wikipedia.org/wiki/Milkshake - https://www.britannica.com/topic/milkshake
https://www.britannica.com/topic/milkshake - https://pubmed.ncbi.nlm.nih.gov/?term=milkshake
https://pubmed.ncbi.nlm.nih.gov/?term=milkshake - https://www.sciencedirect.com/search?qs=milkshake&pub=All
https://www.sciencedirect.com/search?qs=milkshake&pub=All - Ice cream
https://en.wikipedia.org/wiki/Ice_cream - Emulsion
https://en.wikipedia.org/wiki/Emulsion - Vanilla ice cream
https://en.wikipedia.org/wiki/Vanilla_ice_cream