If you’re searching for the best recipe for chocolate malted milkshake, this creamy, classic, easy version is the clear winner. It delivers that signature malted tang and deep chocolate flavor with a simple step-by-step method you can nail the first time. By the end, you’ll know exactly how to mix, blend, and serve a thick shake that tastes like the malt counter, not a compromise.
A chocolate malted milkshake is simply chocolate ice cream blended with malt powder, milk, and a touch of vanilla until thick and creamy. Use the right ratio and blend time to nail the classic malt “body,” then adjust thickness with small milk increments so your homemade shake matches the texture you’d expect from a great diner.
This guide walks you through a practical, repeatable method—plus expert texture tips, chocolate flavor variations, and serving ideas that keep the shake tasting rich rather than overly sweet or icy.
Ingredients for a Chocolate Malted Milkshake

– Chocolate ice cream, malt powder, and milk are the core ingredients
– Add vanilla for extra depth and sweetness
– Optional: whipped cream and chocolate syrup for topping
A classic chocolate malted milkshake is all about building three layers of flavor and texture: (1) the dairy richness from chocolate ice cream, (2) the signature toasted malt notes (slightly nutty, gently caramel-like), and (3) the creaminess that comes from milk emulsifying smoothly with the ice cream.
Recommended ingredient ratios (great starting point):
– Chocolate ice cream: 2–3 scoops (about 300–450 g depending on scoop size)
– Malt powder: 1–3 tablespoons (start with 1 tablespoon and increase to taste)
– Milk: 1/4 to 1/2 cup (60–120 ml), adjusted for thickness
– Vanilla extract (optional but recommended): 1/2 to 1 teaspoon
– Pinch of salt (optional): helps chocolate taste “bigger” without making it salty
Optional toppings that match a classic presentation:
– Whipped cream (for height and aroma)
– Chocolate syrup (for glossy chocolate swirls)
– Extra malt powder lightly dusted on top (for a more “malted” look and flavor)
If you want a more “restaurant-style” shake, keep your ingredients measured rather than by eye—malt powder especially can become dominant quickly if you add too much.
Malted Milkshake Texture Targets (Home Batch)
| # | Target Texture | Milk (ml) | Blending Time | Shake Thickness Rating |
|---|---|---|---|---|
| 1 | Very thick (spoonable, classic) | 60 | 25–30 sec | 9/10 |
| 2 | Classic diner thickness | 75 | 20–25 sec | 8/10 |
| 3 | Balanced (straw-friendly) | 90 | 18–22 sec | 7/10 |
| 4 | Softer (closer to drinkable) | 105 | 15–20 sec | 5/10 |
| 5 | Thin (avoid for true malt feel) | 120 | 12–16 sec | 3/10 |
| 6 | High-malt body (more pronounced) | 75 | 22–28 sec | 8/10 |
| 7 | Cocoa-forward (drier finish) | 80 | 20–24 sec | 7/10 |
Step-by-Step Instructions

– Add ice cream, malt powder, milk, and vanilla to a blender
– Blend until smooth and thick, pausing to scrape the sides if needed
– Adjust with a little more milk to reach your preferred consistency
This is the streamlined method that reliably produces a classic chocolate malted milkshake at home—no special equipment beyond a blender.
Step-by-step:
1. Pre-scoop your ice cream. Add 2–3 scoops of chocolate ice cream to the blender. If the ice cream is rock-hard, let it sit 3–5 minutes so it blends faster.
2. Add malt powder. Stir in 1 tablespoon of malt powder first. For a stronger malt flavor, increase up to 2–3 tablespoons (taste once it blends—malt blooms as it hydrates).
3. Add milk. Pour in 1/4 cup (about 60–75 ml) milk. Start here for a thicker, classic texture.
4. Add vanilla (and optional salt). Add 1/2 teaspoon vanilla extract and a pinch of salt if you’re using it.
5. Blend. Blend 15–30 seconds, depending on your blender power and the texture you want. Pause once to scrape the sides and bottom, then blend again.
6. Adjust consistency. If the shake is too thick, add milk 1 tablespoon at a time and blend briefly after each adjustment.
What “done” looks like: the mixture should be glossy, smooth, and thick enough that it holds shape briefly when poured. If it’s thin or foamy, it usually needs either less milk or a slightly shorter blend with better scraping.
Getting the Perfect Thickness

– Use less milk for a thicker, spoonable shake
– Blend longer for a smoother, more “classic” malt texture
– Chill glasses beforehand if you want it extra cold
Thickness is the defining quality of a good malted milkshake, because it signals proper emulsification of dairy fat and malt solids. The goal is a shake that feels dense, not watery—and smooth, not gritty.
Practical thickness controls:
– Milk is your primary lever.
– Start with 60–75 ml for classic thickness.
– Move up to 90 ml for a straw-friendly shake.
– Avoid going much beyond 120 ml if you want that diner-style “body.”
– Blend time affects texture.
Malt powder can take a little time to fully hydrate. A longer blend (especially with scraping) makes the malt feel smoother rather than powdery.
– Temperature matters.
Warm ingredients melt faster and can thin the shake quickly. For best results, chill your glasses and avoid leaving the blended shake sitting around.
If your shake turns out too thick: add milk in small increments and blend for 5–8 seconds.
If it turns out too thin: add a small spoonful of ice cream (or ice) and blend again. Do not keep adding malt powder to thicken—malt will change flavor intensity and may cause a dry, pasty finish.
Chocolate Flavor Variations

– Use chocolate syrup or cocoa powder for a deeper chocolate taste
– Try chocolate ice cream vs. vanilla + cocoa for different profiles
– Add a pinch of salt to make the chocolate flavor pop
Chocolate malted milkshakes are forgiving—you can tune the chocolate character without losing that classic malt backbone. The key is understanding what each add-in changes: syrup adds sweetness and gloss, cocoa adds intensity and bitterness, and ice cream base determines richness.
Variation ideas (choose one):
1. Deep chocolate with syrup (classic “counter” style):
Add 1–2 teaspoons chocolate syrup to the blender. This boosts sweetness and creates a darker, more dessert-like finish.
2. More cocoa intensity (less sweet, more chocolate-forward):
Replace part of the malt emphasis with 1 tablespoon cocoa powder (or add cocoa on top of malt). Blend thoroughly to prevent cocoa clumps.
3. Base swap for a different flavor profile:
– Chocolate ice cream gives a round, consistent chocolate flavor.
– Vanilla ice cream + cocoa yields a brighter, more “cocoa powder” taste that can feel less sweet and more grown-up.
4. Pinch of salt for flavor lift (recommended):
A tiny pinch helps chocolate taste more complex—especially if your malt powder is lightly sweet.
Flavor balancing tip: if you increase chocolate syrup, you may want to slightly reduce malt (or vice versa) so neither element overpowers the other.
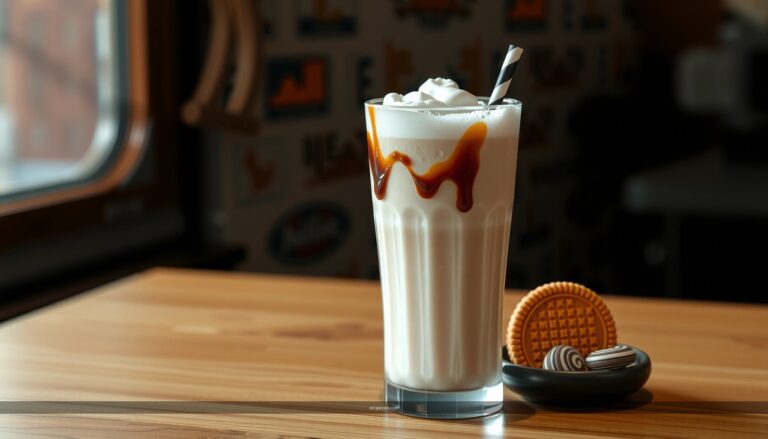
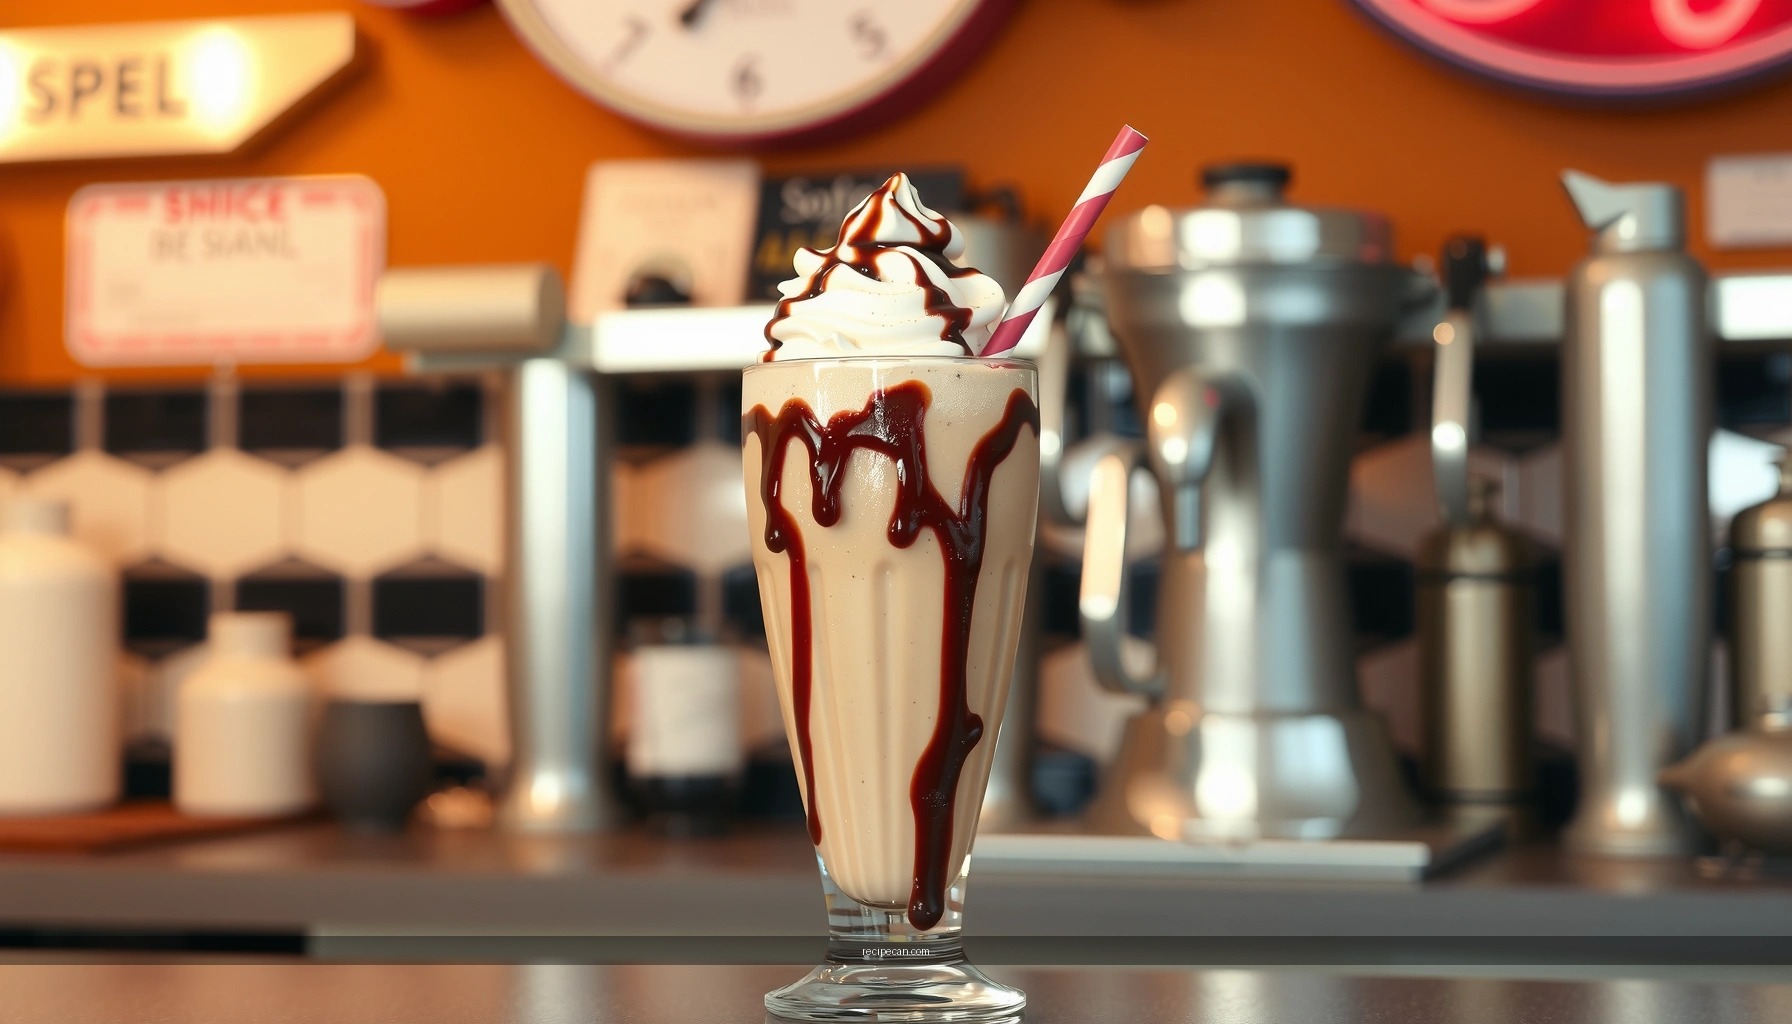
Serving and Toppings Ideas
– Top with whipped cream for a traditional look
– Drizzle chocolate syrup or dust with extra malt powder
– Serve immediately with a thick straw or spoon
Presentation isn’t just aesthetic—it affects perceived flavor. Toppings add aroma, texture contrast, and a “finishing” touch that makes the shake feel premium even when made at home.
Serve like a classic malt shop:
– Whipped cream swirl: pipe or spoon on top, then add a drizzle of chocolate syrup down the side.
– Malt powder dusting: a light sprinkle adds visual cues and a subtle extra malt note right at the first sip.
– Chocolate curls or shavings (optional): for a business-worthy, “event” dessert look.
How to serve for best experience:
– Serve immediately. Malted shakes start to relax as ice cream melts, which can reduce thickness and “mouthfeel.”
– Use the right utensil: a thick straw works well for balanced thickness; a spoon is best for very thick, spoonable shakes.
If you’re serving multiple people, prepare the blender batch and pour promptly. Stirring the shake after it sits can help, but re-blending briefly is safer for restoring smoothness.
Make-Ahead and Storage Tips
– Best enjoyed right away for maximum creaminess
– If needed, cover and refrigerate briefly, then stir and re-blend lightly
– Avoid long storage to prevent separation
A malted milkshake is best as a “fresh blend” product. Storage changes texture because the fat phase and the water phase separate as the mixture warms and rests—especially when malt powder has absorbed liquid.
What to do if you must prep:
– Best window: make it as close to serving as possible.
– Short refrigeration workaround: if you have to hold it, cover the blender container (or transfer to an airtight container) and refrigerate briefly—about 1–2 hours.
– Restore texture before serving: stir well, then re-blend for 5–10 seconds to recombine and smooth the malt.
Avoid long storage if you want that hallmark thick, classic feel. The longer it sits, the more likely it is to turn slightly grainy or lose its emulsified creaminess.
—
A great chocolate malted milkshake comes down to the right balance of malt, chocolate, and milk—blend until thick, then tweak to taste. Make it this week using the ingredient list and steps above, and try one variation (like chocolate syrup topping or extra cocoa) to find your perfect version.
References
- Google Scholar Google Scholar
https://scholar.google.com/scholar?q=chocolate+malted+milkshake+recipe - https://scholar.google.com/scholar?q=malted+milkshake+cocoa+milk+procedures Google Scholar
https://scholar.google.com/scholar?q=malted+milkshake+cocoa+milk+procedures - Google Scholar Google Scholar
https://scholar.google.com/scholar?q=milkshake+malted+milk+food+formulation - Milkshake
https://en.wikipedia.org/wiki/Milkshake - Malted milk
https://en.wikipedia.org/wiki/Malted_milk - Chocolate milk
https://en.wikipedia.org/wiki/Chocolate_milk - https://www.britannica.com/topic/milkshake
https://www.britannica.com/topic/milkshake - https://pubmed.ncbi.nlm.nih.gov/?term=malted+milk
https://pubmed.ncbi.nlm.nih.gov/?term=malted+milk - https://pubmed.ncbi.nlm.nih.gov/?term=milkshake
https://pubmed.ncbi.nlm.nih.gov/?term=milkshake - USDA FoodData Central
https://fdc.nal.usda.gov/