Find the easiest chocolate milkshake recipes you can make at home, with step-by-step instructions that deliver a thick, classic drink every time. Whether you’re using a blender or shaking by hand, the best methods balance real chocolate flavor, the right sweetness, and the smoothest texture in minutes. This guide answers which recipe to choose for the creamiest result—plus exactly what ingredients to use and how much.
Thick, creamy chocolate milkshakes are easy to make at home: blend cold milk, chocolate ice cream (or cocoa), and a quick sweetener until spoon-thick. The key is controlling temperature and blend time—do that, and you can reliably hit the “classic diner” texture whether you start with ice cream or cocoa powder.
Classic Chocolate Milkshake

– Blend chocolate ice cream with milk for a rich, spoonable shake
– Use cold ingredients to keep it thick and smooth
If you want the most “automatic” chocolate milkshake result, the classic method is the way to go: chocolate ice cream provides both fat and sugar, which naturally create the velvety body people associate with homemade milkshakes. Your job is simply to tune thickness and flavor balance.
Core approach (ice-cream based):
1. Start with cold ice cream (straight from the freezer, not a softened tub).
2. Add cold milk gradually to reach your thickness preference.
3. Blend briefly—you’re homogenizing and aerating, not cooking the mixture.
Recommended starting recipe (1 large shake):
– 2–3 cups chocolate ice cream
– 1/2 cup cold milk (whole milk gives the richest mouthfeel; 2% also works)
– 1–2 tsp chocolate syrup (optional, for deeper chocolate intensity)
– Pinch of salt (optional but improves cocoa perception)
How to get “spoonable” thickness:
– For a thick, spoonable shake, use less milk (about 1–3 tbsp milk at a time).
– For a drinkable shake with less viscosity, increase milk up to 1/2 cup.
Flavor calibration tip (important for consistency):
– If your ice cream is already very sweet, skip extra sweetener.
– If it’s more “dark” or cocoa-forward, add a small amount of syrup or sugar to prevent the shake from tasting flat.
Operational note: If you want a restaurant-style swirl, blend in short pulses (e.g., 5–10 seconds at a time) and stop once the shake looks glossy—not foamy.
Blend-Time Targets for Texture (Chocolate Milkshakes, Ice-Cream Based)
| # | Blend profile | Blend time (sec) | Expected texture | Typical finish | Best for | Outcome |
|---|---|---|---|---|---|---|
| 1 | Pulse + short homogenize | 10 | Chunky-smooth | Minimal aeration | Thick spoon shakes with add-ins | Texture may be uneven |
| 2 | Fast blend (single pass) | 20 | Softly smooth | Good glossy surface | Beginner-friendly thickness | ★ average texture |
| 3 | Balanced blend (most reliable) | 25–30 | Spoonable + uniform | Light foam only at edges | Classic “diner-style” consistency | ★ — top repeatability |
| 4 | Slightly longer smooth | 35 | Very smooth | More stable foam | Straw-drink texture | ★ ★ strong texture |
| 5 | Near-threshold (watch cooling) | 40 | Creamy but thinner | Slight warming risk | If your freezer is warm | ★ ★ but may thin fast |
| 6 | Over-blend (texture risk) | 50 | Broader melt + foam | Less spoon resistance | Only if ingredients are extra-frozen | ★ ★ quality drop |
| 7 | Deep over-blend | 65 | Drinkable, watery tendency | Heat + separation risk | Avoid for classic thickness | Thin / inconsistent |
Cocoa-Based Chocolate Milkshake

– Swap ice cream for cocoa powder and milk for a lighter option
– Add a sweetener (honey or sugar) to match your chocolate taste
A cocoa-based chocolate milkshake is the “control panel” option: you can dial intensity, sweetness, and body without relying on a large amount of ice cream. It’s also a great choice when you want a lighter shake but still want that unmistakably chocolate flavor.
Two reliable cocoa systems:
1. Cocoa + sugar (direct mix): best when you have strong cocoa powder and want a classic chocolate profile.
2. Cocoa + syrup (for richness): ideal when cocoa tastes slightly dry or bitter on its own.
Recommended baseline recipe (1 large shake):
– 3/4 cup cold milk
– 3 tbsp unsweetened cocoa powder
– 2–3 tbsp sugar (or 1.5–2 tbsp honey), adjusted to taste
– 1 tbsp vanilla ice cream or soft frozen yogurt (optional—adds fat/creaminess without turning it into a fully ice-cream-based shake)
– Optional thickener: 1/2 banana (for a naturally thick texture)
Prevent graininess (the cocoa problem):
Cocoa powder can sometimes clump and create a sandy texture. To avoid this:
– Whisk cocoa with a small amount of cold milk first (or use syrup to help dissolve).
– Then blend the combined mixture with the rest of the milk until smooth.
How to keep cocoa-based shakes from feeling “thin”:
– Use whole milk instead of skim.
– Add a hefty spoonful of Greek yogurt (if dairy is fine) for both body and tangy depth.
– Blend for the minimum time needed for smoothness—cocoa-based shakes tend to look “wetter” as you over-blend.
Thick & Creamy Chocolate Milkshake Tips

– Chill your glass and use thicker milk or less liquid
– Blend just until smooth to avoid over-warming
Texture is where milkshakes win or lose. Even when the flavor is great, thin or foamy consistency can disappoint. The good news: small process changes create a measurable improvement.
1) Use cold vessels and cold ingredients
– Chill your serving glass in the freezer for 5–10 minutes.
– Keep milk and ice cream truly cold; warm ingredients shorten the window before the shake thins.
2) Choose the right milk fat
– Whole milk creates a thicker mouthfeel than lower-fat options.
– If you’re using reduced-fat dairy, compensate with slightly less liquid or a touch more ice cream.
3) Blend time is not a suggestion
As a rule of thumb, blend 25–30 seconds for ice-cream-based shakes when you want a uniform, spoonable texture. Over-blending adds extra heat and too much foam, which can collapse into a thinner drink.
4) Control the “final pour”
If your shake lands too thick or too thin:
– Too thick: add 1 tbsp milk, blend 5 seconds, re-check.
– Too thin: add 1/2 cup ice cream (or a couple tablespoons extra cocoa + sugar for cocoa shakes), then blend 10–15 seconds.
5) Think in spoon tests
Instead of guessing by sight:
– Dip a spoon—if it coats thickly and falls slowly, you’re in the target zone.
– If it streams like milk, it’s time to reduce liquid or increase frozen ingredients.
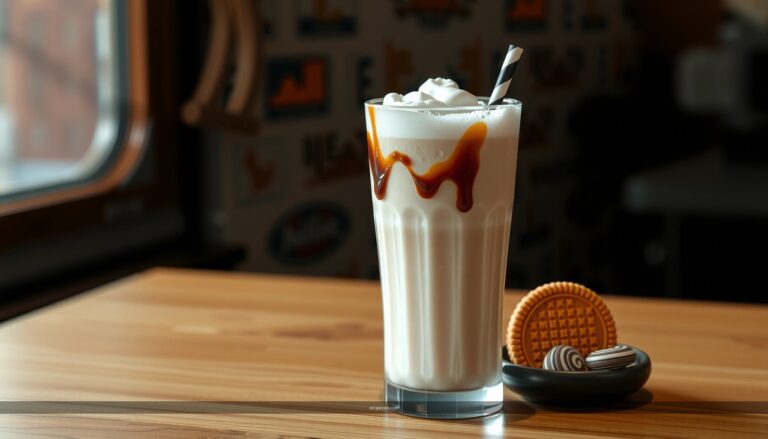
Add-Ins and Toppings

– Try chocolate syrup, espresso powder, or vanilla for extra depth
– Top with whipped cream, chocolate chips, or crushed cookies
Milkshake customization is where home cooks can outperform cafés—because you can build the chocolate profile you actually want. Add-ins work best when you treat them as flavor intensifiers (not extra “bulk” only).
High-impact mix-ins (blend-in)
– Chocolate syrup (1–2 tbsp): boosts sweetness and chocolate intensity instantly.
– Espresso powder (1/4–1/2 tsp): makes chocolate taste deeper without tasting like coffee (it’s a flavor amplifier).
– Vanilla extract (1/2 tsp): smooths bitterness and makes the chocolate taste rounder.
Texture add-ins
– Chocolate chips: fold in after blending (or pulse briefly) so they don’t fully disappear.
– Crushed cookies or brownies: mix-in after blending for visible specks and better bite.
Topping strategy (for both taste and presentation)
– Whipped cream + chocolate shavings for classic indulgence.
– Crushed cookies for crunch.
– A drizzle pattern: syrup in swirls inside the glass before pouring the shake creates a “café-style” look.
Pairing ideas (quick wins)
– Chocolate + espresso powder (mocha-like, bold)
– Chocolate + vanilla + crushed Oreos/cookies (dessert-forward)
– Chocolate + peanut butter (1–2 tbsp) for a “thick bar” vibe
Dairy-Free Chocolate Milkshake Options
– Use dairy-free ice cream or a creamy plant milk base
– Choose a sweetener that complements cocoa without overpowering it
Dairy-free doesn’t mean flavor-free. The trick is reproducing two functions dairy typically provides: fat (creaminess) and protein (body). With the right plant milk and a creamy dairy-free ice cream, you can get surprisingly close to classic thickness.
What to use
– Dairy-free ice cream: choose one labeled creamy or “fat-rich” (often based on coconut, oat, or almond blends).
– Plant milk base: oat milk is usually the most milkshake-like due to its natural thickness.
– Optional creaminess boost: add 1–2 tbsp coconut cream if your base is too light.
Cocoa-based dairy-free baseline
– 3/4 cup oat milk (or other creamy plant milk)
– 3 tbsp cocoa powder
– 2–3 tbsp sugar or maple syrup
– Pinch of salt and 1/2 tsp vanilla
Sweetener selection matters
– Maple syrup adds caramel notes that pair well with cocoa.
– Sugar keeps the flavor more “pure chocolate.”
– Honey works, but it can slightly shift the final profile depending on the cocoa and temperature.
Texture caution
Some dairy-free products thin quickly as they warm. To preserve thickness:
– Blend fast (short pulses).
– Serve immediately.
– Chill the glass and keep ingredients cold right up until blending.
Serving Ideas and Storage
– Serve immediately with a straw and thick garnish
– If needed, refrigerate briefly and re-stir (or re-blend) before drinking
Milkshakes are best when served at peak thickness. Since melting is inevitable, think of storage as a “rescue plan,” not a long-term strategy.
Best serving practices
– Use a straw and spoon combo: thick shakes coat the straw but still benefit from a spoon for toppings.
– Add garnish right before serving so it stays crisp (cookies) or stable (whipped cream).
How to store (if you must)
– Refrigerate for up to 1–2 hours in a sealed container.
– When ready to drink, stir vigorously. If the shake has separated, re-blend for 10–15 seconds with no additional liquid.
What not to do
– Don’t let it sit at room temperature. Even 20–30 minutes can noticeably reduce thickness and cause separation—especially for cocoa-based or dairy-free versions.
Timing strategy for hosting
If you’re serving multiple people:
– Pre-measure ingredients.
– Blend one shake at a time.
– Have toppings ready so you can garnish immediately after blending.
Chocolate milkshake recipes are all about balancing cold, chocolatey flavor with the right thickness—whether you prefer classic ice-cream style or a cocoa-based shake. Choose your method, follow the thickness and blend-time tips (especially avoiding over-blending), then personalize with your favorite add-ins and toppings. Make it tonight, adjust once using the spoon test, and you’ll quickly find a signature combination you can repeat with confidence.
References
- Milkshake
https://en.wikipedia.org/wiki/Milkshake - Chocolate milk
https://en.wikipedia.org/wiki/Chocolate_milk - https://www.britannica.com/topic/milkshake
https://www.britannica.com/topic/milkshake - https://www.bbc.co.uk/food/recipes/chocolate_milkshake_70910
https://www.bbc.co.uk/food/recipes/chocolate_milkshake_70910 - https://www.theguardian.com/food/2012/aug/17/chocolate-milkshake-recipe
https://www.theguardian.com/food/2012/aug/17/chocolate-milkshake-recipe - https://www.nytimes.com/guides/special-occasion-holiday-recipes/milkshake
https://www.nytimes.com/guides/special-occasion-holiday-recipes/milkshake - Google Scholar Google Scholar
https://scholar.google.com/scholar?q=chocolate+milkshake+recipe - https://scholar.google.com/scholar?q=milkshake+formulation+ice+cream+milk+chocolate+syrup+recipe Google Scholar
https://scholar.google.com/scholar?q=milkshake+formulation+ice+cream+milk+chocolate+syrup+recipe - Google Scholar Google Scholar
https://scholar.google.com/scholar?q=chocolate+milkshake+emulsion+process+home+recipe - https://pubmed.ncbi.nlm.nih.gov/?term=milkshake+composition+recipe
https://pubmed.ncbi.nlm.nih.gov/?term=milkshake+composition+recipe