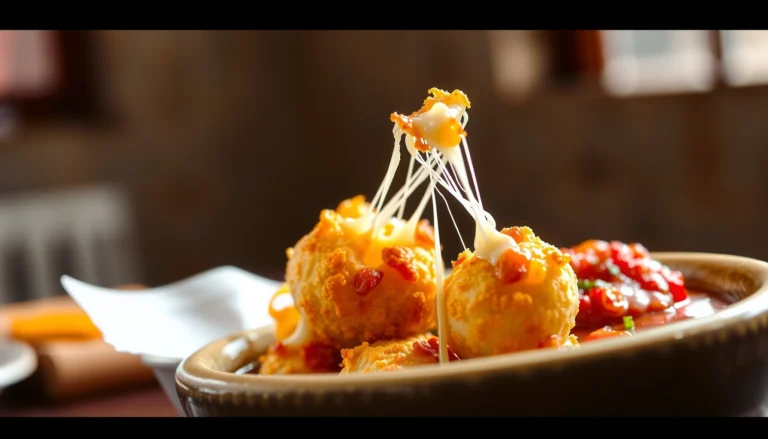
Get a sesame balls recipe that delivers the one result that matters: crisp, golden exteriors with a sweet, tender center. This easy-to-follow method walks you through the dough, fillings, shaping, and frying so your sesame balls turn out right on the first try. If you’ve struggled with pale color or chewy texture before, this version is your clear win.
Sesame balls are simple to make at home: shape glutinous rice dough into small balls, fry until deeply golden, and finish with sesame for a crisp shell and tender, chewy center. This sesame balls recipe breaks the process into practical steps—mixing and resting the dough, shaping for even cooking, frying at the right temperature, and rolling while warm—so you can reliably get that classic “crackly outside” texture.
Sesame balls (often called Jian Dui in some regions) are one of the most forgiving desserts you can produce when you control two variables: dough hydration and frying temperature. Get those right, and you’ll avoid the common failure modes—greasy balls, pale color, or doughy interiors.
Sesame Balls Frying Bench Guide (Oil Temp vs. Doneness)
| # | Batch (Makes) | Target Oil Temp | Typical Fry Time | Color Goal | Repeatability Score |
|---|---|---|---|---|---|
| 1 | 18–20 balls | 175°C | 3.0–3.5 min | Deep golden | ★★★ ★☆ |
| 2 | 24–26 balls | 170°C | 3.2–3.8 min | Golden with darker freckles | ★★★★☆ |
| 3 | 30–32 balls | 165°C | 3.6–4.4 min | Golden, not brown | ★★★☆☆ |
| 4 | 18–20 balls | 160°C | 4.2–5.2 min | Pale golden | ★★☆☆☆ |
| 5 | 24–26 balls | 180°C | 2.6–3.1 min | Deep golden, risk of over-browning | ★★★☆☆ |
| 6 | 30–32 balls | 185°C | 2.3–2.8 min | Very dark quickly | ★☆☆☆☆ |
| 7 | 20–22 balls | 175°C (re-stabilized) | 3.1–3.6 min | Golden with uniform browning | ★★★★★ |
Ingredients for Sesame Balls

To make sesame balls that are crisp outside and chewy inside, the ingredient strategy is straightforward: build a dough that stays elastic during frying, add sweetness in the dough and/or filling, and coat with sesame that adheres while warm.
Base dough ingredients
– Glutinous rice flour: The key structural ingredient for the chewy center.
– Sugar: Balances the natural mildness of the rice flour and supports a lightly caramelized exterior.
– Water: Hydrates the flour to form a pliable dough. Hot vs. cool water can slightly change elasticity, so keep your method consistent.
– White sesame seeds: Provide the signature aroma and texture. Toasting is optional, but it can improve fragrance.
Optional filling
– Sweet red bean paste (classic) or another thick sweet filling (ensure it’s not runny).
– If you’re working for speed, you can make no-filling sesame balls by shaping the dough into balls without any center.
Frying
– Neutral oil (like canola, vegetable, or sunflower oil): Clean flavor prevents sesame and sweet notes from getting muddy.
– Use enough oil to maintain stable frying temperature when you add balls.
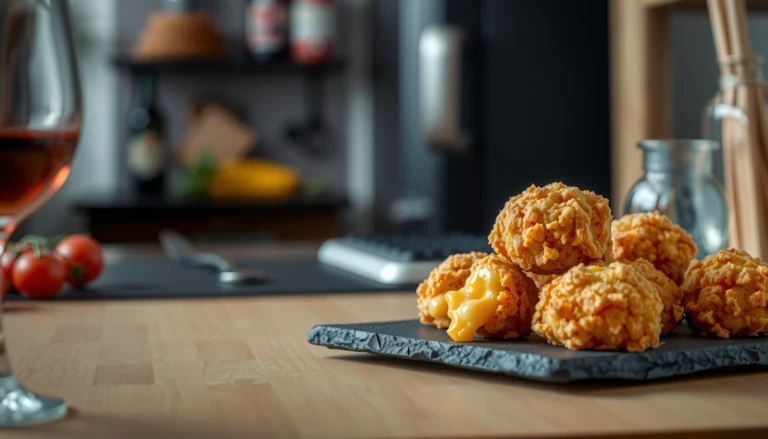
Pro tip (for professional consistency): Aim for sesame balls that are roughly the same diameter—typically around 2.5–3 cm. Uniform size reduces variability in fry time and prevents a batch where some pieces are brown but undercooked.
Make the Dough

The dough is where most “good intentions” fail—either it’s too dry (hard to seal, cracks while frying) or too wet (oil absorption and loss of shape). Your goal is smooth, pliable, and slightly tacky—not sticky enough to glue to your hands.
1. Mix thoroughly until smooth
– Combine glutinous rice flour and sugar first, then add water gradually.
– Stir until the dough comes together and looks cohesive.
– For best texture, avoid leaving dry pockets; unmixed flour often shows up later as uneven chew.
2. Cook or gelatinize if your method requires it
– Many sesame ball methods involve heating part of the mixture or using hot water to encourage gelatinization.
– If your dough feels overly firm immediately after mixing, that’s usually a hydration issue. Add water in small increments and mix again.
3. Rest briefly
– Resting—often 10–20 minutes—allows hydration to fully distribute.
– Rested dough holds shape better and stretches more cleanly when you seal filling.
4. Adjust texture with small increments
– If it’s cracking or feels stiff: add a teaspoon of water and knead again.
– If it’s overly sticky: lightly dust with a small amount of glutinous rice flour, then knead just until workable.
– The adjustment should be incremental; large changes usually push you past the ideal window.
Analytical takeaway: Glutinous rice flour forms a network that becomes chewy when properly heated. Under-hydration yields brittle structure; over-hydration increases steam pockets that can rupture and cause greasy surfaces.
Shape and Fill

Shaping is not just presentation—it’s process control. Correct sealing and sizing help keep filling where it belongs and maintain that characteristic contrast: crisp shell + chewy core.
1. Roll into even balls
– Lightly dust your hands if needed.
– Roll each ball to the same diameter so frying time stays consistent.
2. If using filling, don’t overstuff
– Flatten each ball into a cup with slightly thicker edges.
– Add a small spoonful of sweet red bean paste (or your filling), then close the dough over it.
– Seal edges firmly by pressing and pinching, then smooth the ball seam side down.
3. Aim for a clean seal
– A weak seal leads to filling leakage, which can contaminate the oil and darken the remaining balls.
– If the seam opens when you roll, your dough is likely too dry—knead in a few drops of water and try again.
4. Uniform size = uniform doneness
– Differences in size translate directly to differences in internal heating.
– For batch cooking, measure by count and visually compare thickness/diameter before frying.
Speed option: For a no-filling version, skip shaping “cups” entirely. Roll, coat with sesame, and fry—same process, fewer failure points.
Fry Until Golden and Crispy

Frying is the critical “finish” stage. Even excellent dough can fail if the oil temperature swings or the balls cook too close together. Your mission is stable heat + enough surface agitation to prevent sticking.
1. Heat oil to the right temperature
– If you don’t have a thermometer, test with one small piece of dough: it should bubble gently and rise gradually.
– Too cool = pale, greasy results.
– Too hot = dark crust before the inside cooks.
2. Fry in batches
– Overcrowding drops oil temperature and encourages oil absorption.
– Work in small groups so the temperature recovers quickly.
– Gently stir or rotate the balls early to prevent sticking.
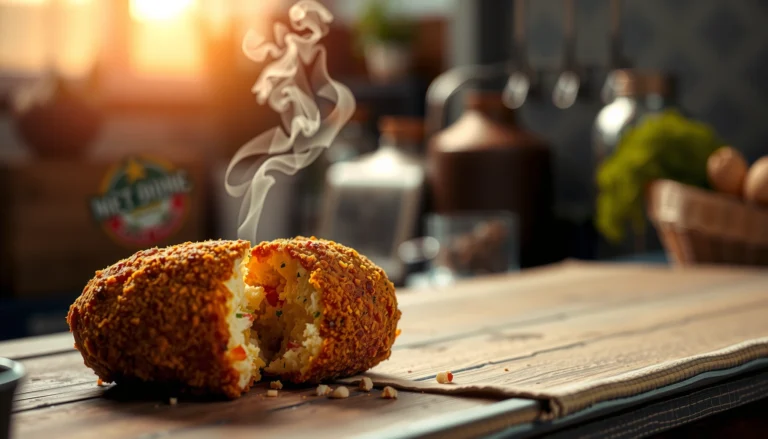
3. Remove at deep golden
– Look for a strong golden color with a more “set” surface, not just lightly colored.
– Drain thoroughly so excess oil doesn’t soften the sesame coating.
4. Manage carryover
– As sesame balls rest after frying, they keep cooking slightly due to residual heat.
– Removing them at the moment they look optimally golden helps prevent a dry center.
The data guide above summarizes how fry temperature and batch size affect repeatability—use it as a practical lever to dial in your method.
Roll in Sesame Seeds
Sesame adhesion is time-sensitive. Roll while the balls are warm so the exterior is still slightly tacky—this improves coverage and reduces sesame shedding.
1. Roll immediately after draining
– Let them drain only briefly so the surface isn’t dripping oil.
– Then roll in sesame seeds.
2. Press gently for full coverage
– Press lightly to help sesame stick without crushing the crisp shell.
– If you crush the coating, you lose the protective layer that keeps the inside chewy.
3. Let cool slightly
– A short rest allows the sesame layer to set and the crust to firm up.
– Avoid fully cooling right away if your goal is maximum crispness—serve warm for best texture contrast.
Flavor note: White sesame provides a clean, nutty sweetness. If you want deeper aroma, lightly toast sesame seeds first, but keep an eye on timing so they don’t burn.
Storage and Reheating Tips
Sesame balls are best immediately after frying, but with the right storage and reheating approach, you can extend quality.
1. Store cooled sesame balls airtight
– Wait until fully cool to prevent condensation inside the container.
– Use an airtight container to limit moisture absorption, which softens the crust.
2. Reheat to restore crispness
– Oven or air fryer is your best option.
– Use moderate heat and reheat until warmed through and re-crisped.
– Microwaving will typically soften the shell and reduce the crisp sesame crunch.
3. Eat sooner for best texture
– Even with good reheating, fried pastry texture declines over time.
– Plan to eat within 1–2 days for the closest experience to fresh.
Operational guidance: If you’re producing for an event or business setting, fry in waves close to serving time, and reheat in an air fryer in small batches to maintain consistent texture.
Sesame balls are best when fried to a deep golden color and coated with sesame while warm. Use this recipe to dial in dough consistency, shape uniformity, and frying control—so you reliably get a crisp exterior and tender, chewy center. Try the no-filling option first if you want speed and simplicity, then add a sweet filling once you’re comfortable with dough handling.
References
- Google Scholar Google Scholar
https://scholar.google.com/scholar?q=sesame+balls+recipe - Google Scholar Google Scholar
https://scholar.google.com/scholar?q=jian+dui+sesame+balls+recipe - Google Scholar Google Scholar
https://scholar.google.com/scholar?q=tangyuan+sesame+balls+recipe - Jian dui
https://en.wikipedia.org/wiki/Sesame_ball - Jian dui
https://en.wikipedia.org/wiki/Jian_dui - Tangyuan
https://en.wikipedia.org/wiki/Tangyuan - Glutinous rice ball
https://en.wikipedia.org/wiki/Glutinous_rice_ball - https://en.wikipedia.org/wiki/Chinese_dessert
https://en.wikipedia.org/wiki/Chinese_dessert - List of Chinese desserts
https://en.wikipedia.org/wiki/List_of_Chinese_desserts - List of desserts
https://en.wikipedia.org/wiki/List_of_desserts