If you want a simple and effective way to incorporate the invigorating scent and exfoliating properties of coffee into your skincare routine, this easy coffee soap recipe is your best bet. This guide reveals step-by-step instructions to create a luxurious soap that not only cleanses but also rejuvenates your skin. Say goodbye to complicated formulations and hello to a delightful DIY experience that enhances your daily routine.
Making your own coffee soap is a delightful way to blend your passion for coffee with skincare. This easy DIY project allows you to create aromatic, exfoliating bars that cleanse the skin while providing a refreshing scent. Not only is it simple to make, but it also serves as a thoughtful gift for friends and family who appreciate handmade products.
Recipe Overview

Coffee soap is a unique and luxurious addition to your skincare routine, marrying the invigorating properties of coffee with the benefits of handmade soap. This recipe is particularly appealing to coffee enthusiasts, as it combines natural ingredients to create a product that leaves the skin feeling revitalized and smooth. With a short preparation time and minimal skill required, you can expect to produce approximately six bars of this delightful soap, perfect for personal use or as gifts for loved ones.
Time Required

– 🕐 Prep Time: 20 minutes
– ⏱ Total Time: 1 hour (includes cooling time)
Ingredients

The key to a successful coffee soap lies in the quality of the ingredients used. Fresh, high-quality coffee grounds not only contribute to the soap’s exfoliating properties but also enhance its aromatic profile. Here’s what you will need:
Main Ingredients
– 1 pound of melt-and-pour soap base (glycerin or shea butter)
– 1/4 cup of brewed coffee (cooled)
– 1/4 cup of coffee grounds
– Optional: 1 teaspoon of essential oil (like vanilla or coffee)
The melt-and-pour soap base is a wonderful choice for beginners, as it eliminates the need for lye and complex procedures. The brewed coffee adds a rich scent and color, while the coffee grounds provide natural exfoliation.
Step-by-Step Instructions

1. Prepare the Soap Base: Begin by cutting the melt-and-pour soap base into small cubes. Place these cubes in a microwave-safe bowl, and melt them in the microwave in 30-second intervals. Stir the mixture after each interval to ensure even melting, avoiding overheating that could cause bubbling.
2. Add Coffee: Once the soap base is completely melted, carefully stir in the cooled brewed coffee and coffee grounds. Make sure to mix well to achieve an even distribution throughout the soap.
3. Essential Oils (Optional): For those who wish to enhance the aroma, you can add the essential oil at this point. A teaspoon of vanilla or coffee essential oil complements the coffee scent beautifully. Mix thoroughly to ensure the oil is well incorporated.
4. Mold the Soap: Pour the mixture into your soap molds, filling each mold to the top. Silicone molds are particularly useful, as they allow for easy removal once the soap has set.
5. Cool and Set: Allow the soap to cool at room temperature for about 30 to 45 minutes, or until it is completely hardened. If you’re short on time, placing the molds in the refrigerator can speed up the setting process.
6. Remove and Store: Once the soap is fully set, gently remove the bars from the molds. Store them in an airtight container until you are ready to use or gift them.
Heat & Temperature Guide
Cooking Method
The melt-and-pour method is favored for its simplicity and safety, especially for those new to soap making. It allows for creativity without the complexities of traditional cold-process soap making.
Temperature & Timing
– Melting Temperature: Aim for a gentle melt at around 60°C (140°F) to prevent overheating.
– Cooling Temperature: Allow the soap to cool down to room temperature, approximately 20-25°C (68-77°F).
How to Know It’s Done
You’ll know the soap is ready when it feels firm to the touch and has completely cooled down, without any softness or stickiness.
What to Avoid & Precautions
Making coffee soap is relatively straightforward, but there are a few common pitfalls to be aware of. Understanding these can help ensure a successful batch every time.
Overheating the Soap Base
If the soap base is melted too quickly, it can bubble and become unusable. To avoid this, always melt in short bursts and stir frequently.
Not Mixing Well
If the coffee grounds settle at the bottom of the mixture, the bars will have uneven texture. Mix thoroughly before pouring into molds to prevent this issue.
Common Mistakes & How to Fix Them
Overheating the Soap Base
As mentioned, overheating can lead to bubbling and a compromised texture. Always use careful, short intervals in the microwave to prevent this.
Uneven Distribution of Coffee Grounds
If the coffee grounds settle, your soap will have an uneven texture. Make sure to stir well after adding them to the melted soap base.
Not Allowing Enough Cooling Time
Rushing the cooling process can lead to soft soap that doesn’t hold its shape. Be patient and allow sufficient time for the soap to harden completely.
How to Serve
Plating & Presentation
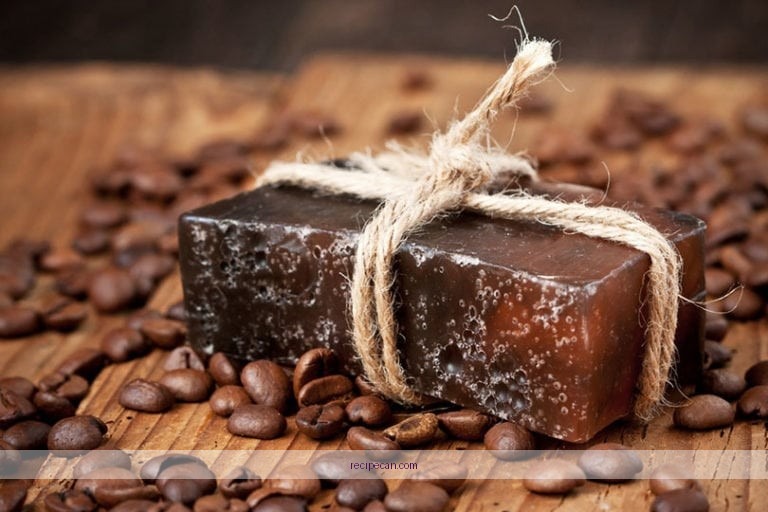
For an elegant touch, consider wrapping your bars in decorative paper or placing them in a gift box. This not only enhances presentation but also makes them perfect for gifting.
What Goes Well With It
Coffee soap pairs wonderfully with other coffee-related products, such as coffee scrubs or body lotions that feature similar scents.
Storage
Keep the soap bars in a cool, dry place away from direct sunlight. This will help maintain their quality and prolong their shelf life.
Making your own coffee soap is an enjoyable and beneficial project that allows you to create a luxurious product tailored to your skincare needs. With just a few simple steps and quality ingredients, you’ll have beautiful, aromatic bars ready to use or gift. Embrace the process, and enjoy the satisfaction of crafting your own skincare products at home!
Frequently Asked Questions
What are the essential ingredients for a basic coffee soap recipe?
A basic coffee soap recipe typically requires a few essential ingredients: coconut oil, olive oil, palm oil, lye (sodium hydroxide), distilled water, and ground coffee. You can also add essential oils for fragrance and natural exfoliants like coffee grounds to enhance texture. These ingredients work together to create a moisturizing soap with the invigorating scent of coffee.
How do I make coffee soap at home using a cold process method?
To make coffee soap at home using the cold process method, start by measuring your oils and lye accurately. Combine the lye with distilled water, letting it cool, while melting the oils together. Once both mixtures reach a similar temperature, slowly mix them together, add your coffee grounds and any desired fragrances, then pour into molds. Allow the soap to cure for 4-6 weeks before use for the best results.
Why should I use coffee in my soap recipe?
Incorporating coffee into your soap recipe provides multiple benefits, including natural exfoliation and antioxidant properties that can be beneficial for the skin. Coffee is known for its ability to improve circulation and can help reduce the appearance of cellulite when used in soaps. Additionally, the rich aroma of coffee adds a delightful scent that enhances the overall bathing experience.
What is the best type of coffee to use in a coffee soap recipe?
The best type of coffee to use in a coffee soap recipe is freshly ground coffee beans, preferably coarsely ground to avoid a gritty texture in the final product. You can choose your favorite coffee type, whether it’s Arabica or Robusta, based on your scent preference and desired exfoliation level. Using leftover brewed coffee can also enhance the fragrance and provide additional skin-nourishing benefits.
Which common mistakes should I avoid when making coffee soap?
Common mistakes to avoid when making coffee soap include not properly measuring lye and oils, which can lead to an unsafe reaction or poor soap quality. Additionally, adding coffee grounds that are too fine can result in a muddy texture, so it’s best to use coarsely ground coffee. Lastly, ensure that your soap is adequately cured for the recommended time to allow the lye to fully saponify and prevent skin irritation.
References
- Soap
https://en.wikipedia.org/wiki/Soap - Checking your browser – reCAPTCHA
https://www.ncbi.nlm.nih.gov/pmc/articles/PMC5796021/ - Checking your browser – reCAPTCHA
https://www.ncbi.nlm.nih.gov/pmc/articles/PMC4533874/ - https://www.sciencedirect.com/topics/agricultural-and-biological-sciences/coffee
https://www.sciencedirect.com/topics/agricultural-and-biological-sciences/coffee - Google Scholar Google Scholar
https://scholar.google.com/scholar?q=coffee+soap+recipe - Google Scholar Google Scholar
https://scholar.google.com/scholar?q=benefits+of+coffee+in+soap - Google Scholar Google Scholar
https://scholar.google.com/scholar?q=homemade+soap+recipes - https://www.britannica.com/topic/soap
https://www.britannica.com/topic/soap - https://www.who.int/news-room/fact-sheets/detail/soap-and-water
https://www.who.int/news-room/fact-sheets/detail/soap-and-water - https://www.cdc.gov/handwashing/when-how-handwashing.html
https://www.cdc.gov/handwashing/when-how-handwashing.html