Making yeasted donuts at home is easier than you might think! With just a few simple ingredients and some patience, you can create fluffy, delicious donuts that rival any bakery. This guide provides a straightforward recipe along with tips for perfecting your yeasted donuts, ensuring you can enjoy these treats fresh from your kitchen.
Ingredients You’ll Need
To create the perfect yeasted donuts, you will need a handful of essential ingredients. Each component plays a crucial role in achieving the desired texture and flavor.
– All-Purpose Flour: This is essential for a soft texture. The gluten content in all-purpose flour gives the donuts their structure, allowing them to rise beautifully and maintain a light, airy quality.
– Active Dry Yeast: This ingredient is what gives the donuts their lightness and rise. Yeast ferments the sugars in the dough, producing carbon dioxide that causes the dough to expand. Using fresh yeast will yield the best results.
– Additional Ingredients: You will also need sugar, salt, milk, eggs, and butter. Sugar not only sweetens the donuts but also helps to activate the yeast. Milk adds moisture and richness, while eggs contribute to the structure and flavor. Butter enhances the overall taste and texture.
Preparing the Dough
The first step in making yeasted donuts is to prepare the dough. This process is vital in developing the flavors and ensuring the yeast is properly activated.
– Activate the Yeast: Begin by combining the active dry yeast with warm milk and a teaspoon of sugar in a bowl. Allow it to sit for about 5-10 minutes until it becomes frothy. This indicates that the yeast is alive and ready to work.
– Mix Ingredients: In a large mixing bowl, combine the activated yeast mixture with the remaining sugar, salt, and eggs. Gradually add in the all-purpose flour, mixing until a rough dough forms. The dough should be slightly sticky but manageable.
– Add Butter: Once the dough starts to come together, incorporate softened butter. This will enrich the dough, making it tender and flavorful. Continue to mix until the dough is smooth and elastic.
Kneading and Rising
Kneading and rising are critical steps that contribute to the texture of your donuts.
– Knead the Dough: Transfer the dough onto a lightly floured surface and knead it for about 5-10 minutes. This process develops the gluten, which gives the donuts their structure. You should aim for a smooth, elastic dough that springs back when poked.
– First Rise: Place the kneaded dough in a greased bowl, cover it with a clean cloth or plastic wrap, and let it rise in a warm, draft-free area. The dough should double in size, which typically takes about 1-2 hours. This is the fermentation process where the yeast works its magic.
Shaping the Donuts
After the dough has risen, it’s time to shape your donuts.
– Roll Out the Dough: Once the dough has doubled in size, punch it down to release any air bubbles. Roll it out on a floured surface to about 1/2 inch thick.
– Cut the Donuts: Use a donut cutter or two round cookie cutters (one larger for the outer part and one smaller for the hole) to cut out your donuts. Place the cut donuts on a parchment-lined baking sheet.
– Second Rise: Allow the shaped donuts to rise again for about 30 minutes. This second rise is crucial for achieving extra fluffiness in your finished donuts.
Frying the Donuts
Frying is where the magic happens, transforming your dough into golden, fluffy donuts.
– Heat the Oil: In a deep pot or fryer, heat oil to 350°F (175°C). Use a thermometer for accurate temperature control. Proper oil temperature is crucial; too hot and the donuts will burn, too cool and they will absorb excess oil.
– Fry the Donuts: Carefully place the risen donuts into the hot oil in batches. Fry each donut for about 1-2 minutes on each side, or until they are golden brown. Use a slotted spoon to remove them and place them on a paper towel-lined plate to drain excess oil.
Glazing and Topping Options
Now that your donuts are fried, it’s time to add some finishing touches.
– Prepare a Simple Glaze: A classic glaze can be made by whisking together powdered sugar and milk until smooth. Adjust the consistency to your liking by adding more sugar or milk.
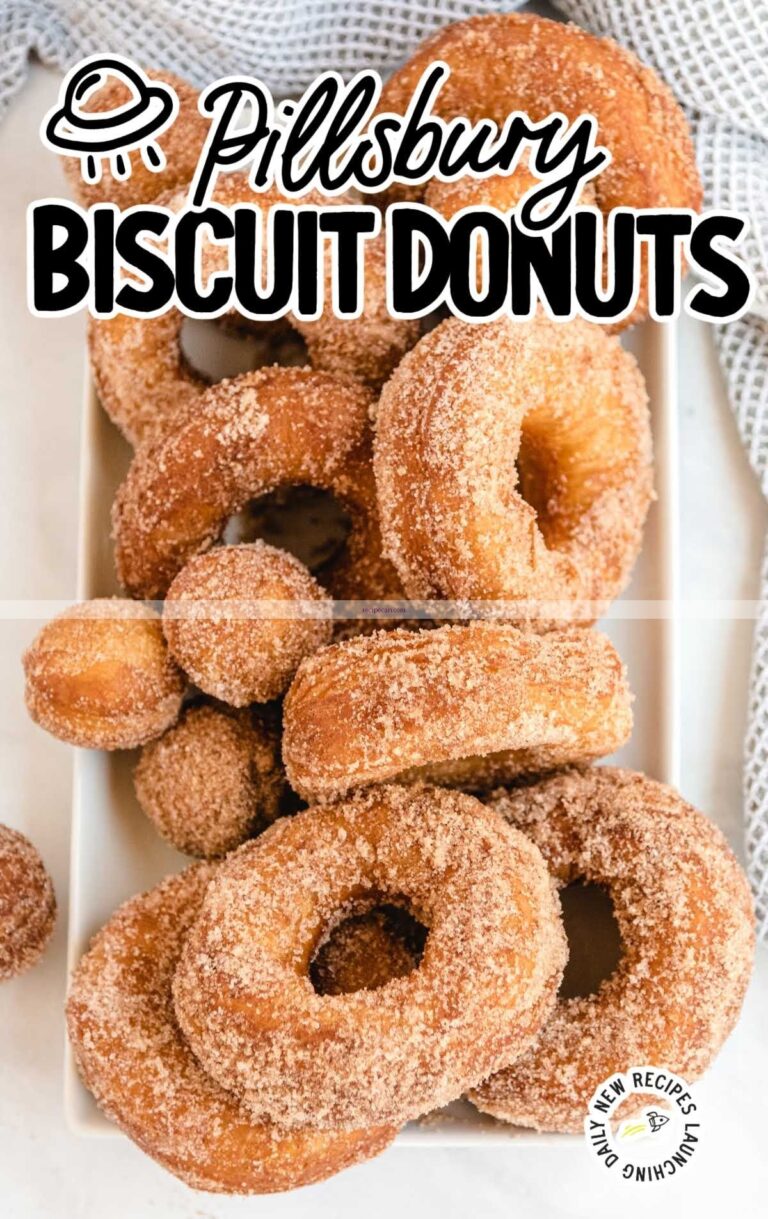
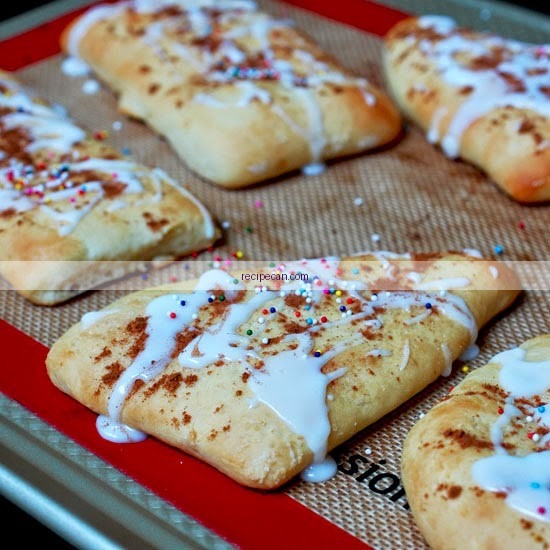
– Add Toppings: Once the glaze is applied, consider adding sprinkles, chocolate drizzle, or even powdered sugar for an extra layer of flavor and visual appeal. You can also experiment with various toppings such as toasted coconut or nuts.
Storage Tips
Storing your donuts properly is essential for maintaining their freshness.
– Airtight Container: After the donuts have cooled completely, store them in an airtight container at room temperature. This will help maintain their soft texture for up to 2 days.
– Reheating: If you want to enjoy them warm, simply reheat the donuts in the oven at a low temperature for a few minutes. This will restore their original texture, making them taste freshly made again.
Top 7 Types of Donuts by Popularity (2024)
| # | Donut Type | Popularity (%) | Average Price ($) | Consumer Rating |
|---|---|---|---|---|
| 1 | Glazed | 30% | 1.50 | ★★★★☆ |
| 2 | Chocolate Frosted | 25% | 1.75 | ★★★★★ |
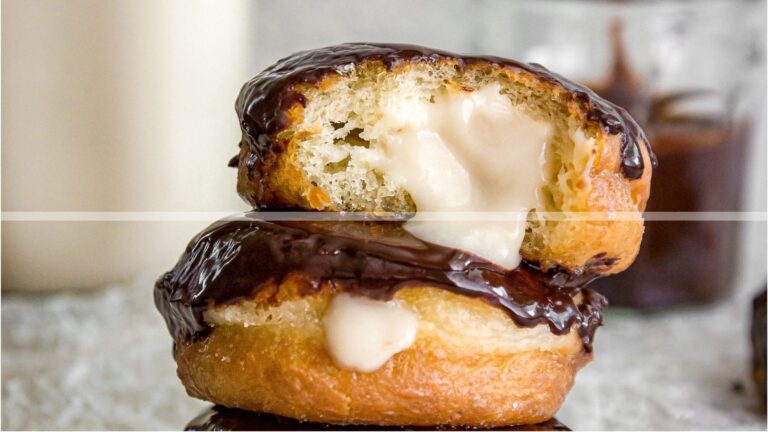
| 3 | Boston Cream | 20% | 2.00 | ★★★★☆ |
| 4 | Jelly Filled | 15% | 1.50 | ★★★☆☆ |
| 5 | Maple Bar | 10% | 2.25 | ★★★★☆ |
| 6 | Old Fashioned | 5% | 1.50 | ★★★☆☆ |
Popularity of Donut Types (%)
There’s nothing quite like the satisfaction of biting into a freshly made yeasted donut. By following this recipe, you can enjoy the warm, fluffy goodness at home. Gather your ingredients, roll up your sleeves, and dive into the delightful world of homemade donuts! With practice and attention to detail, you’ll master this art and create irresistible treats for any occasion.
Frequently Asked Questions
What ingredients do I need for a yeasted donut recipe?
To make yeasted donuts, you will need all-purpose flour, active dry yeast, sugar, milk, eggs, butter, and salt. These ingredients work together to create a soft and fluffy texture that is characteristic of traditional donuts. Make sure to use fresh yeast for the best results, as it is crucial for the rising process.
How do I ensure my yeasted donuts rise properly?
To ensure your yeasted donuts rise properly, it’s important to activate the yeast correctly by mixing it with warm milk and a bit of sugar before combining it with the flour. Additionally, allow the dough to rise in a warm, draft-free environment until it has doubled in size, which typically takes about 1 to 2 hours. Cover the dough with a damp cloth to retain moisture during the rising process.
Why are my yeasted donuts dense instead of fluffy?
Dense yeasted donuts can result from a few factors, including using too much flour, not allowing the dough to rise long enough, or using expired yeast. Make sure to measure flour accurately using the spoon-and-level method, and always check the expiration date on your yeast. Proper kneading and resting time are also essential for achieving that light and airy texture.
What is the best frying temperature for yeasted donuts?
The best frying temperature for yeasted donuts is between 350°F to 375°F (175°C to 190°C). This temperature range ensures that the donuts cook evenly and develop a golden-brown exterior without becoming greasy. Use a kitchen thermometer to maintain the oil temperature, and avoid overcrowding the pan to ensure consistent frying.
Which toppings are best for homemade yeasted donuts?
The best toppings for homemade yeasted donuts vary based on personal preference, but popular choices include classic powdered sugar, chocolate glaze, or a cinnamon sugar mix. You can also experiment with fillings like custard or fruit preserves to add flavor. For a gourmet touch, consider drizzling with caramel or adding sprinkles for a festive look.
References
- Doughnut
https://en.wikipedia.org/wiki/Donut - https://www.bbc.co.uk/food/recipes/doughnuts_90344
https://www.bbc.co.uk/food/recipes/doughnuts_90344 - https://www.sciencedirect.com/topics/food-science/doughnut
https://www.sciencedirect.com/topics/food-science/doughnut - https://www.ncbi.nlm.nih.gov/pmc/articles/PMC6471131/
https://www.ncbi.nlm.nih.gov/pmc/articles/PMC6471131/ - Google Scholar Google Scholar
https://scholar.google.com/scholar?q=yeasted+donut+recipe - Google Scholar Google Scholar
https://scholar.google.com/scholar?q=yeasted+donuts - NYT Cooking – Recipes and Cooking Guides From The New York Times
https://www.nytimes.com/recipes/1019838/yeasted-doughnuts - Doughnut | Definition, History, Types, & Origins | Britannica
https://www.britannica.com/topic/doughnut - https://www.theguardian.com/food/2020/mar/30/how-to-make-the-perfect-doughnut
https://www.theguardian.com/food/2020/mar/30/how-to-make-the-perfect-doughnut - https://www.pubmed.ncbi.nlm.nih.gov/?term=yeasted+donut+recipe
https://www.pubmed.ncbi.nlm.nih.gov/?term=yeasted+donut+recipe